How to Build a Modern Train / Activity Table in 10 Easy Steps
Build an activity table, you say? Pshaw. Not everyone’s a carpenter, right? Wrong! If I can make this table and survive to tell the tale, then so can you.
This DIY project came about during the One Room Challenge, when I was making over my son’s playroom. Of course he had a perfectly functional train table to begin with, but it screamed, “Birch effect! Birch effect!” even more loudly than the bookcases behind it. So, it had to go.
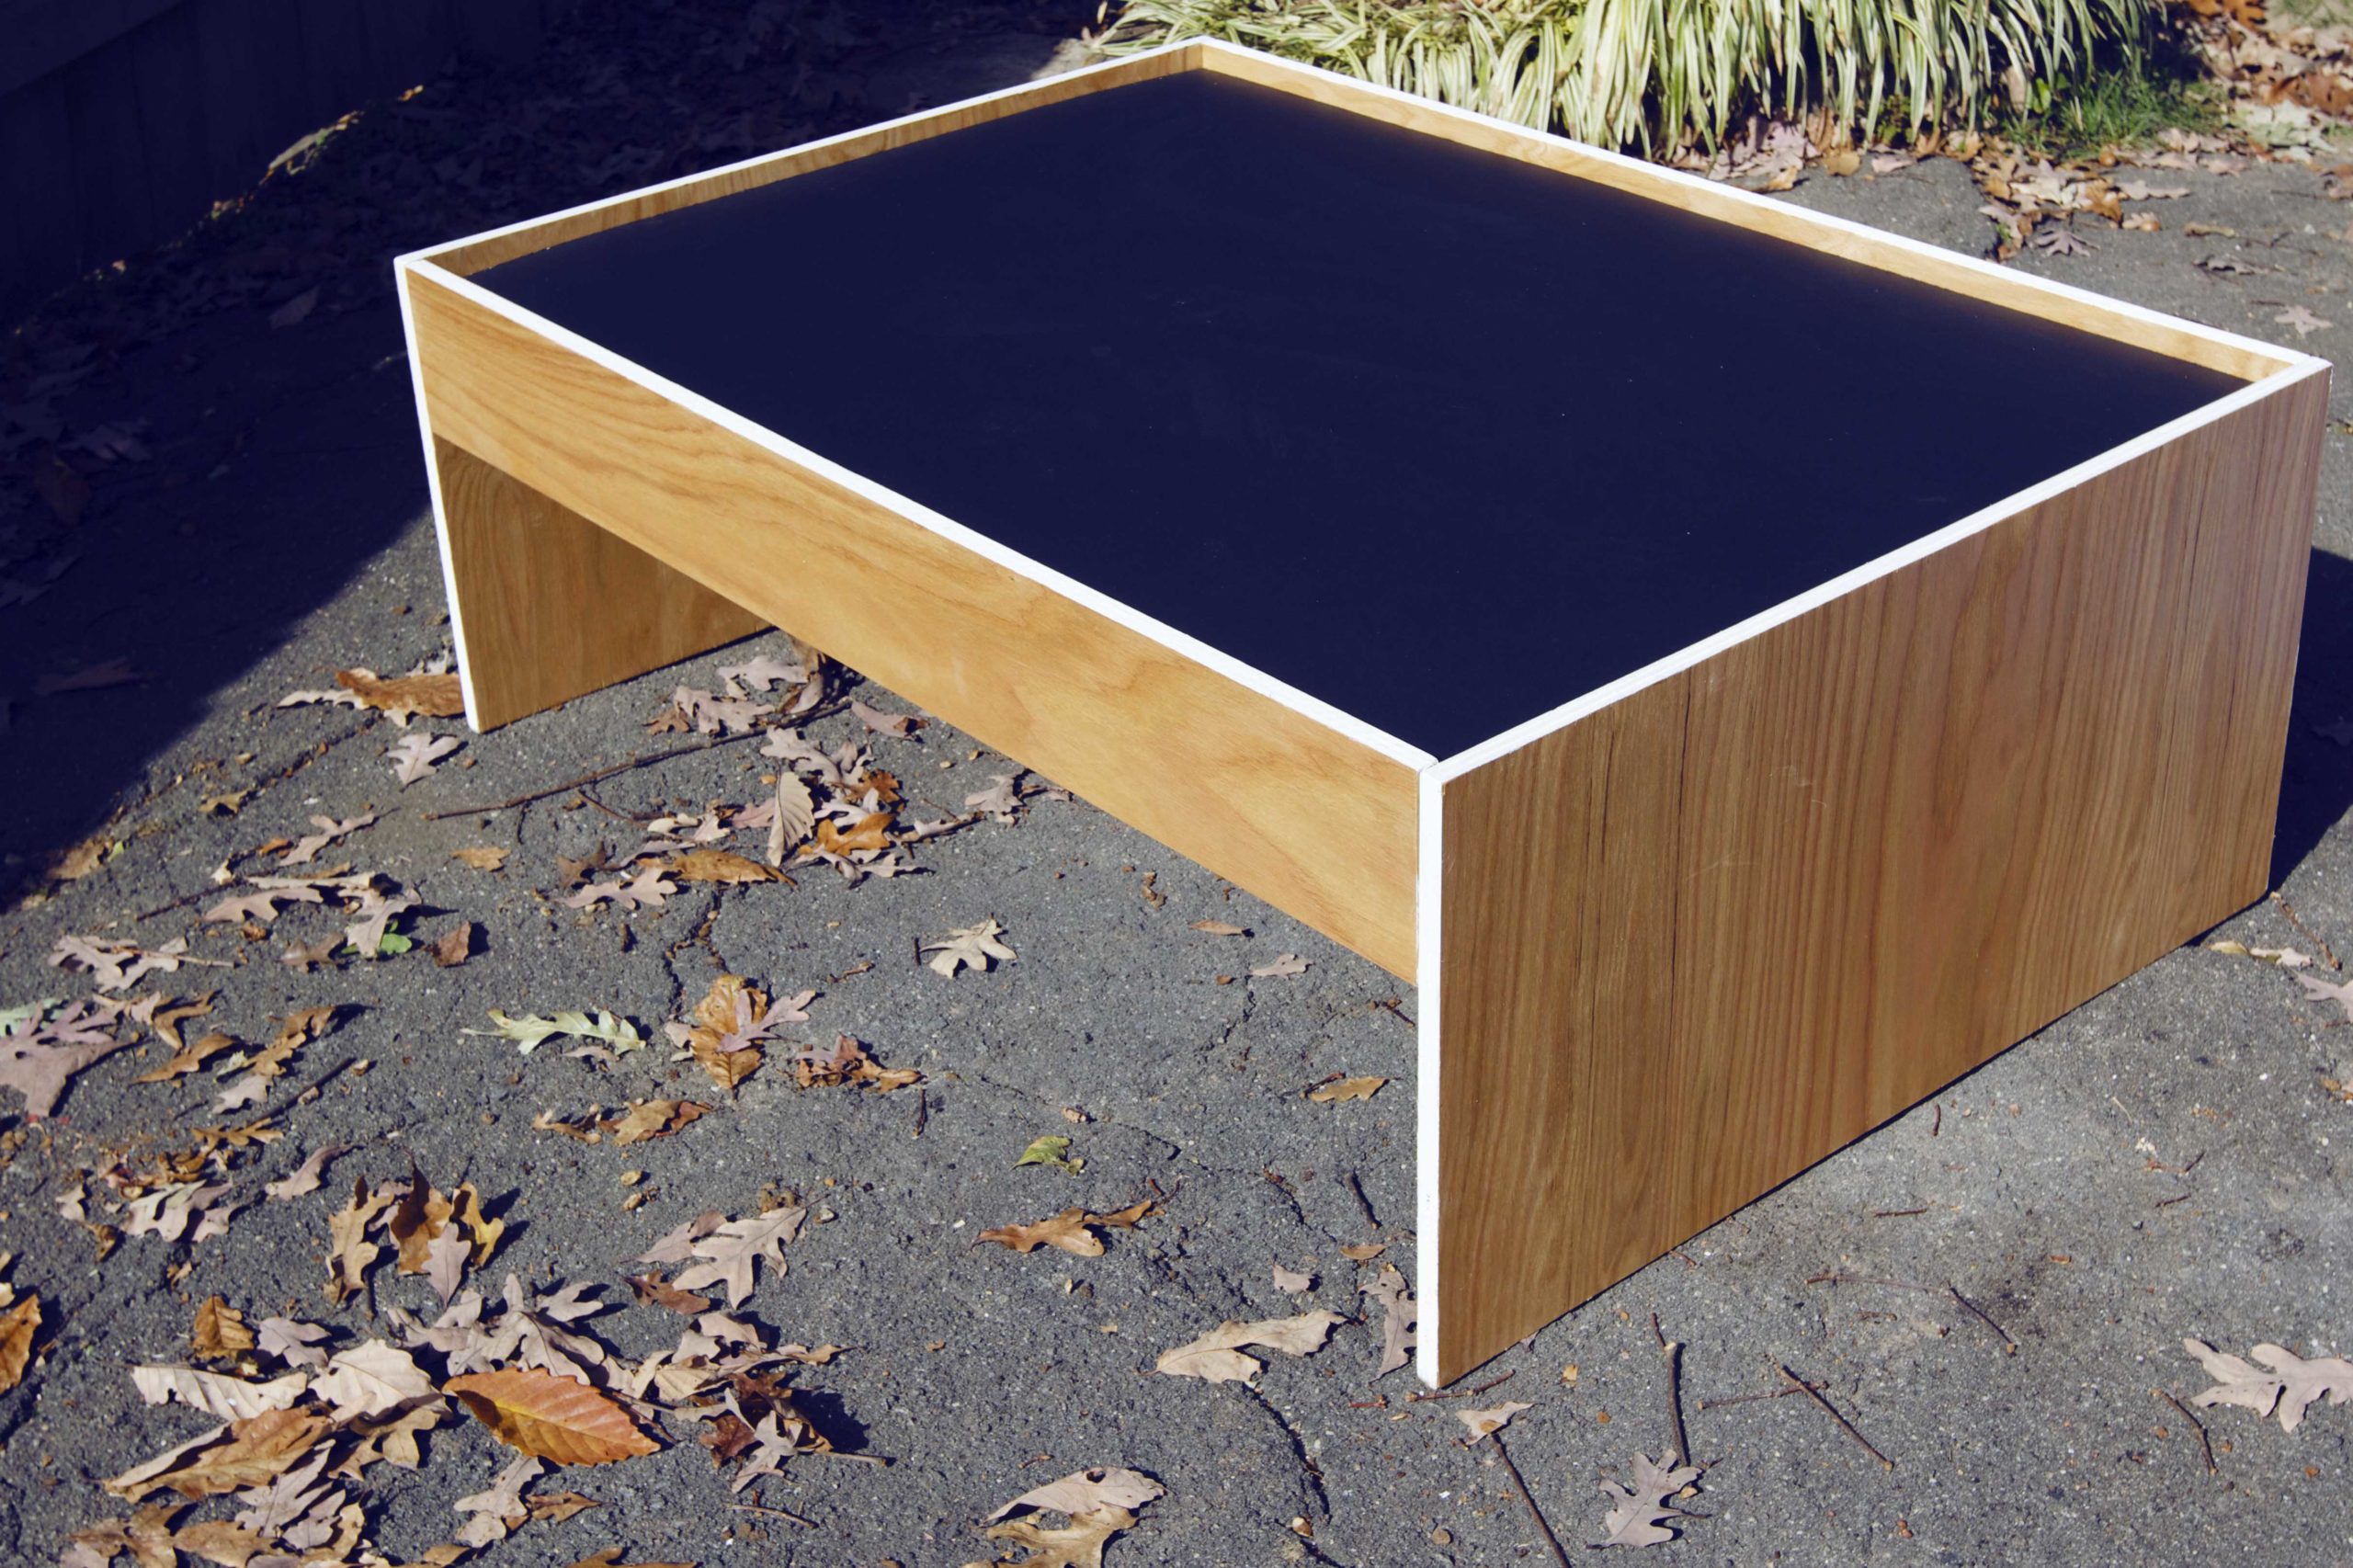
I wanted to make an activity table that was sleek and modern, and that was still feasible for someone with no skills to build. So I took some cues from his existing table, and made my own using a sheet of plywood and some extra lumber I had in the shed.
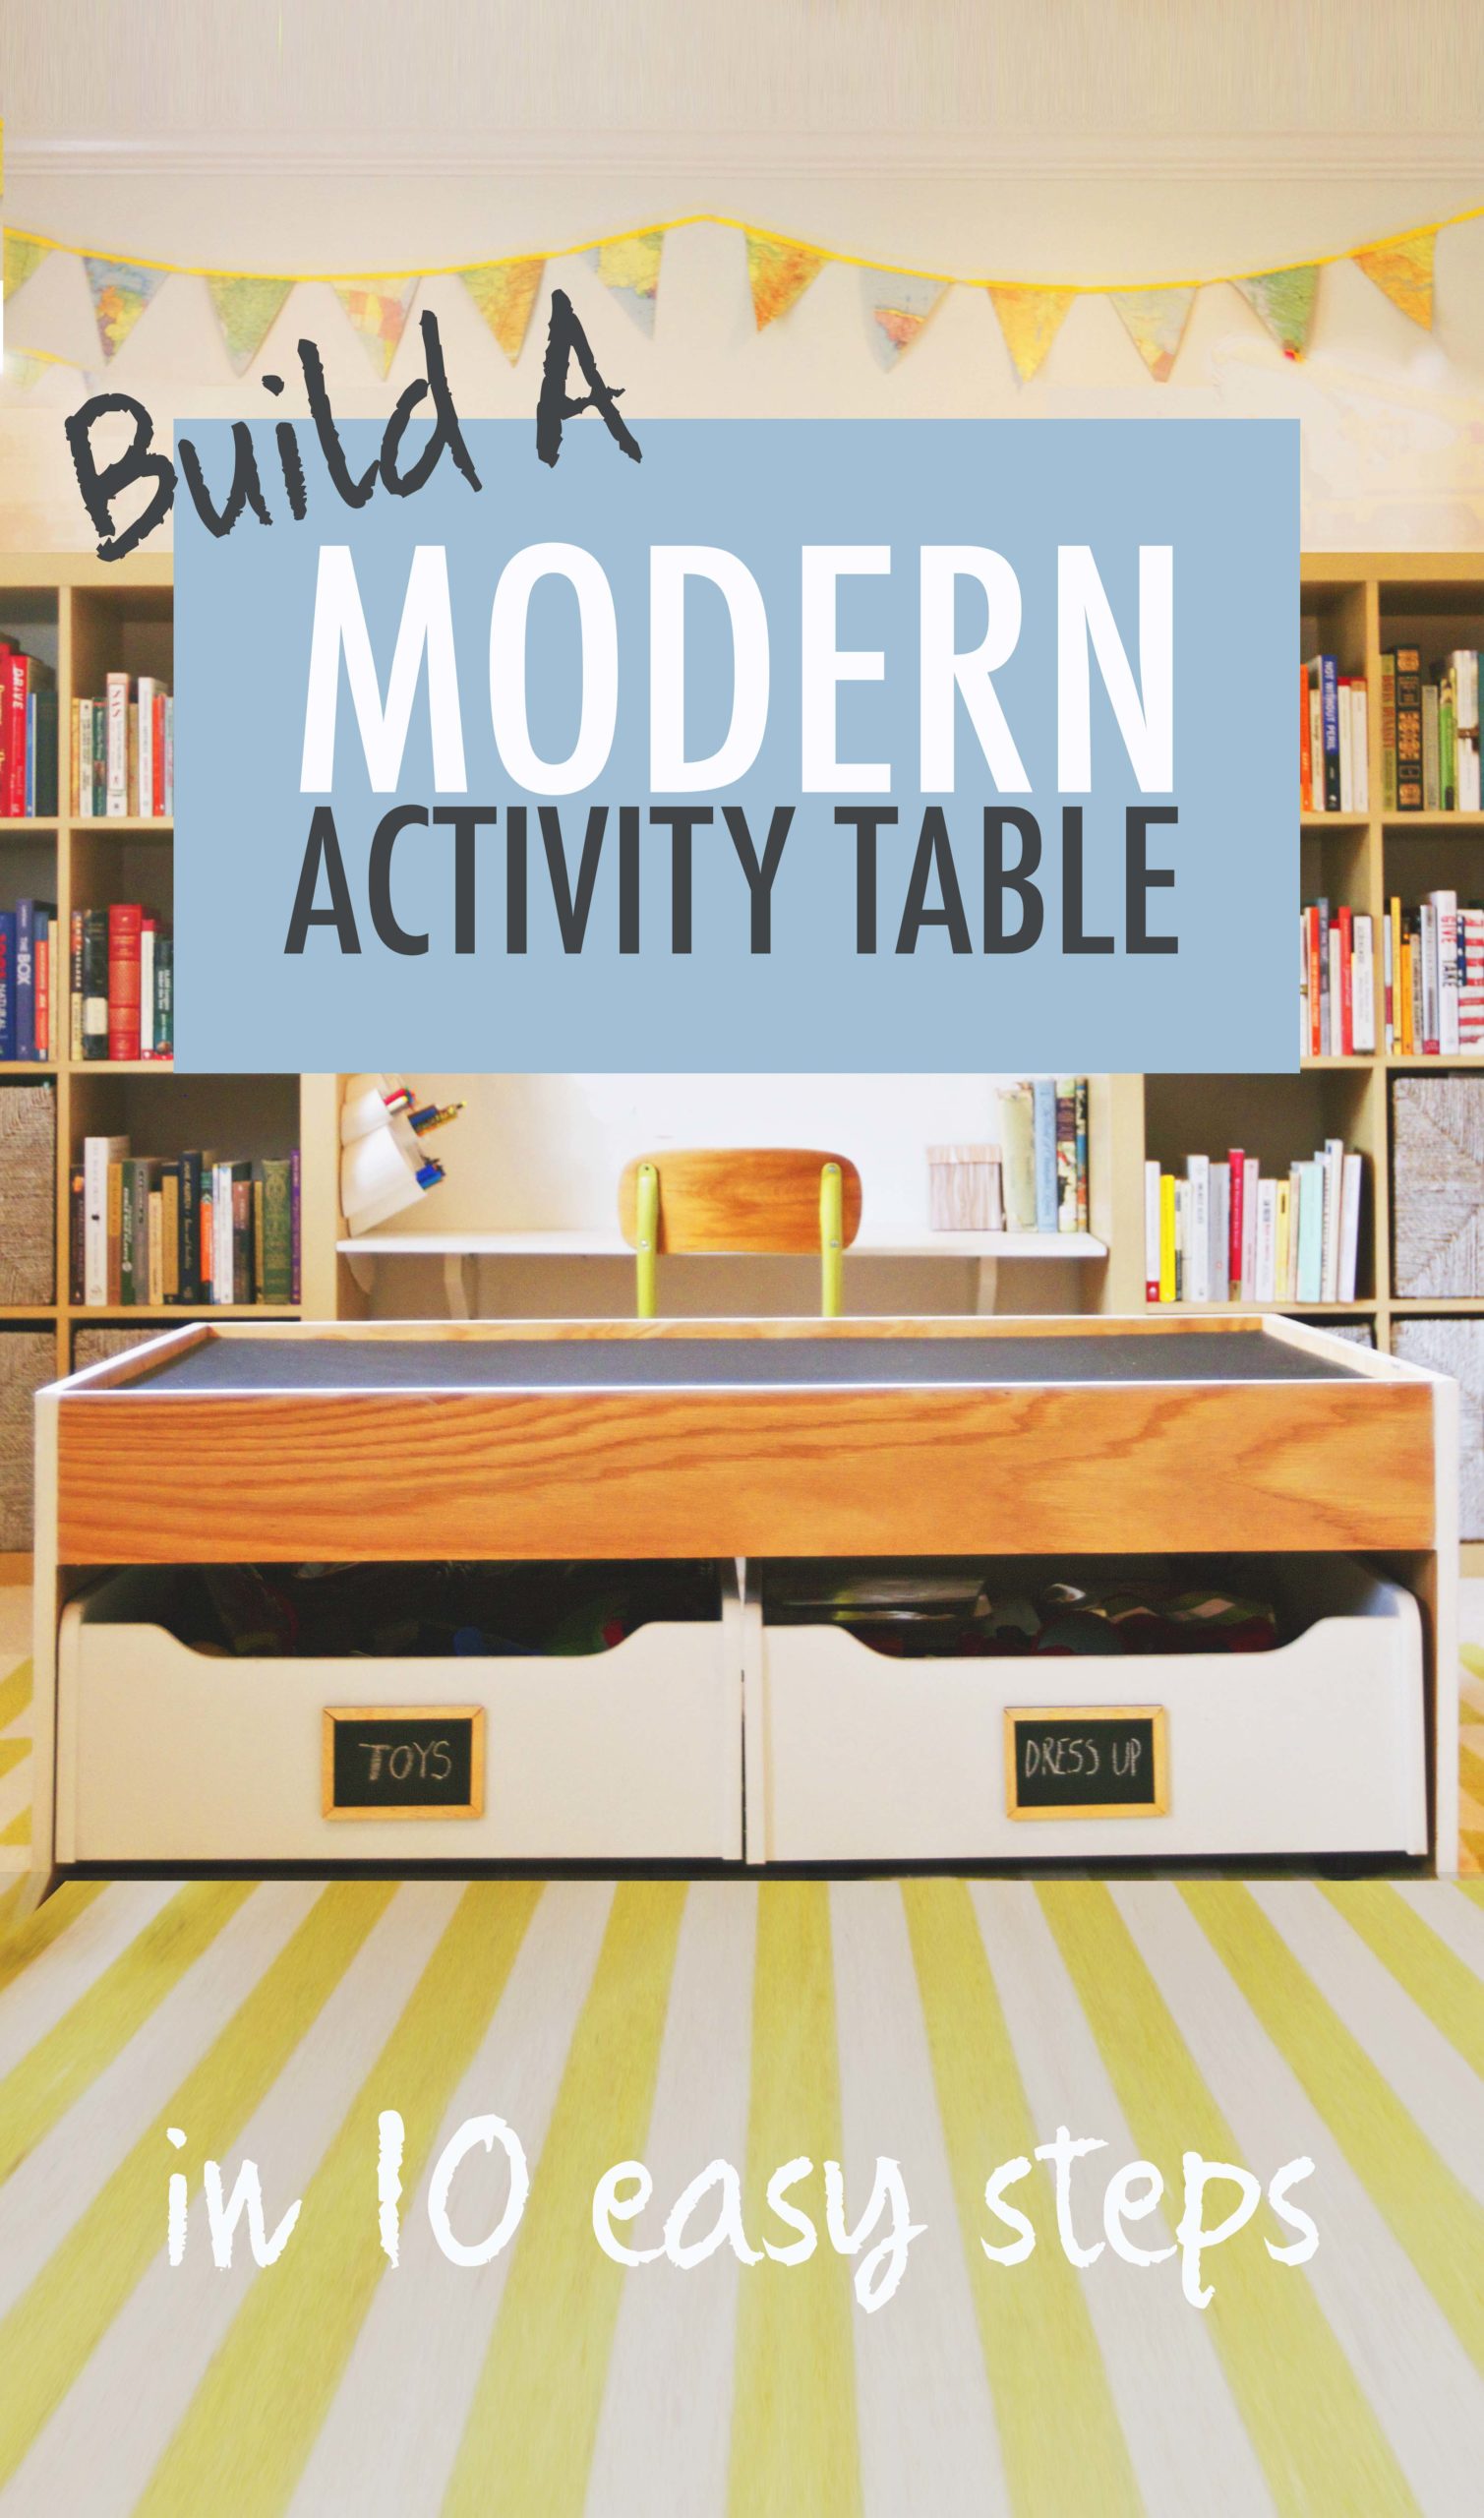
I did decide to keep the drawers from the first table and paint them white, because we still needed the storage. Any under-the-bed drawers would work just as well, or I’m sure they’d be easy to make. But I’m pretty happy with the result! I definitely had a Tarzan, beating-my-chest moment afterwards. The beauty of power tools…
Supplies
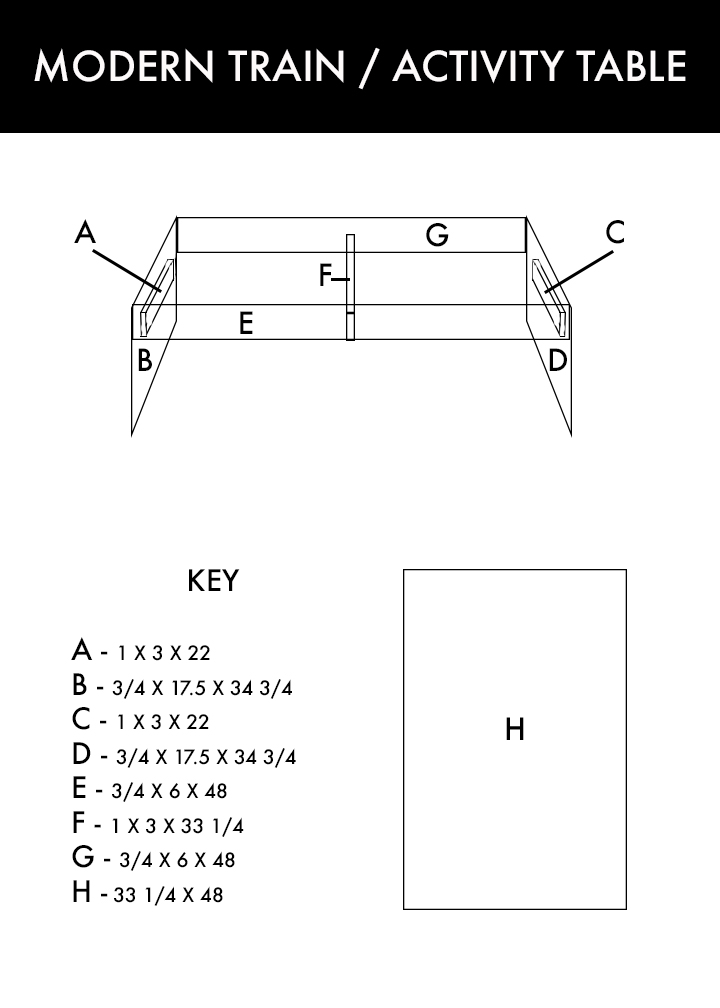
- 1 – 4 x 8 sheet of ¾” thick plywood (I used red oak) cut to the following dimensions:
- 2 pieces 17.5” x 34 ¾”
- 2 pieces 6” x 48”
- 1 – 1 x 3 x 8 board cut to the following lengths:
- 2 pieces approx. 22”
- 1 piece 33 ¼”
- 1 – sheet of 4 x 8 MDF or thin plywood cut to 33 ¼” x 48”
- 12 – 4” L-brackets
- 48 – #10 ¾” wood screws
- 6 – #10 1-¼” wood screws
- Wood stain
- Primer
- Chalkboard paint
- White paint
- Painter’s tape
Equipment
- Drill
- 2 paint rollers covers
- A paint roller, preferably attached to a long handle
- Small painting brush
- Measuring tape
- Pencil
For clarity’s sake, I’ve included a drawing with each piece labeled:
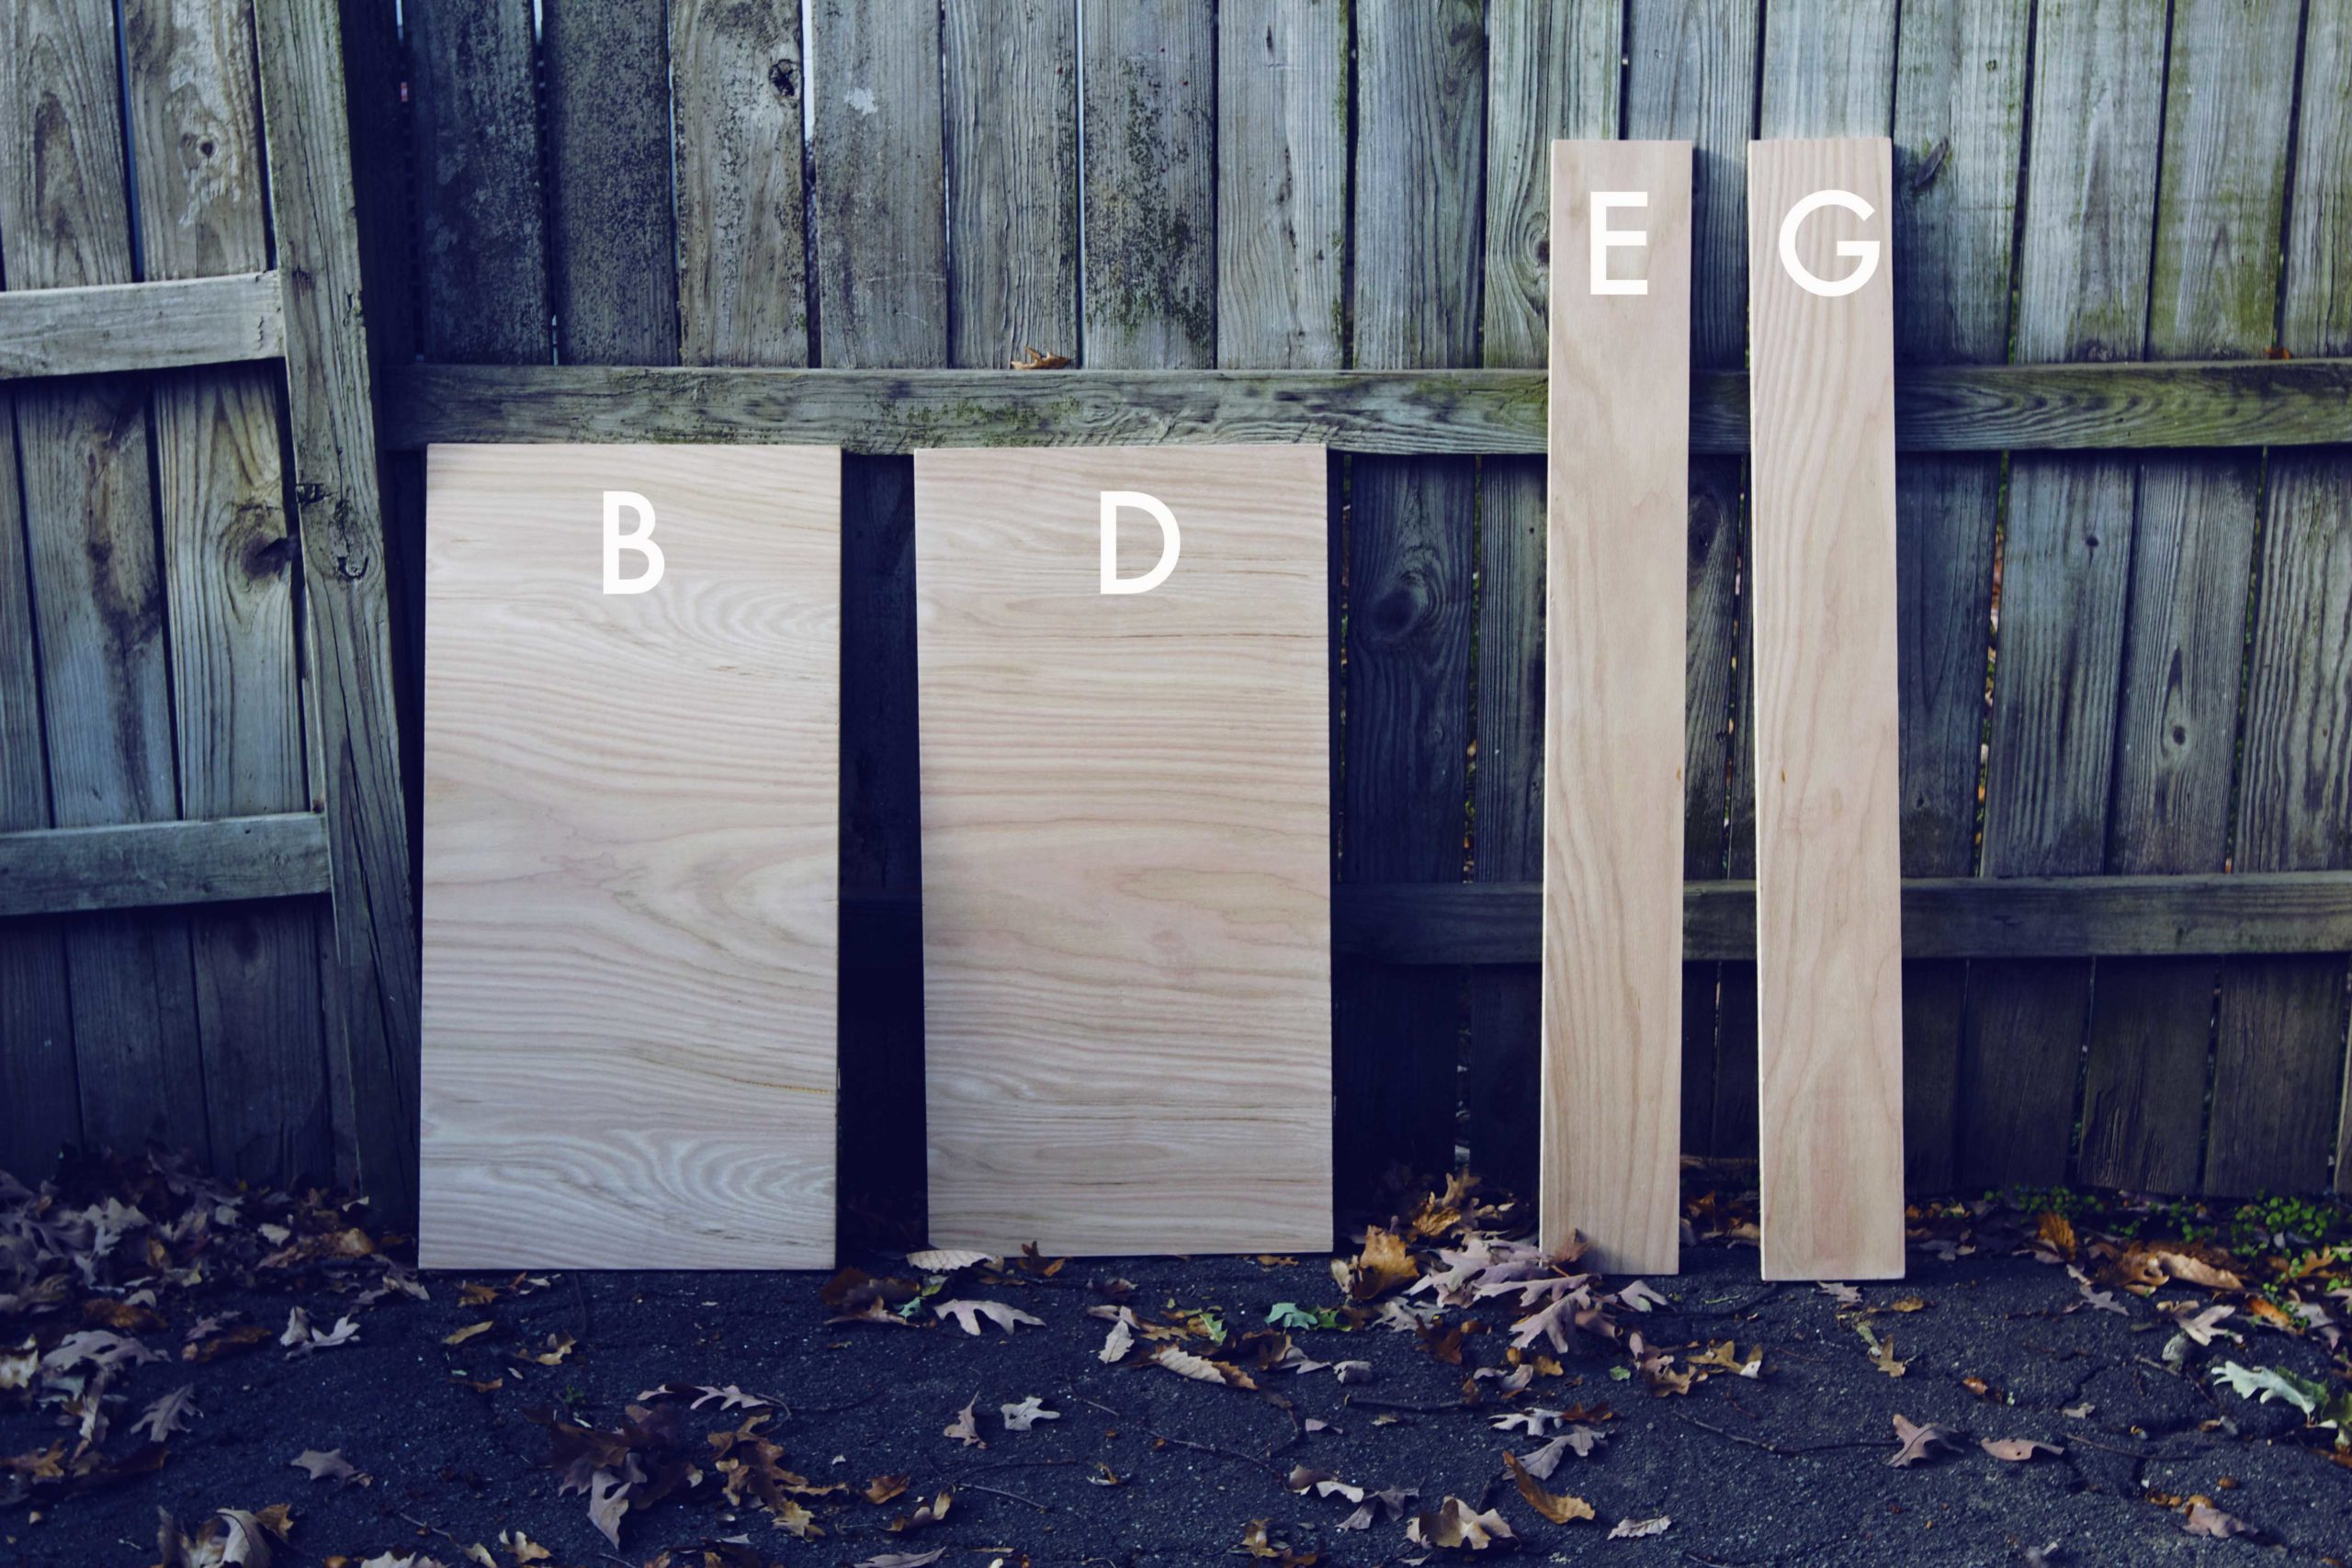
1. Stain your four pieces of ¾” plywood (B, D, E, G) to the desired color using the small brush. Follow the directions on the can as to drying time and technique. Stain both sides, but don’t stain the edges!
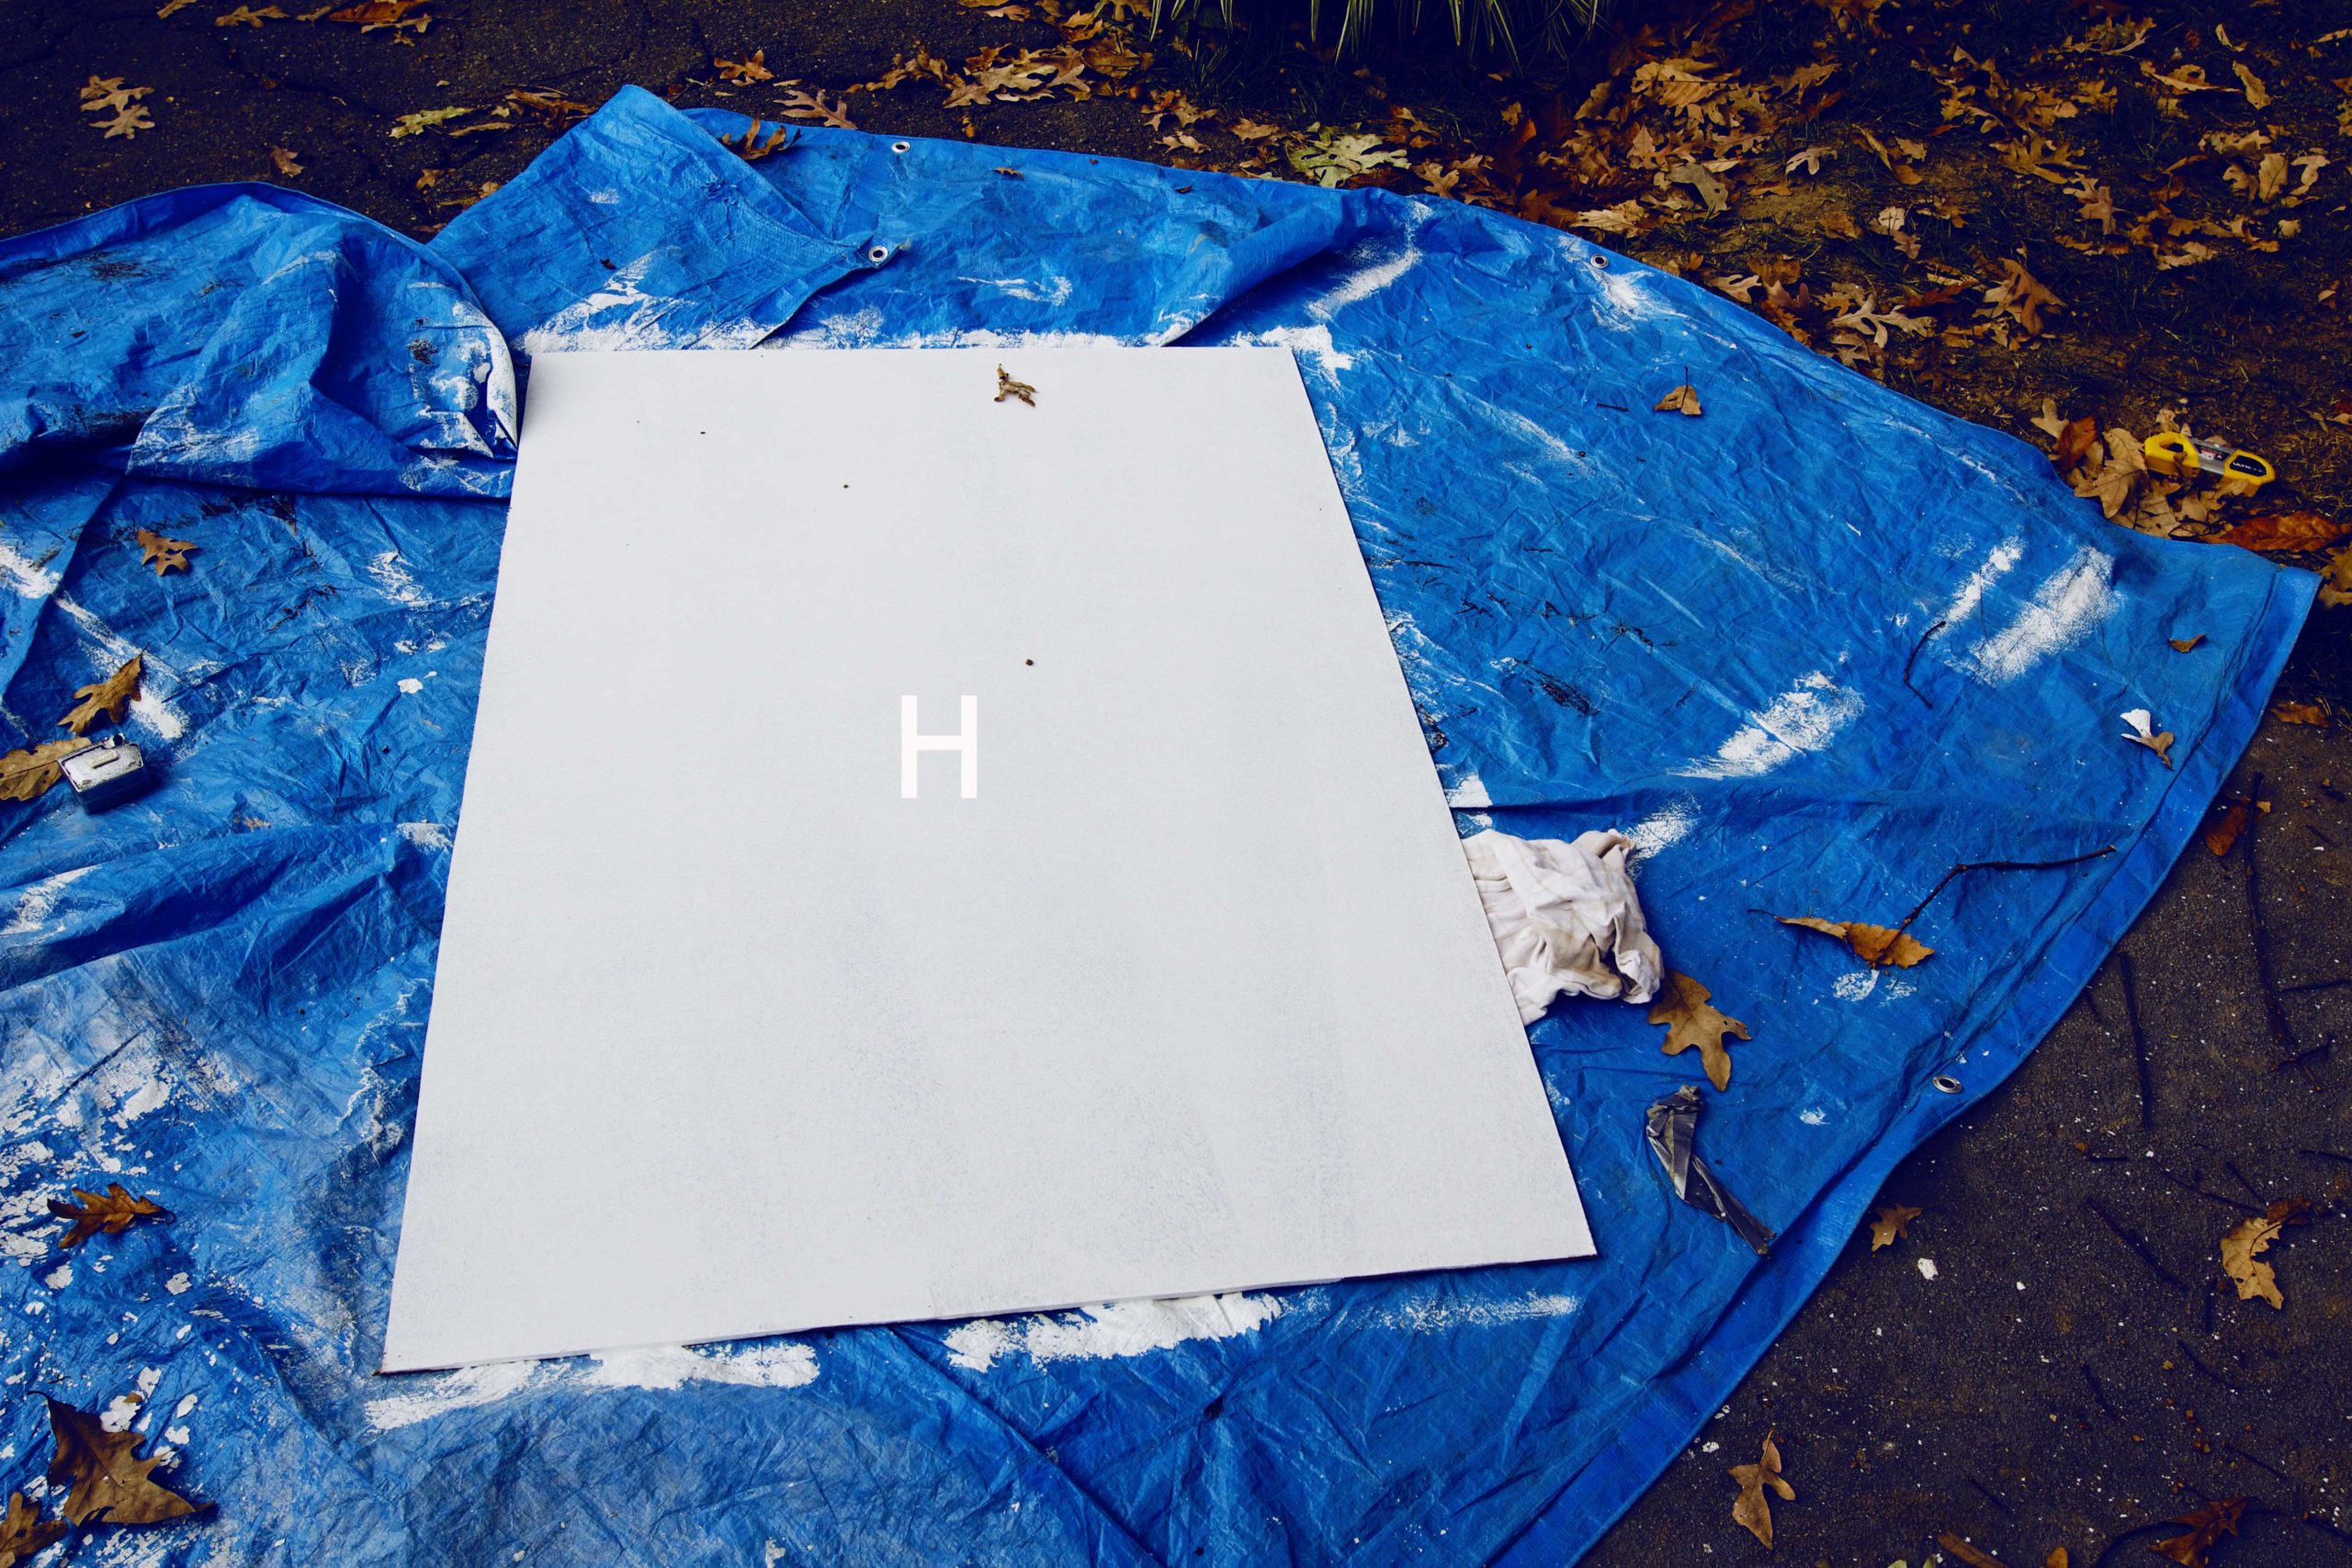
2. While the wood is drying, prime and paint piece H with the chalkboard paint and paint roller. Using one on a long arm, like a broom handle, makes this part go quickly.
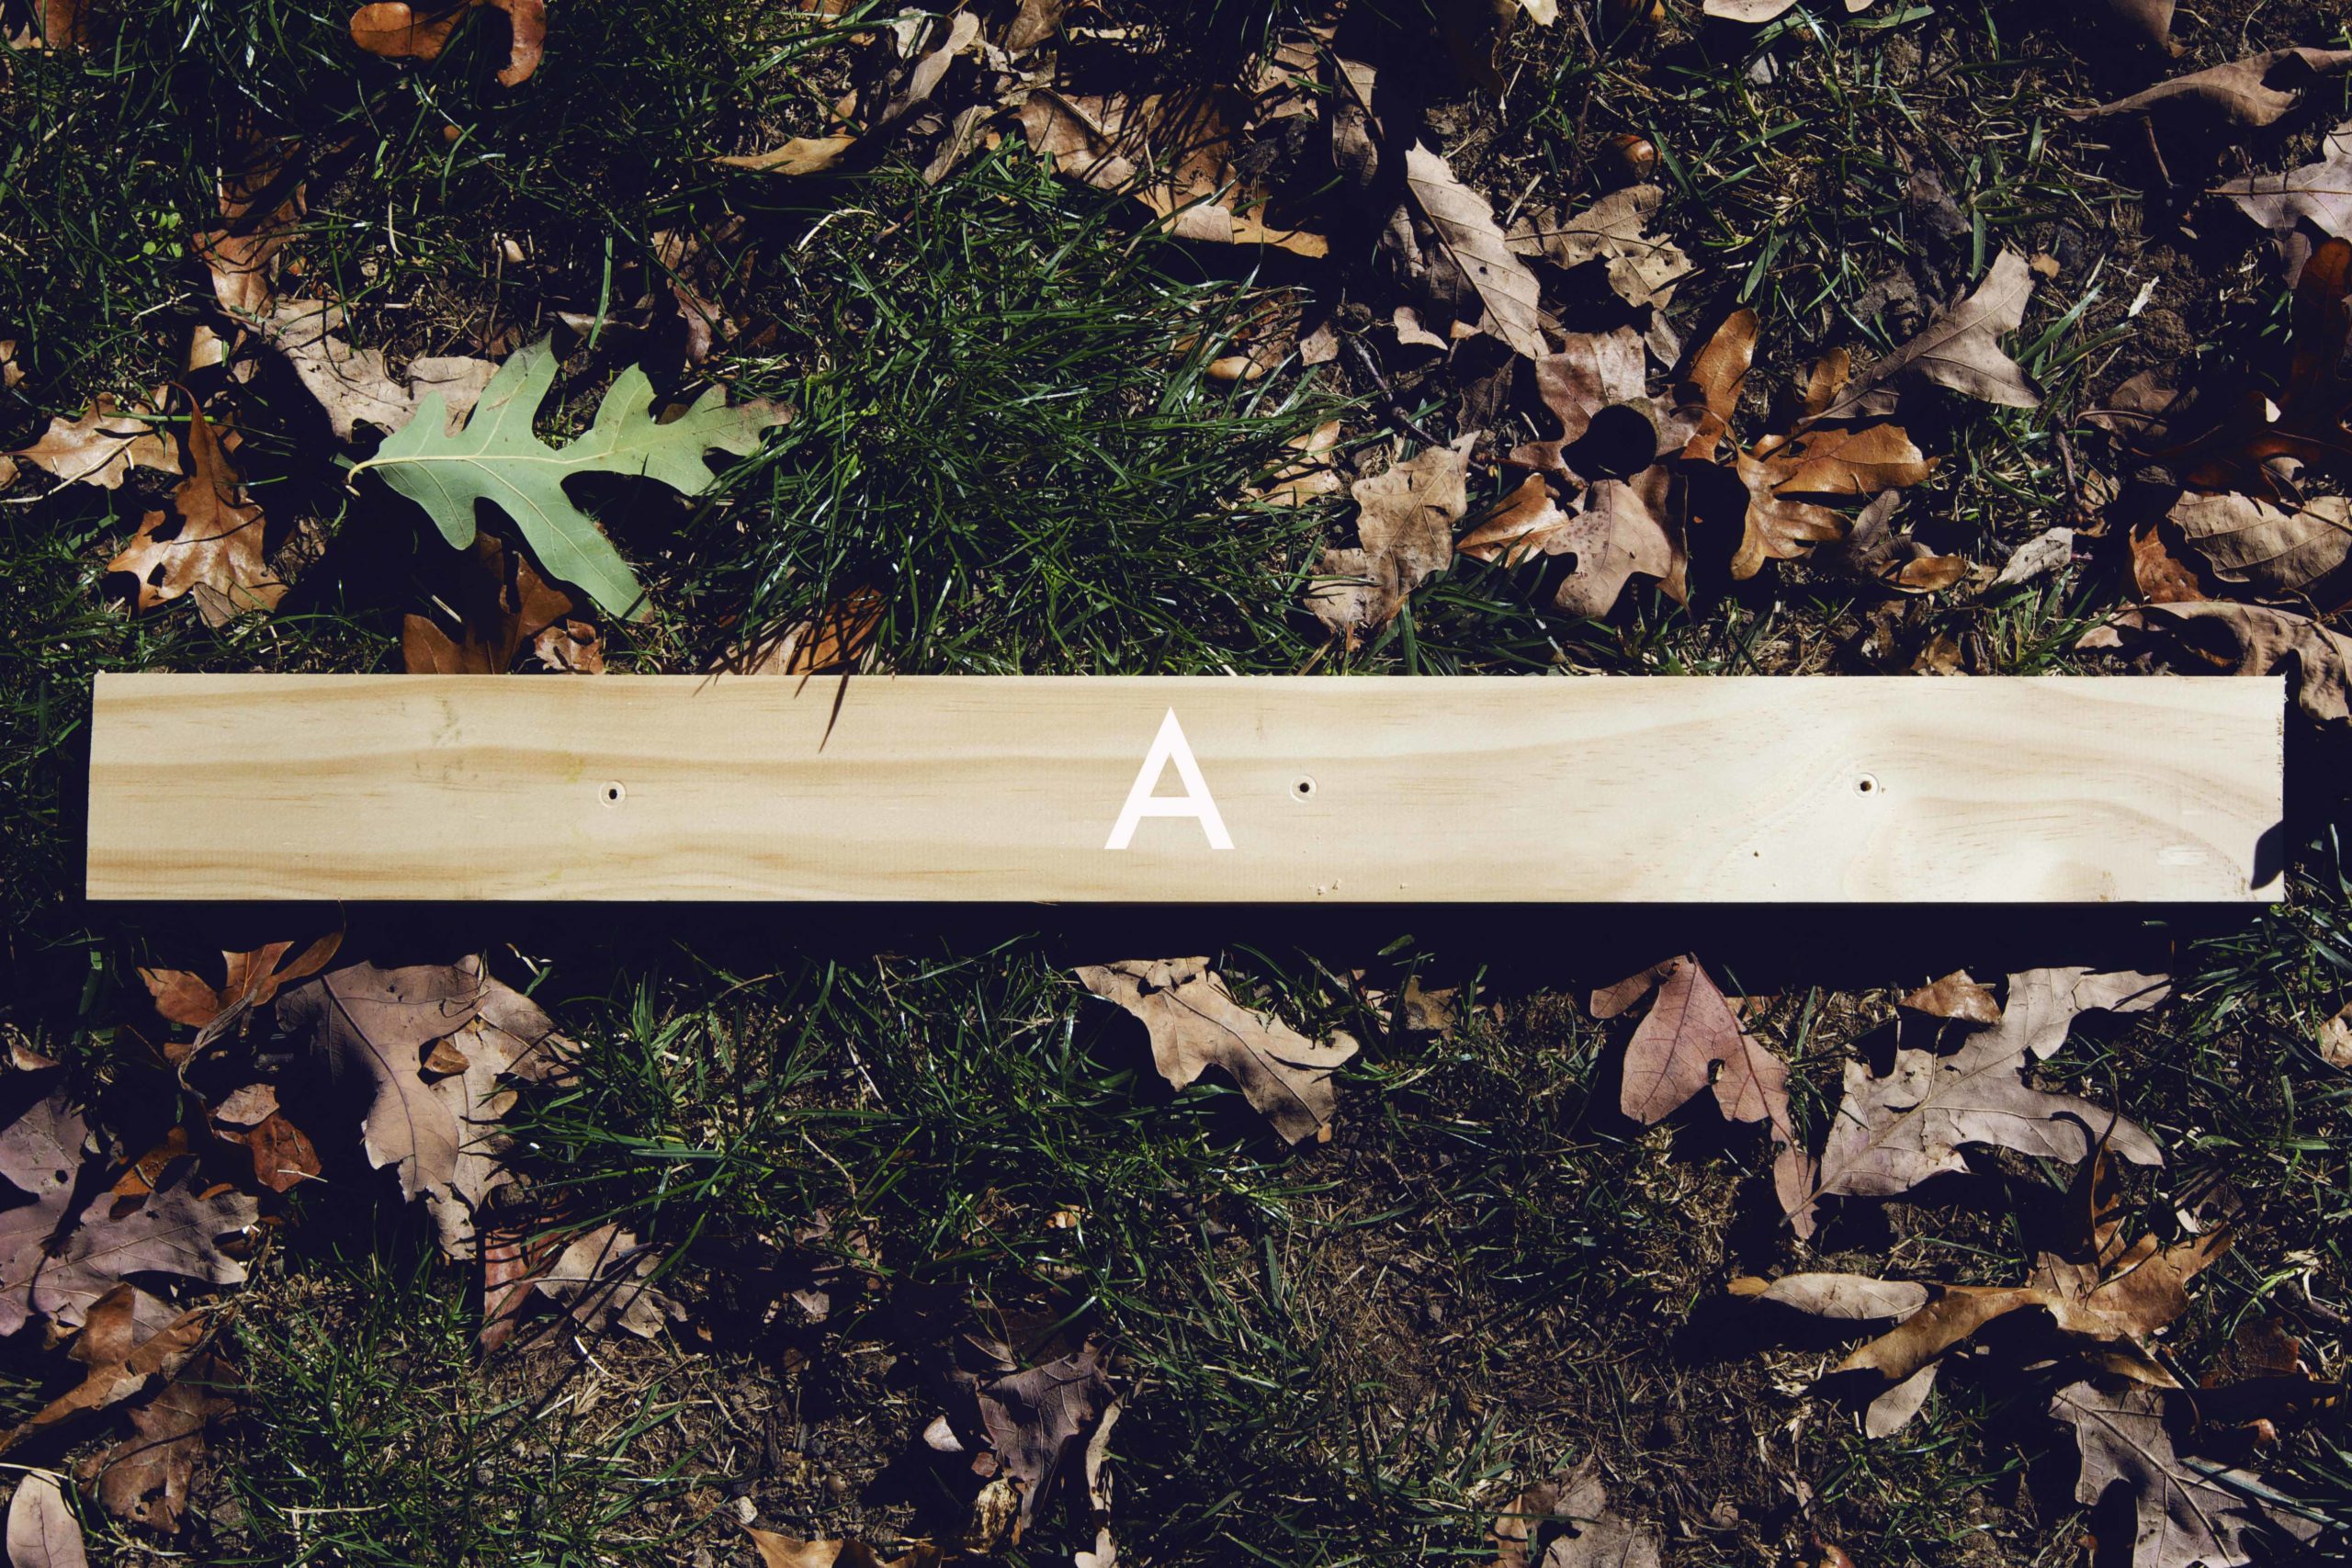
3. Take pieces A and C and drill three small holes evenly spaced down the length of them, as shown.
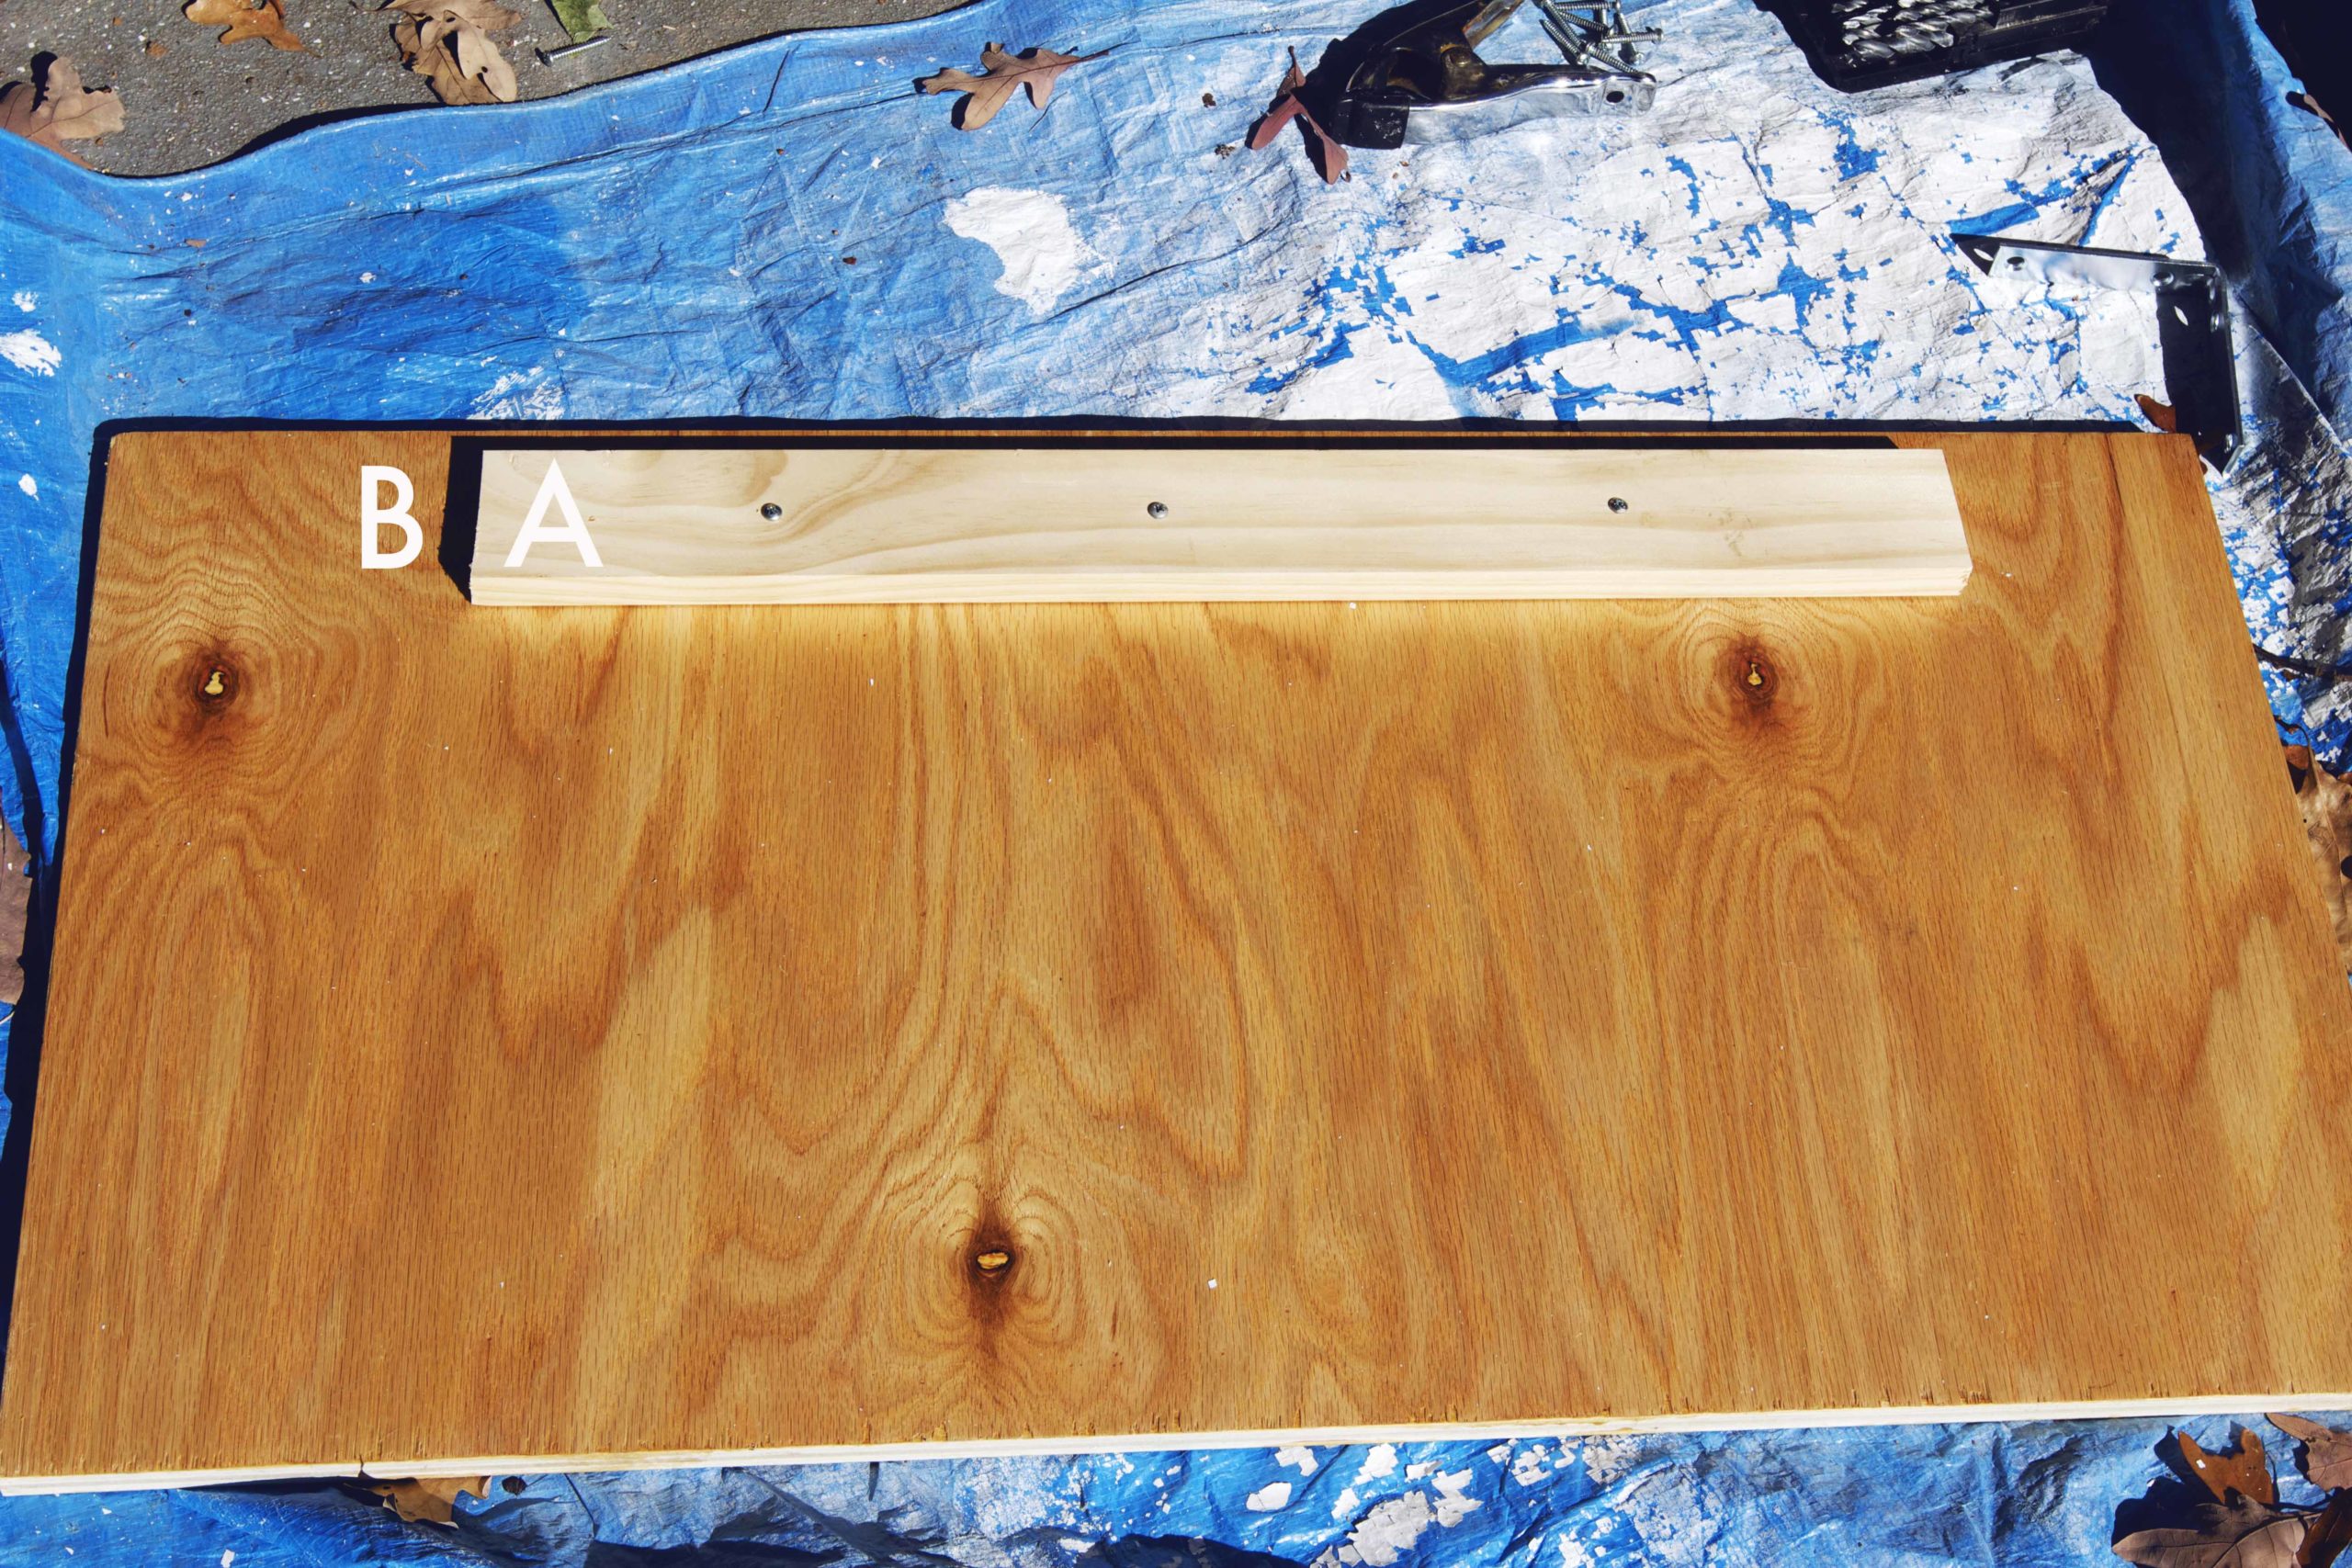
4. Measure 1” from the top of B and D and make several marks along the length with your pencil. Then take piece A, line it up along the marks, and attach it to piece B using three 1-¼” screws. Do the same thing for pieces C and D.
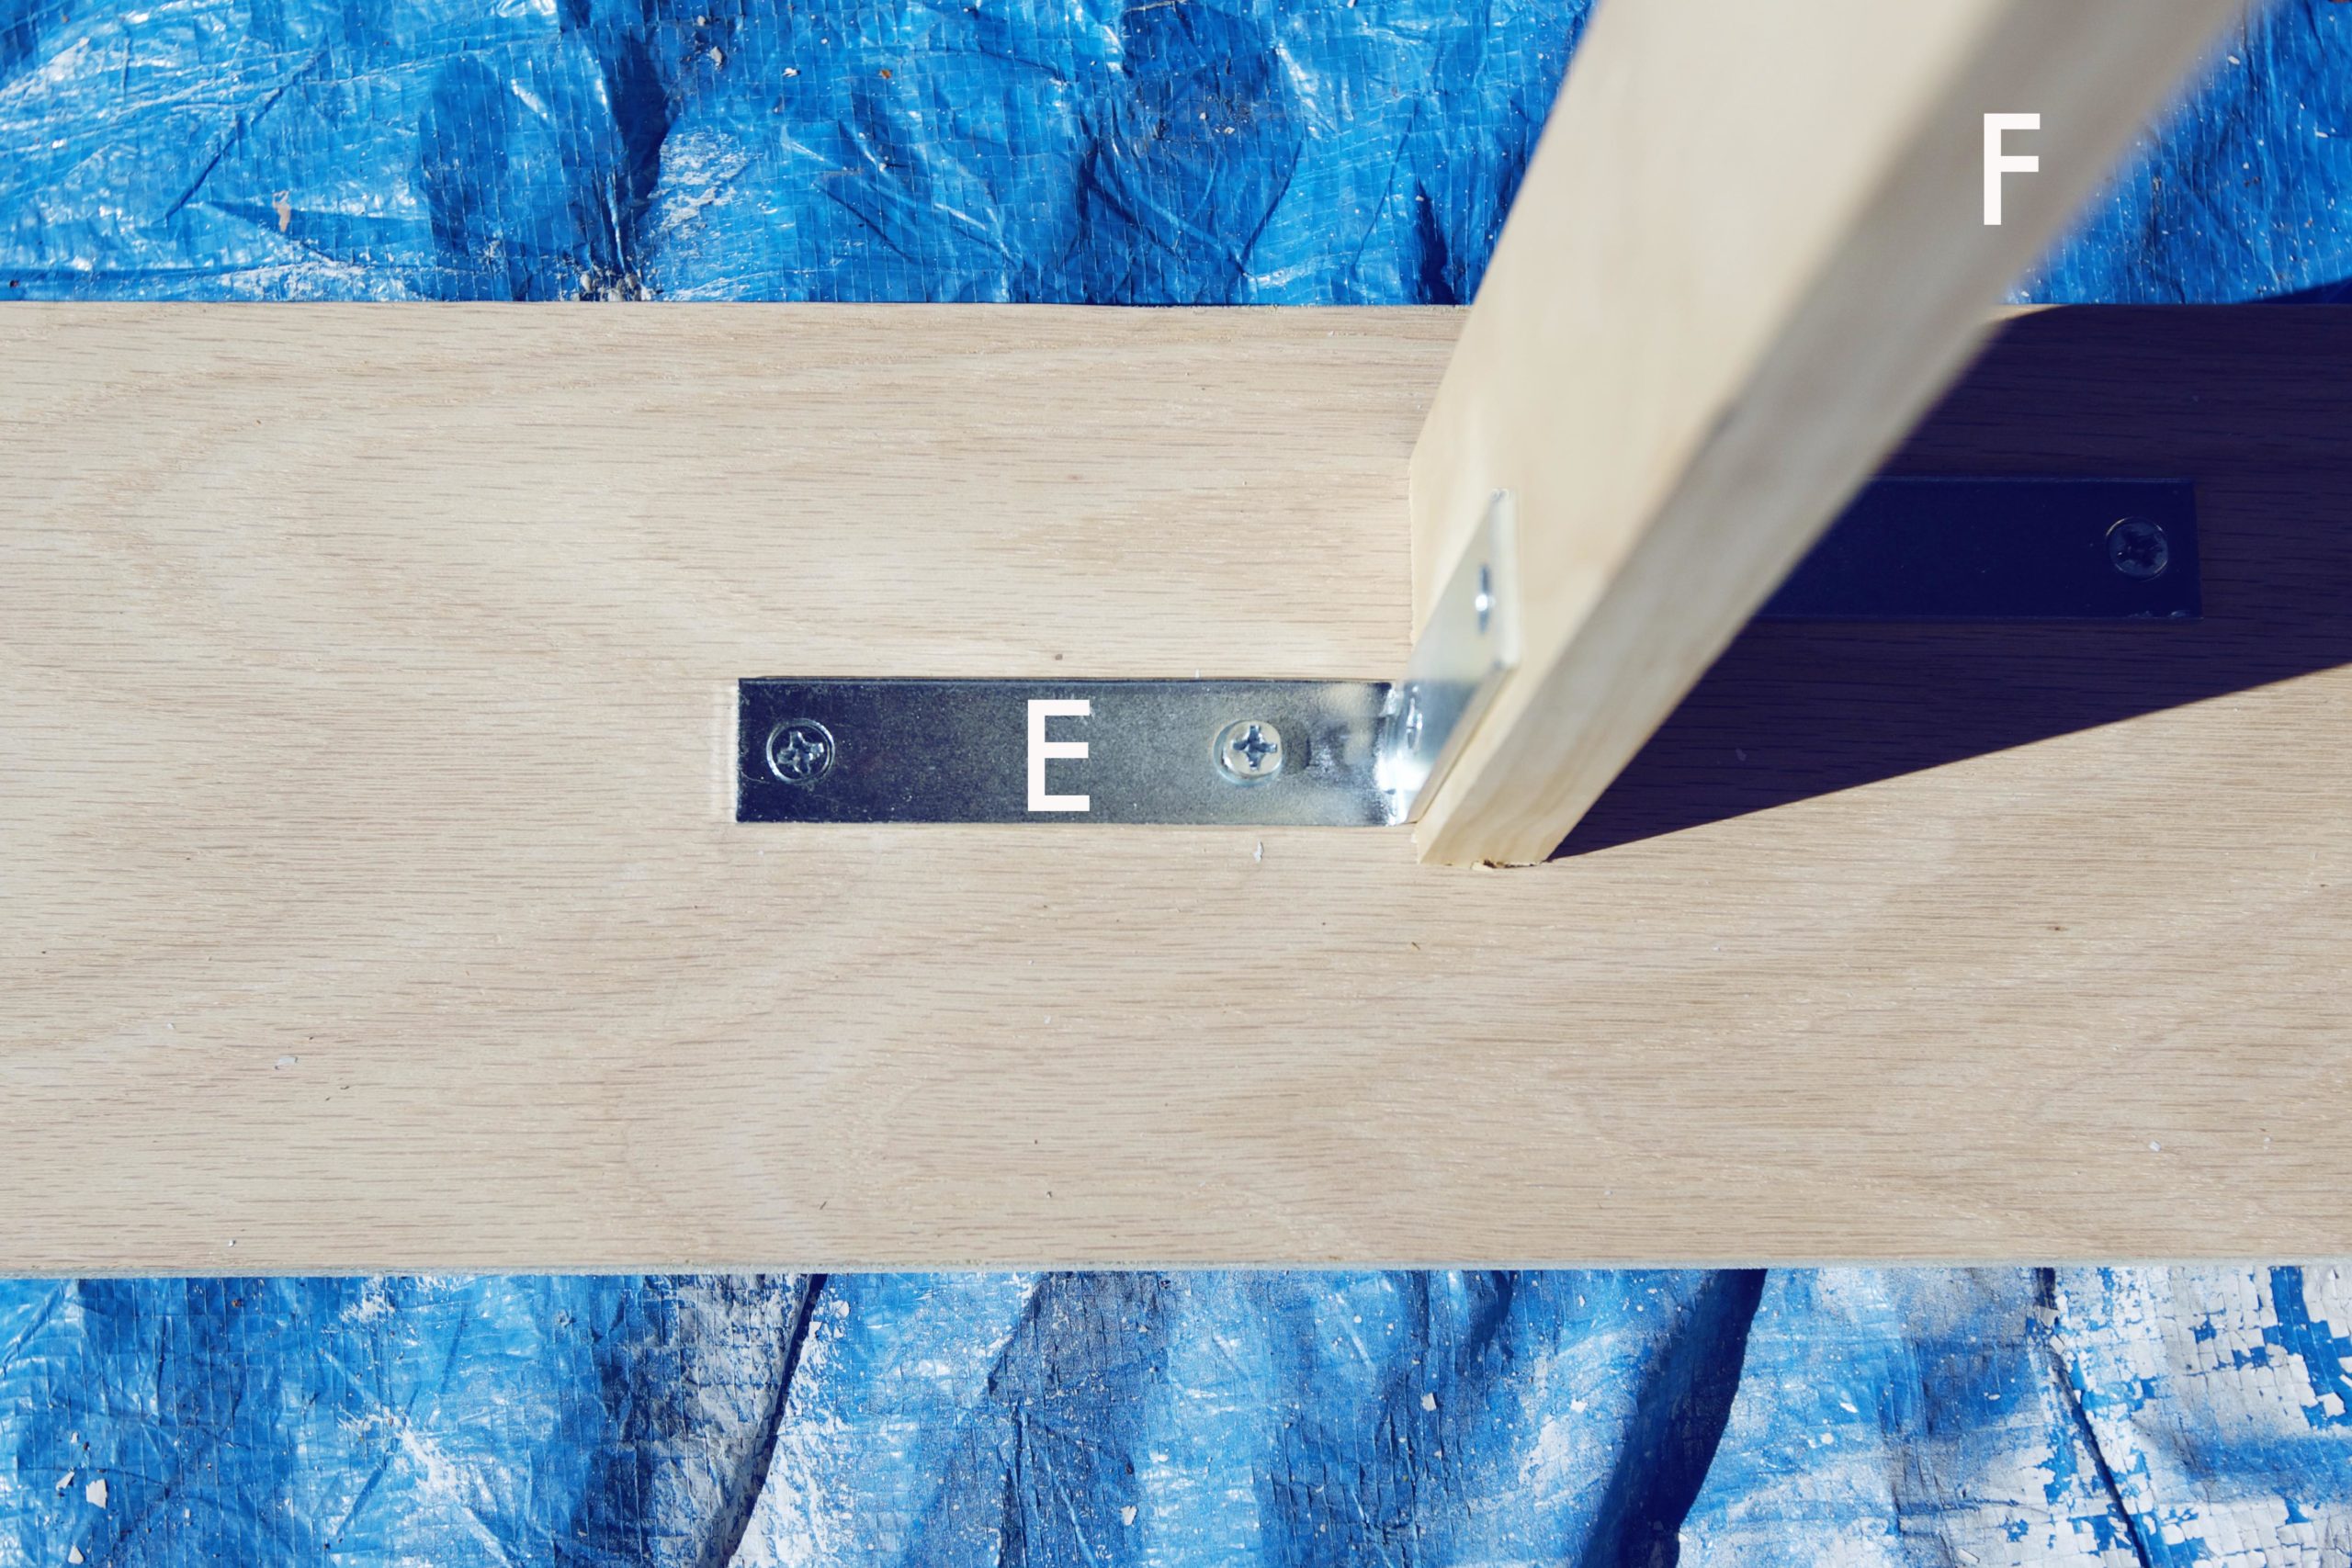
5. Take piece E and align it in the top left corner of piece B as shown (and please ignore the fact that I did not stain both sides of E. Do as I say, not as I do!). Make sure the outer edges of the two pieces are flush. Place two L-brackets in the corner you’ve created, taking care that the top bracket lies below the 1” line you created in Step 4. Affix with the ¾” screws.
Note: my screws were the type that did not need pre-drilled holes, but you may find it easier to pre-drill them.
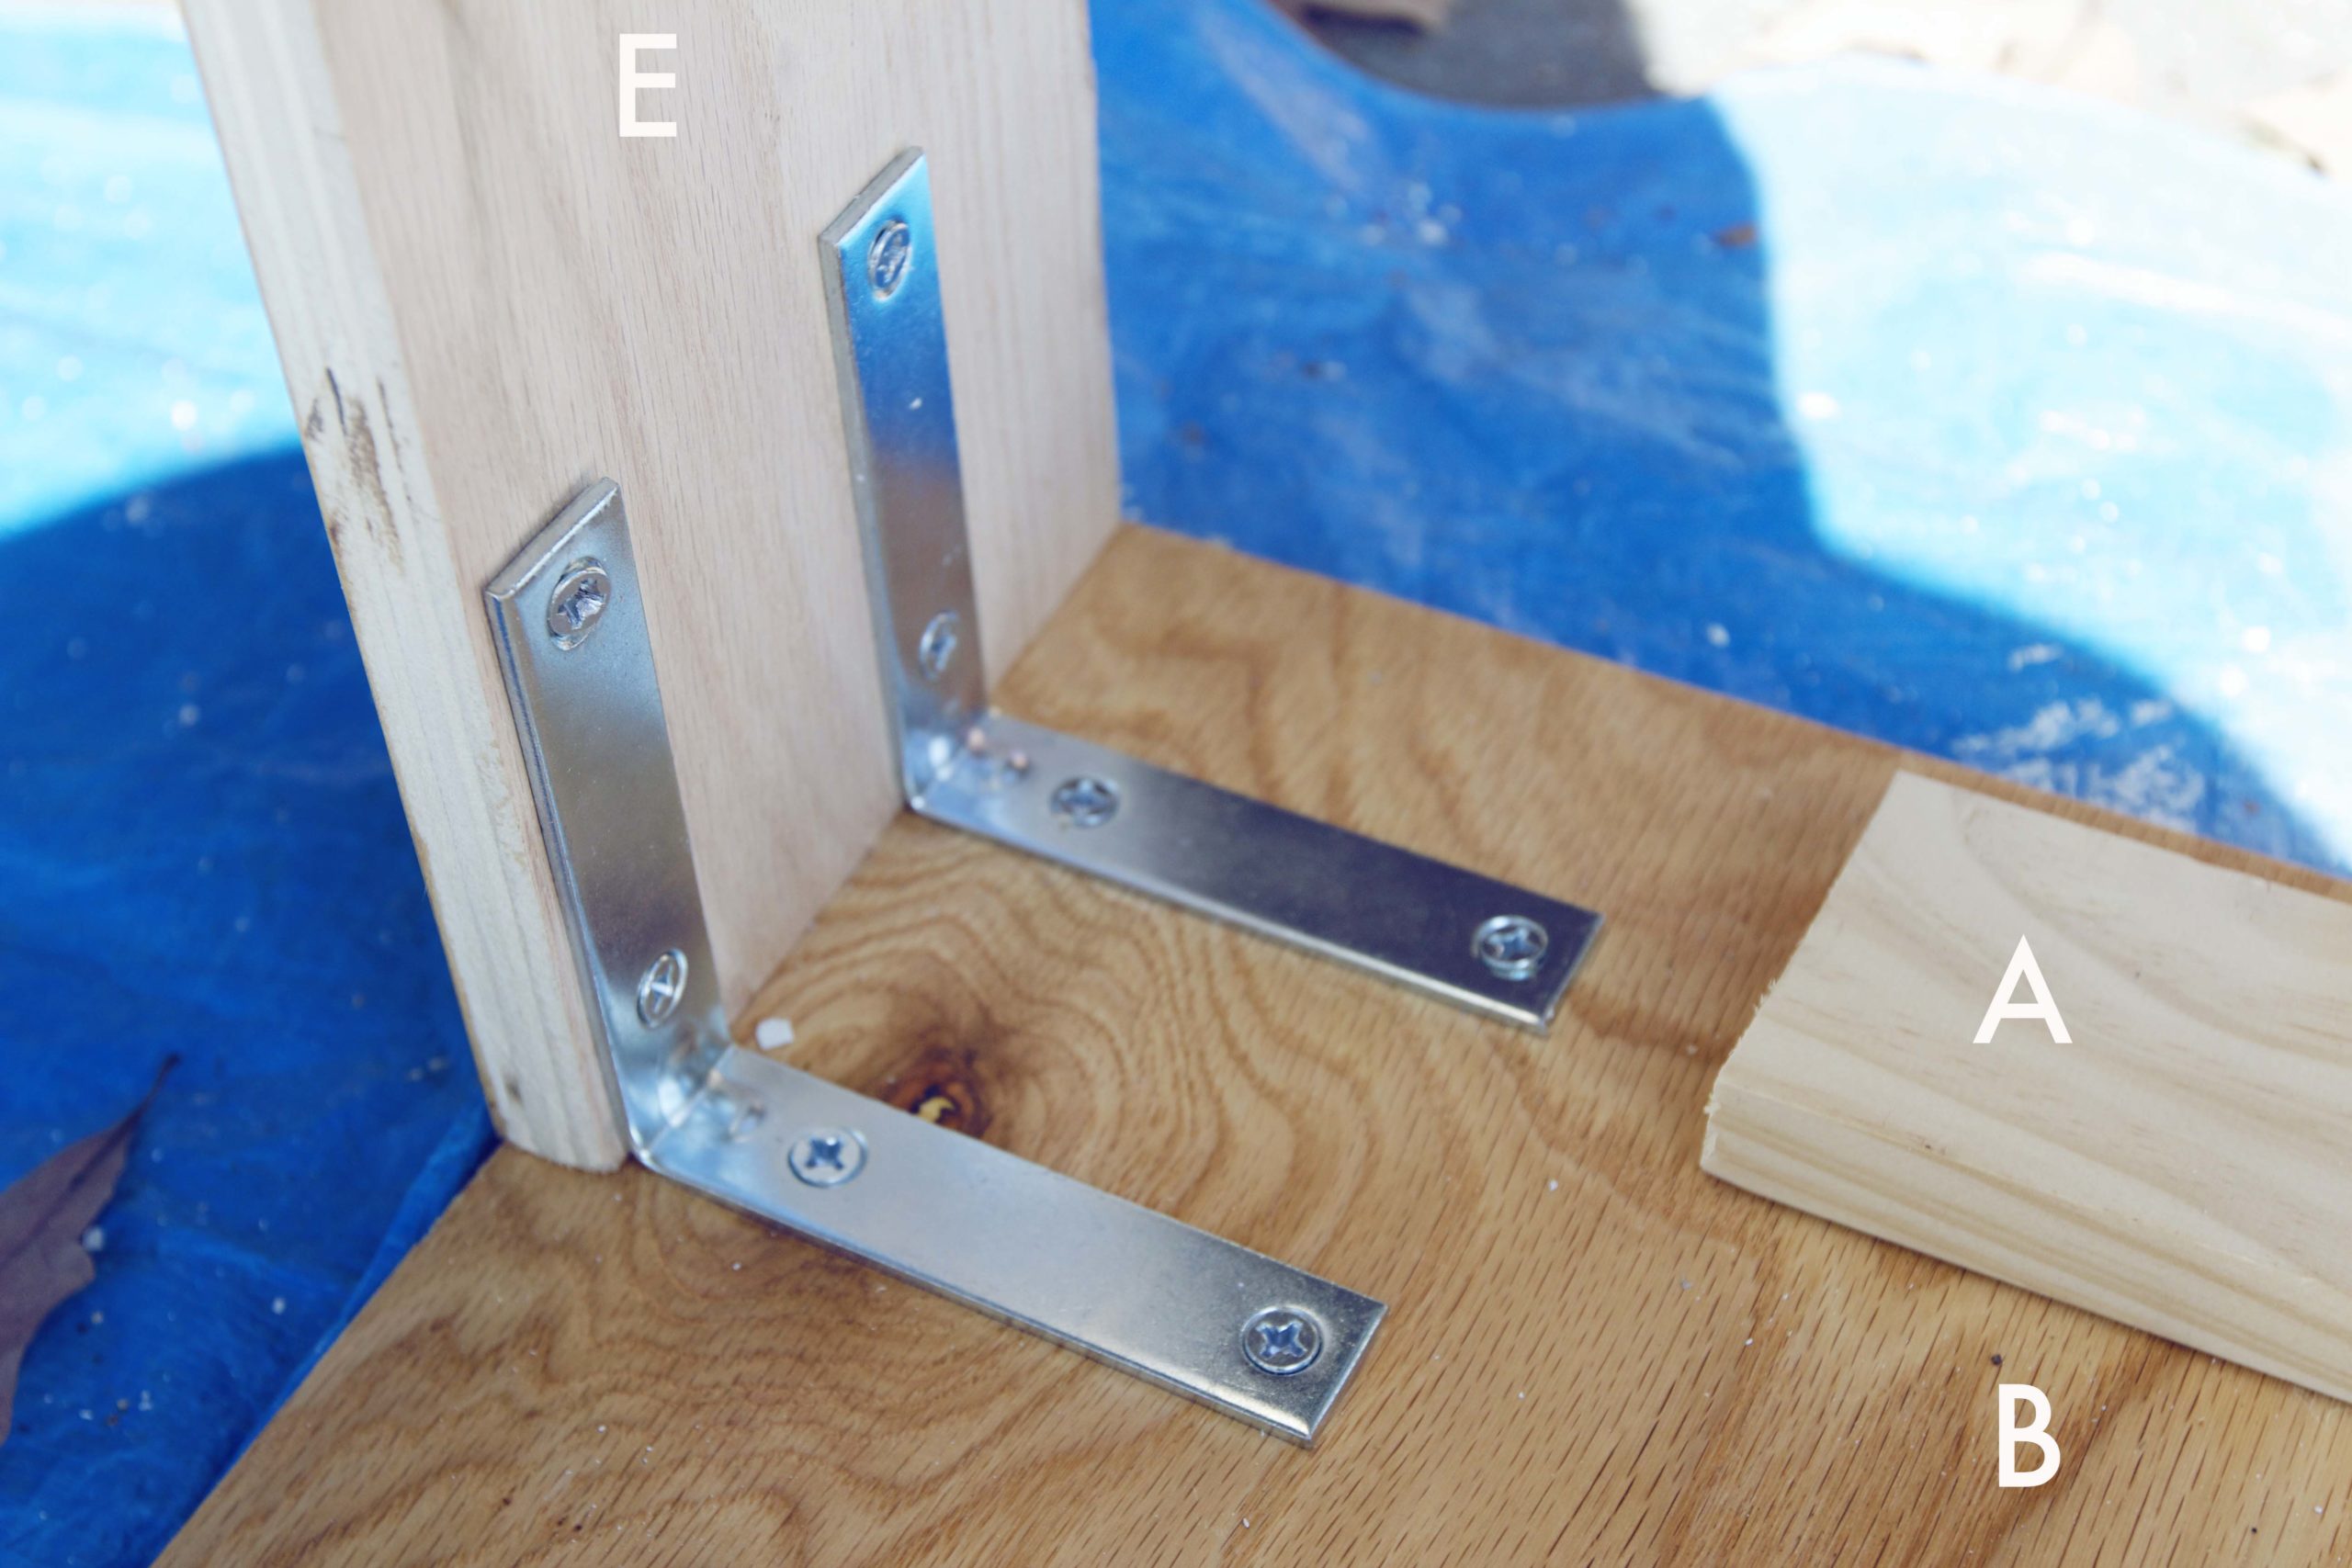
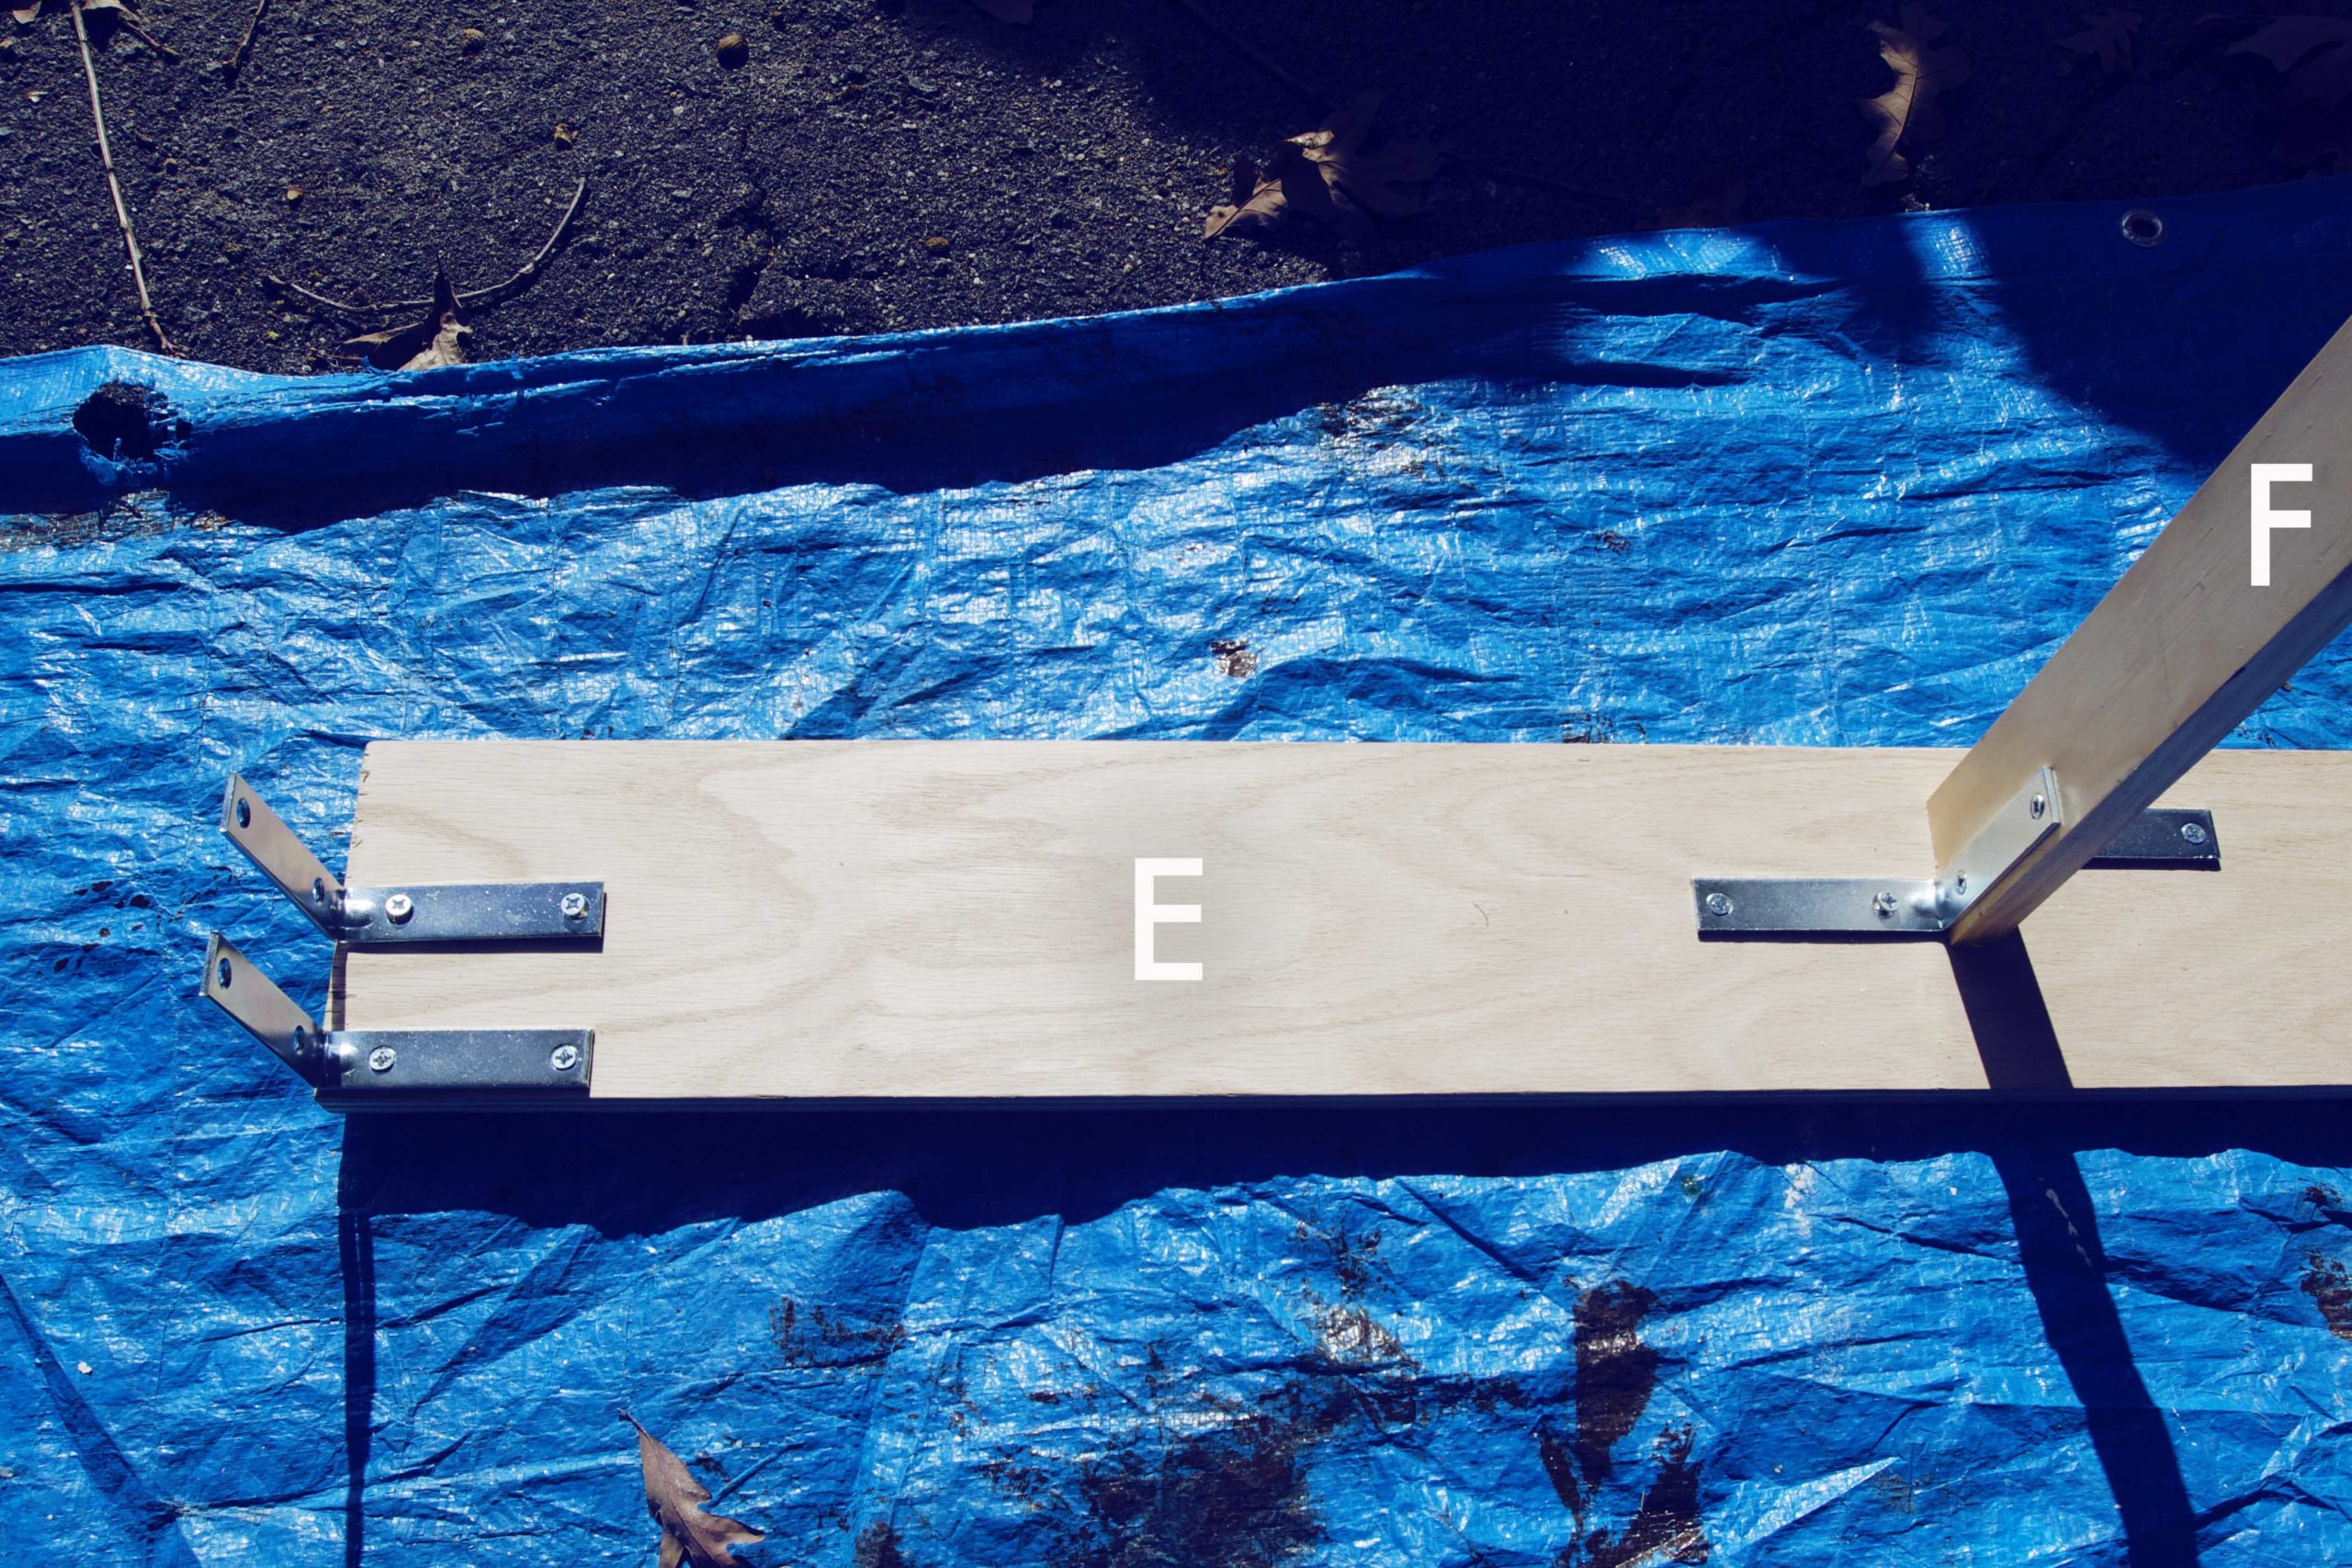
6. Now take piece F and attach 4 L-brackets, 2 on each end and on opposite sides. You will need to stagger them, as you can see in the photo.

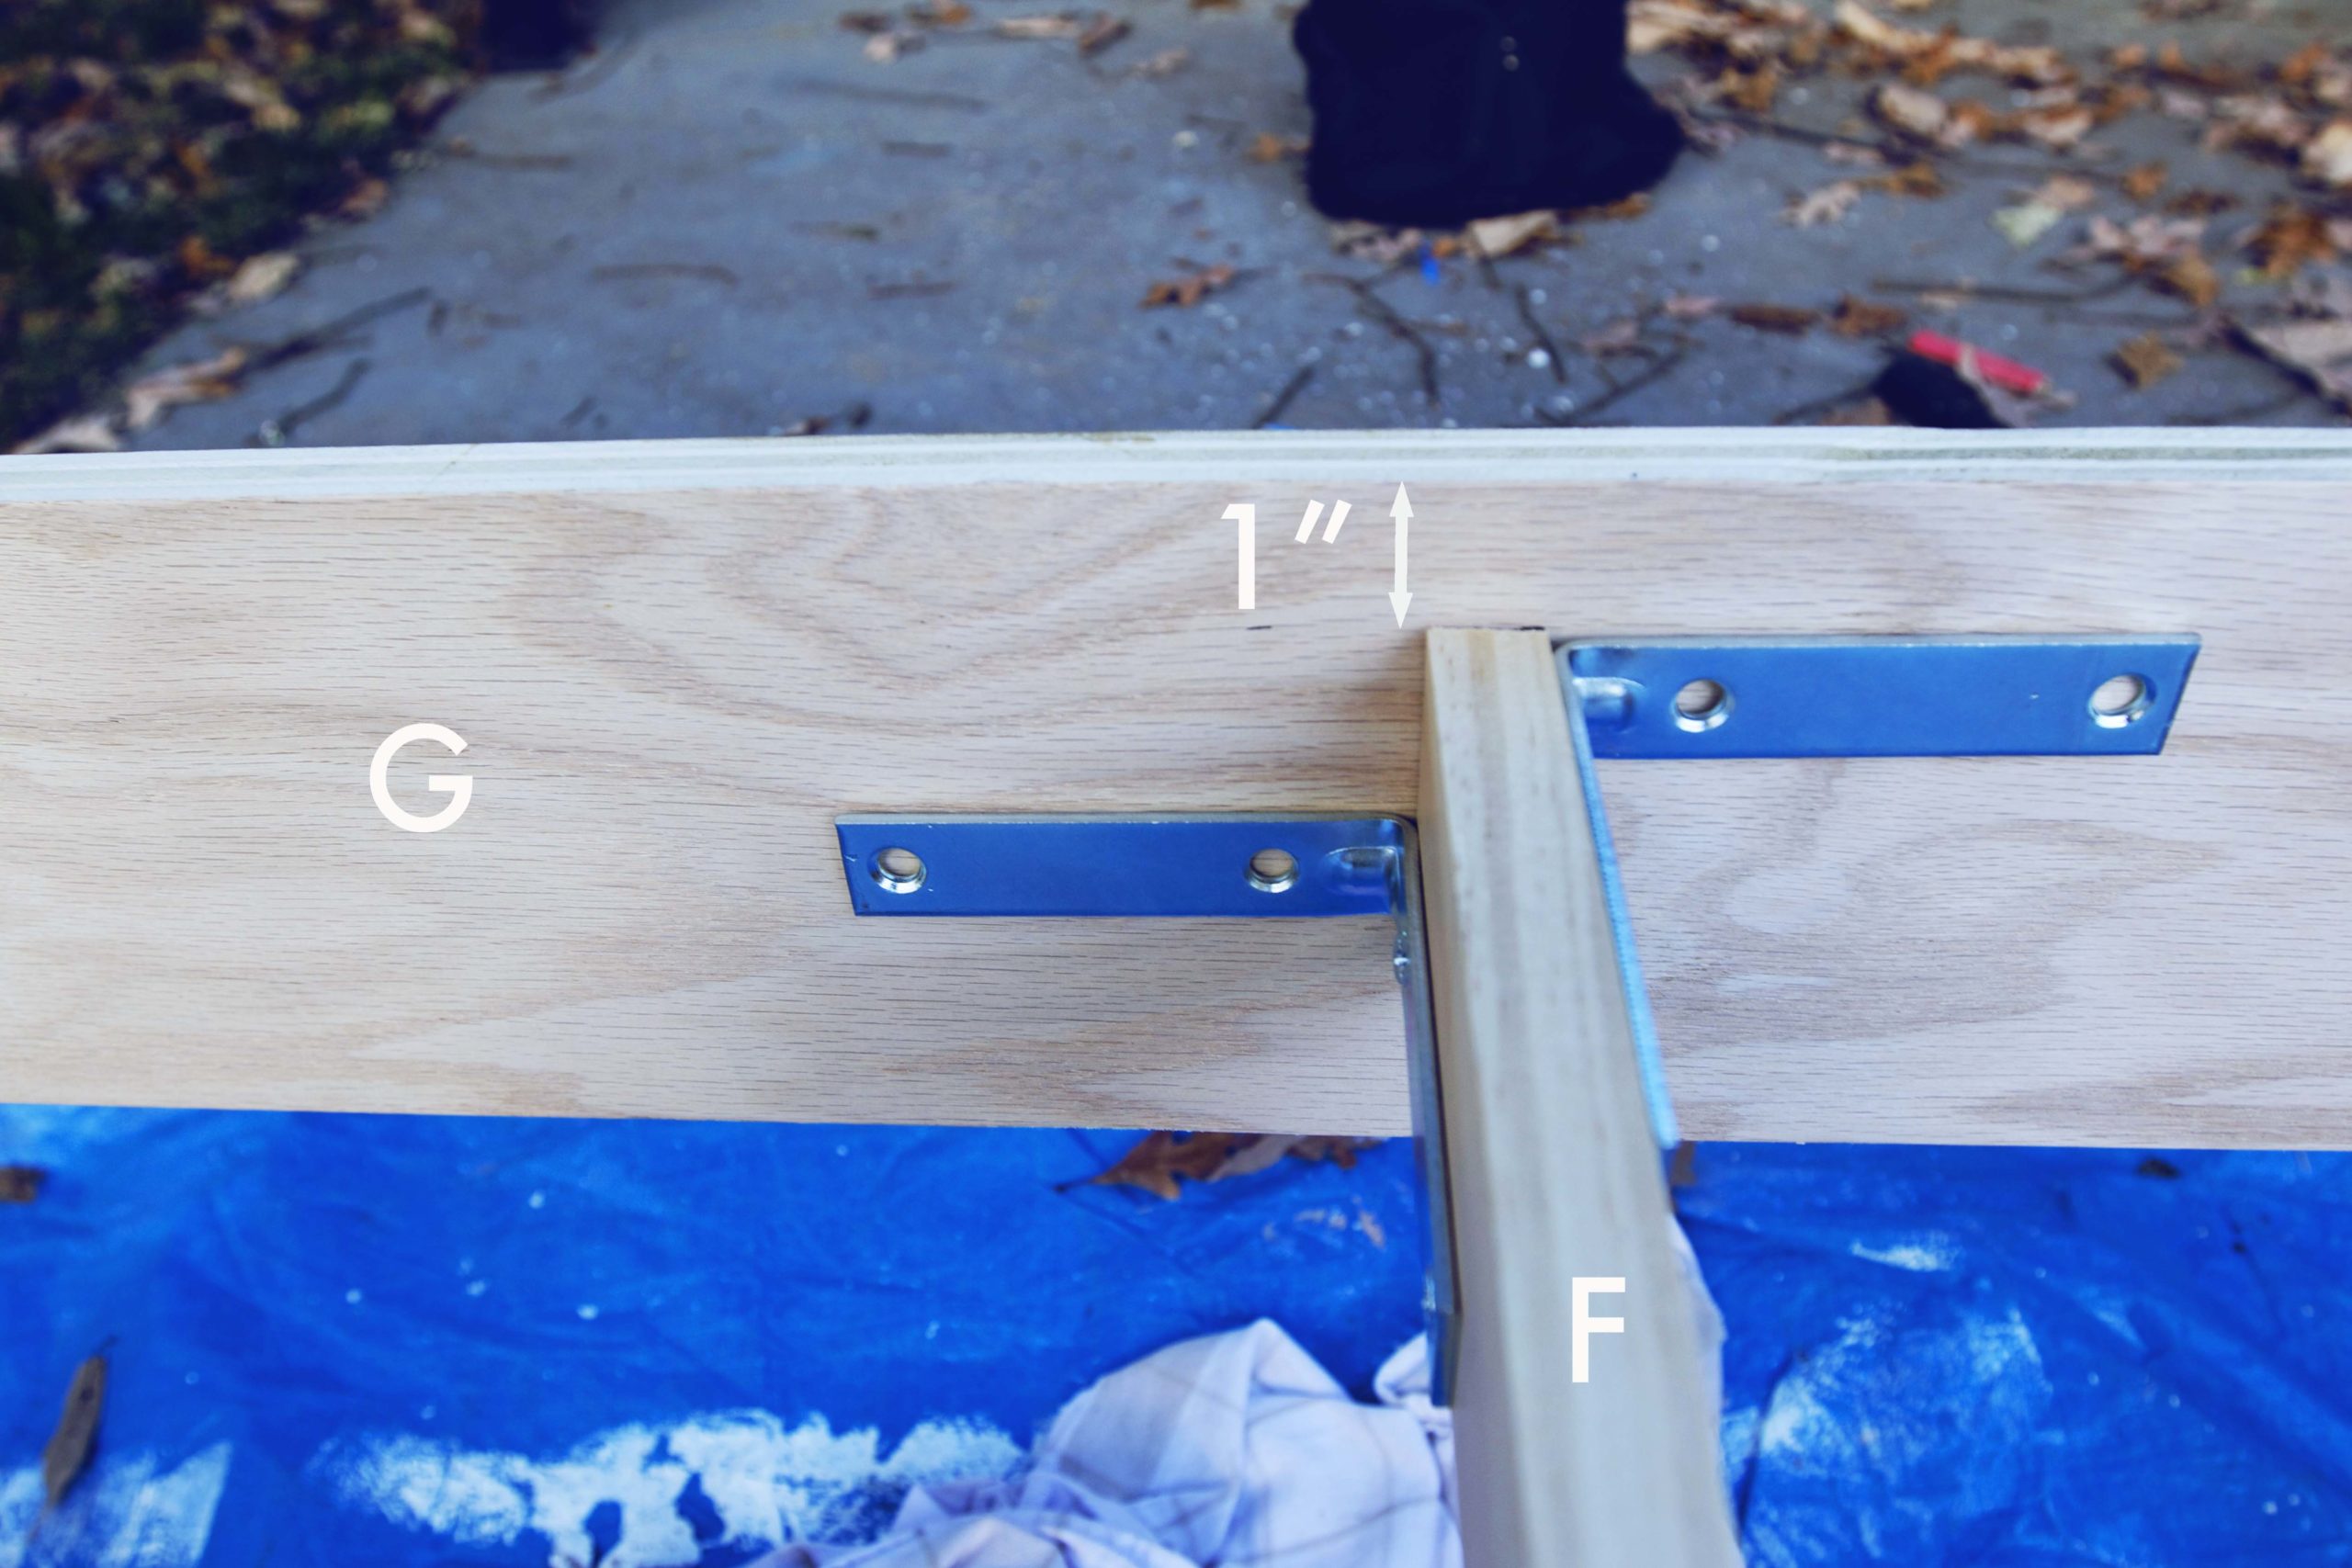
7. In the approximate center of piece E, measure 1” down and mark. Then attach piece F, as shown.
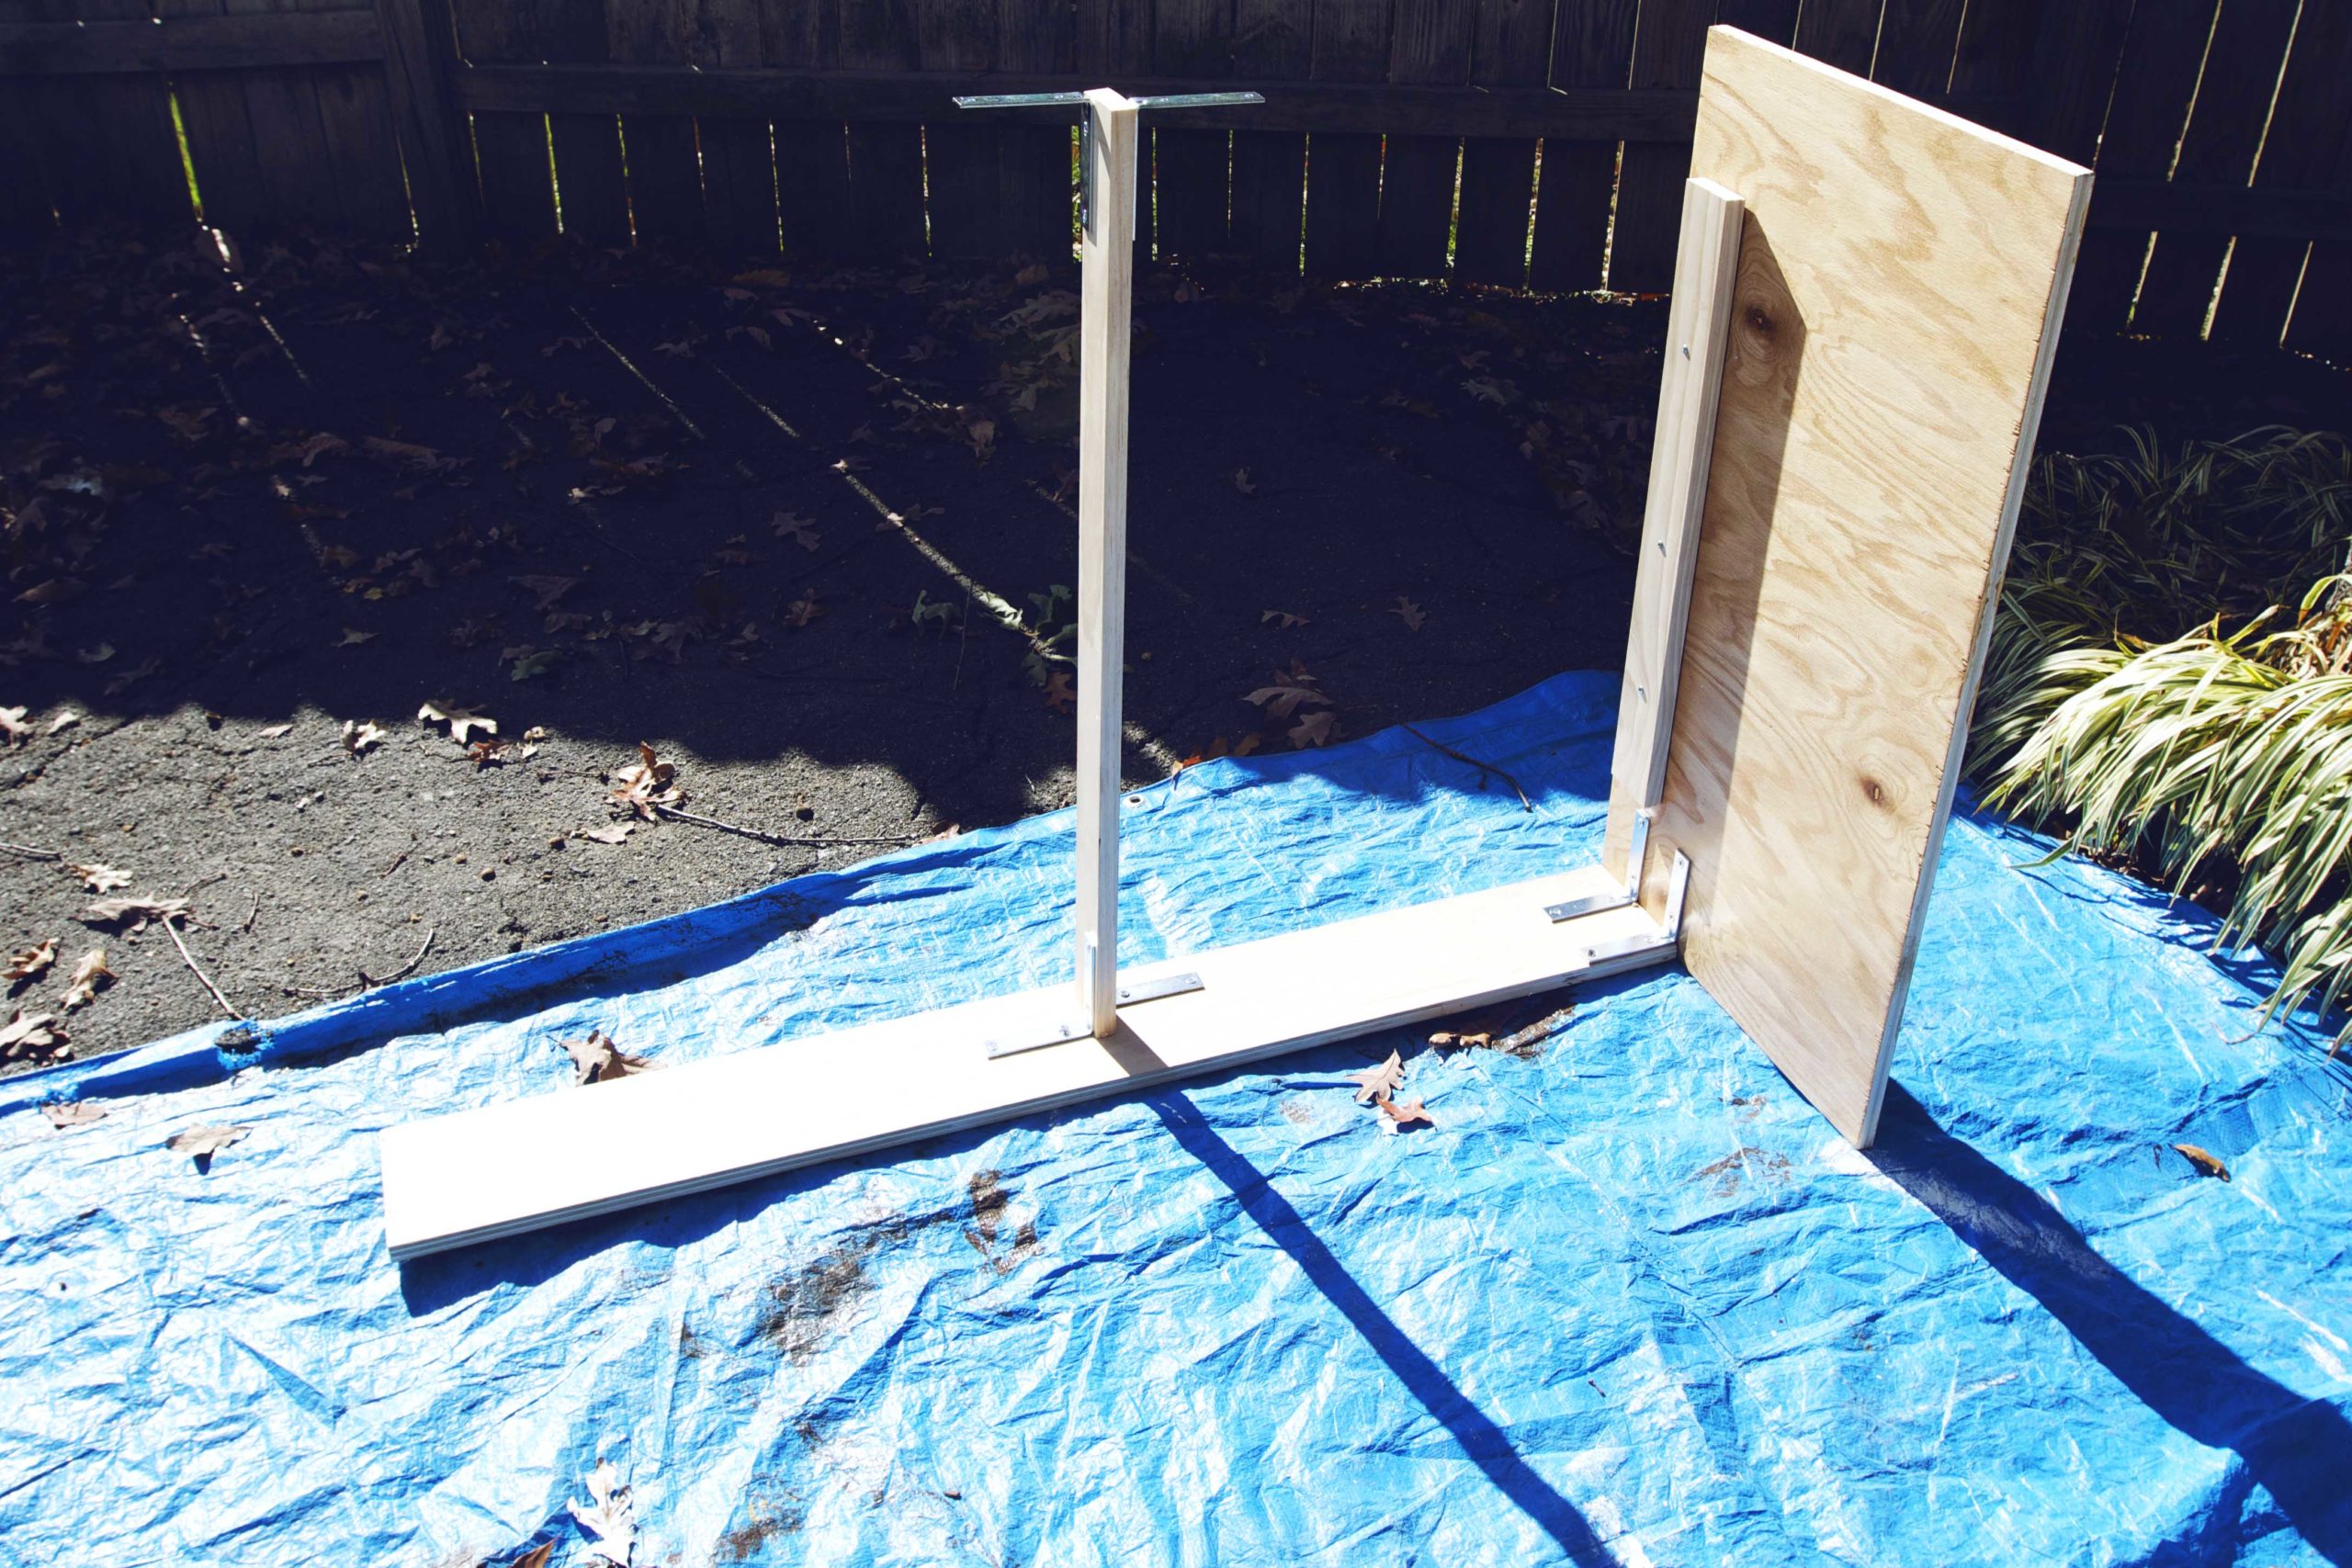
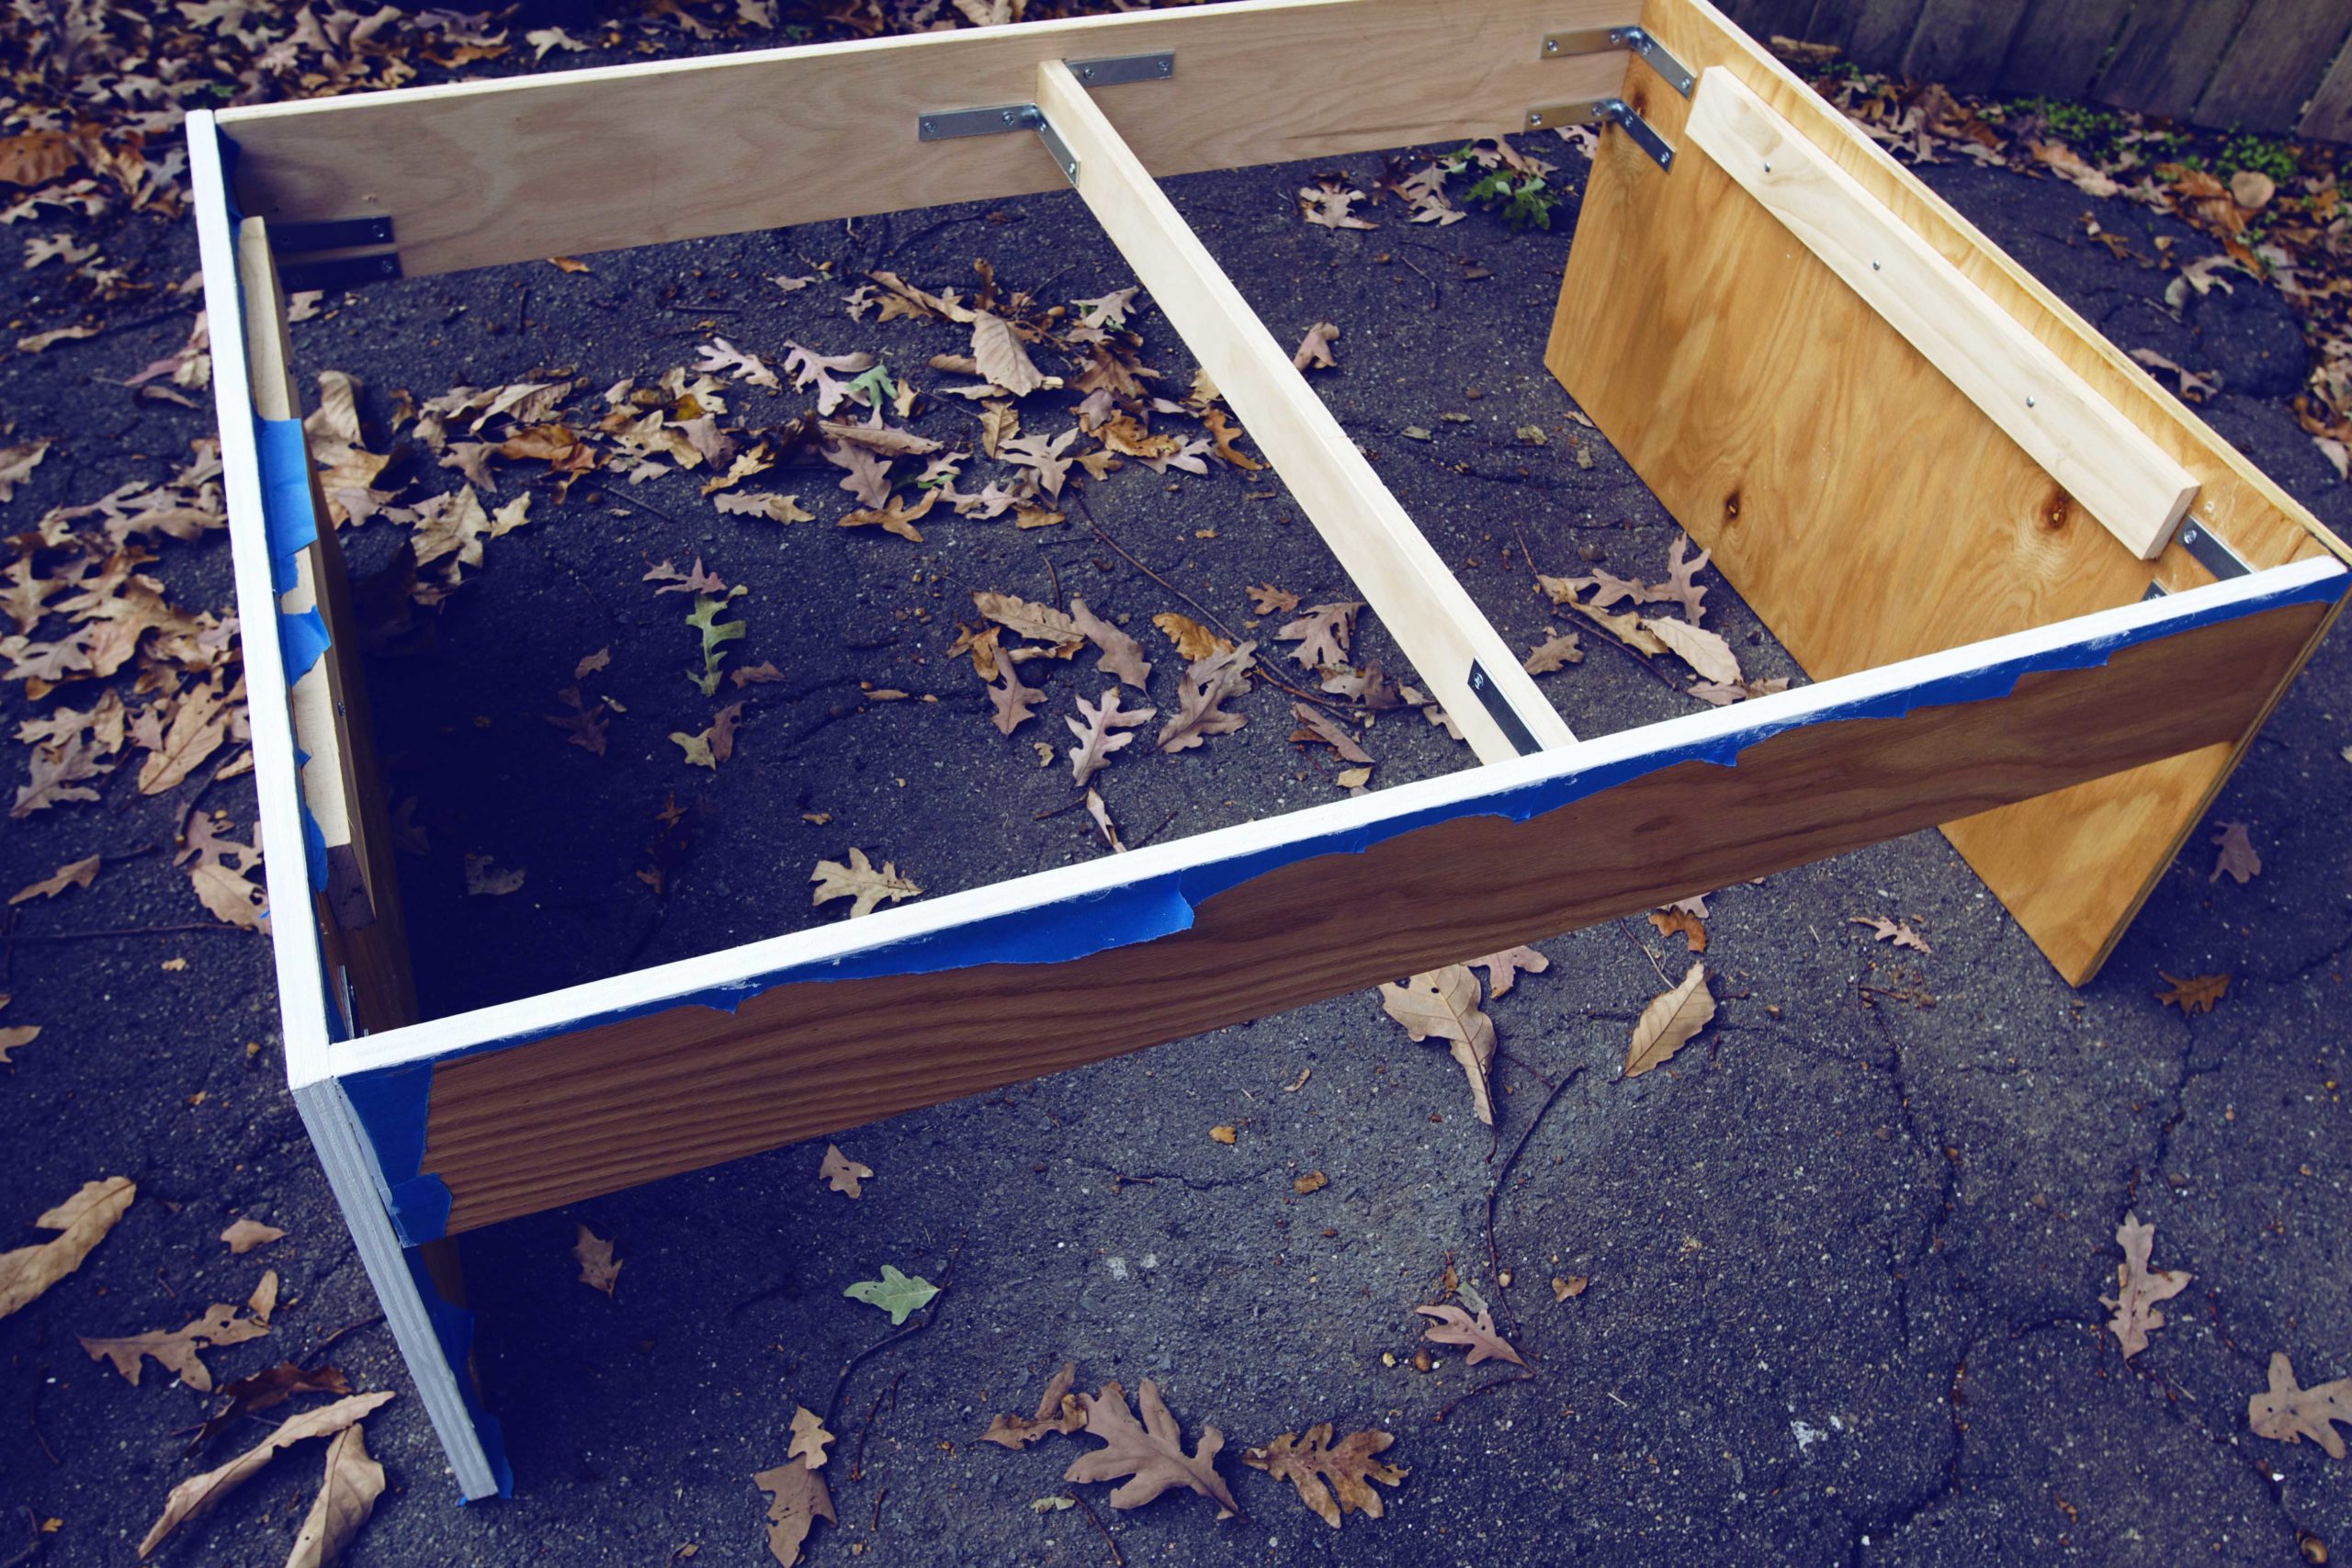
8. Can you see it taking shape? You can probably figure out the rest of the steps from here, but I’ll help you out. Attach 2 more L-brackets to the other end of piece E, in the same manner as before. Then attach pieces D and G with the remaining L-brackets. It helps to have another person on hand to hold things in place, but I managed to do this part alone.
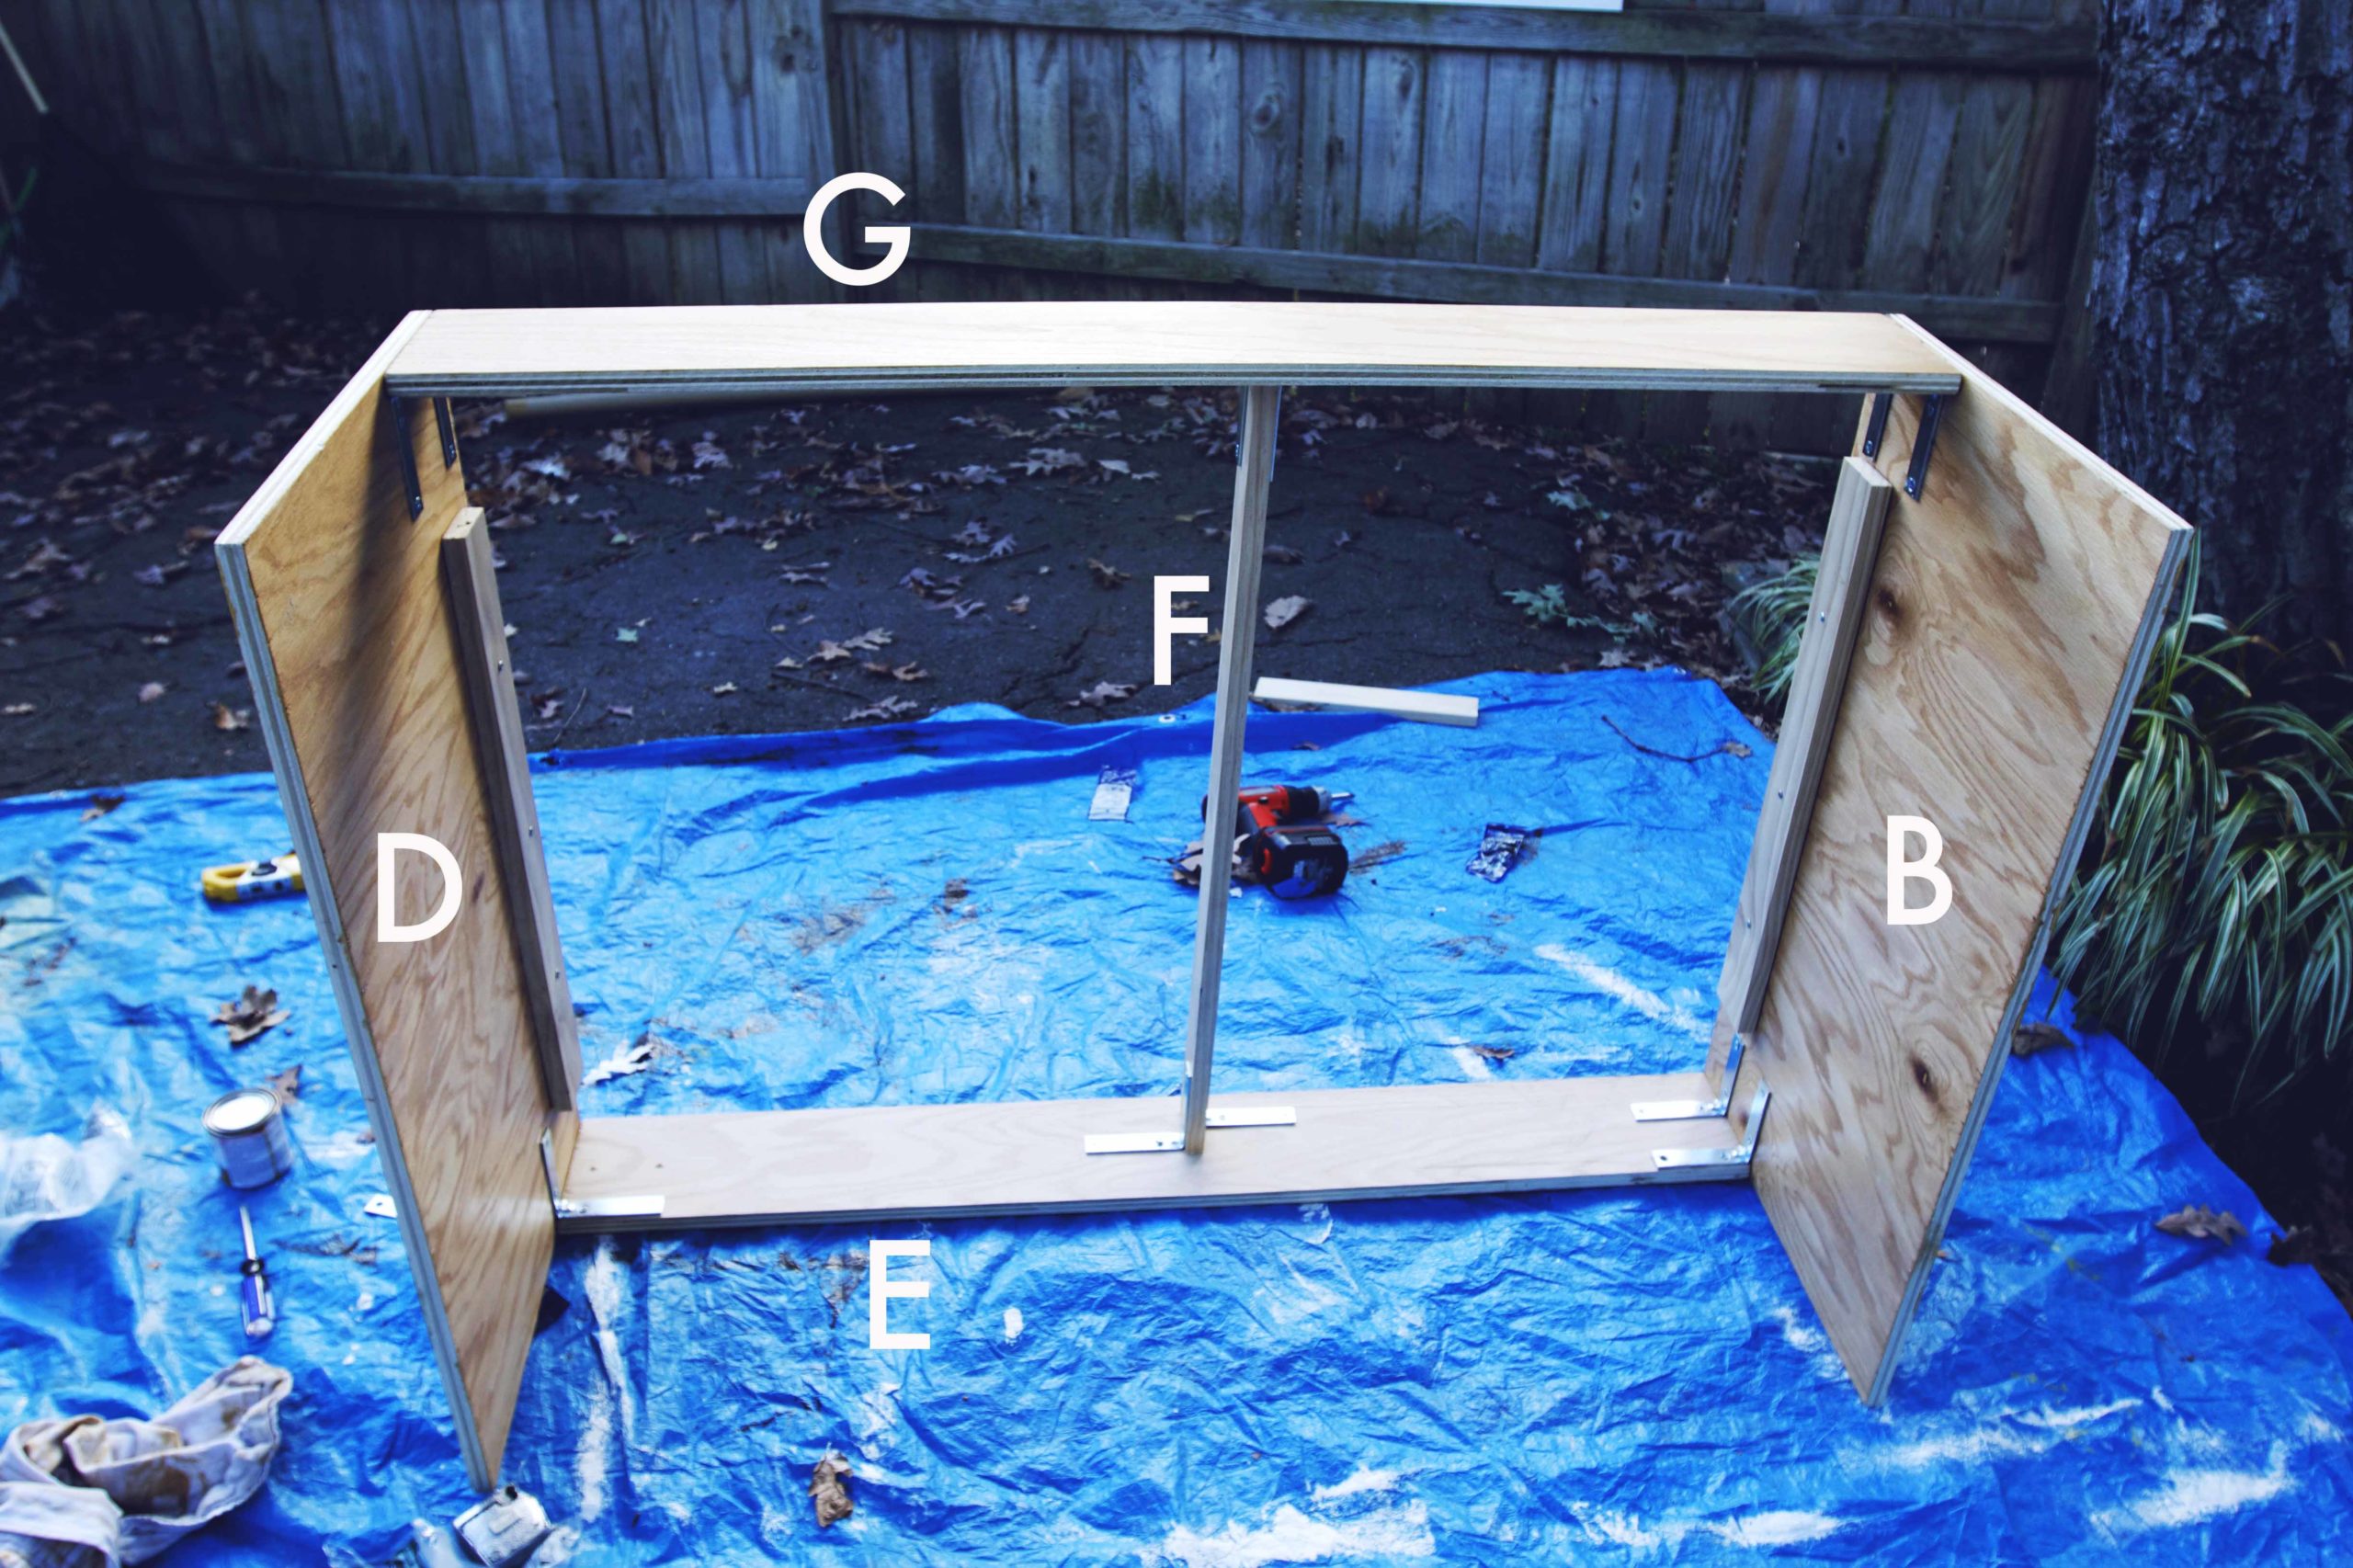
9. Mark 1” from the top on the inside of piece G, line up piece F, and affix with screws.
10. Looking good–almost there! Now, mark off the edges with the painter’s tape and paint them white. Once that’s dry, you can place piece H on top and admire your hard work.
*Here’s a tip: you can go back over any cracks or gaps with spackling paste (the stuff you use to fill nail holes in your walls). It’s already white, and it’ll make the edges nice and smooth!
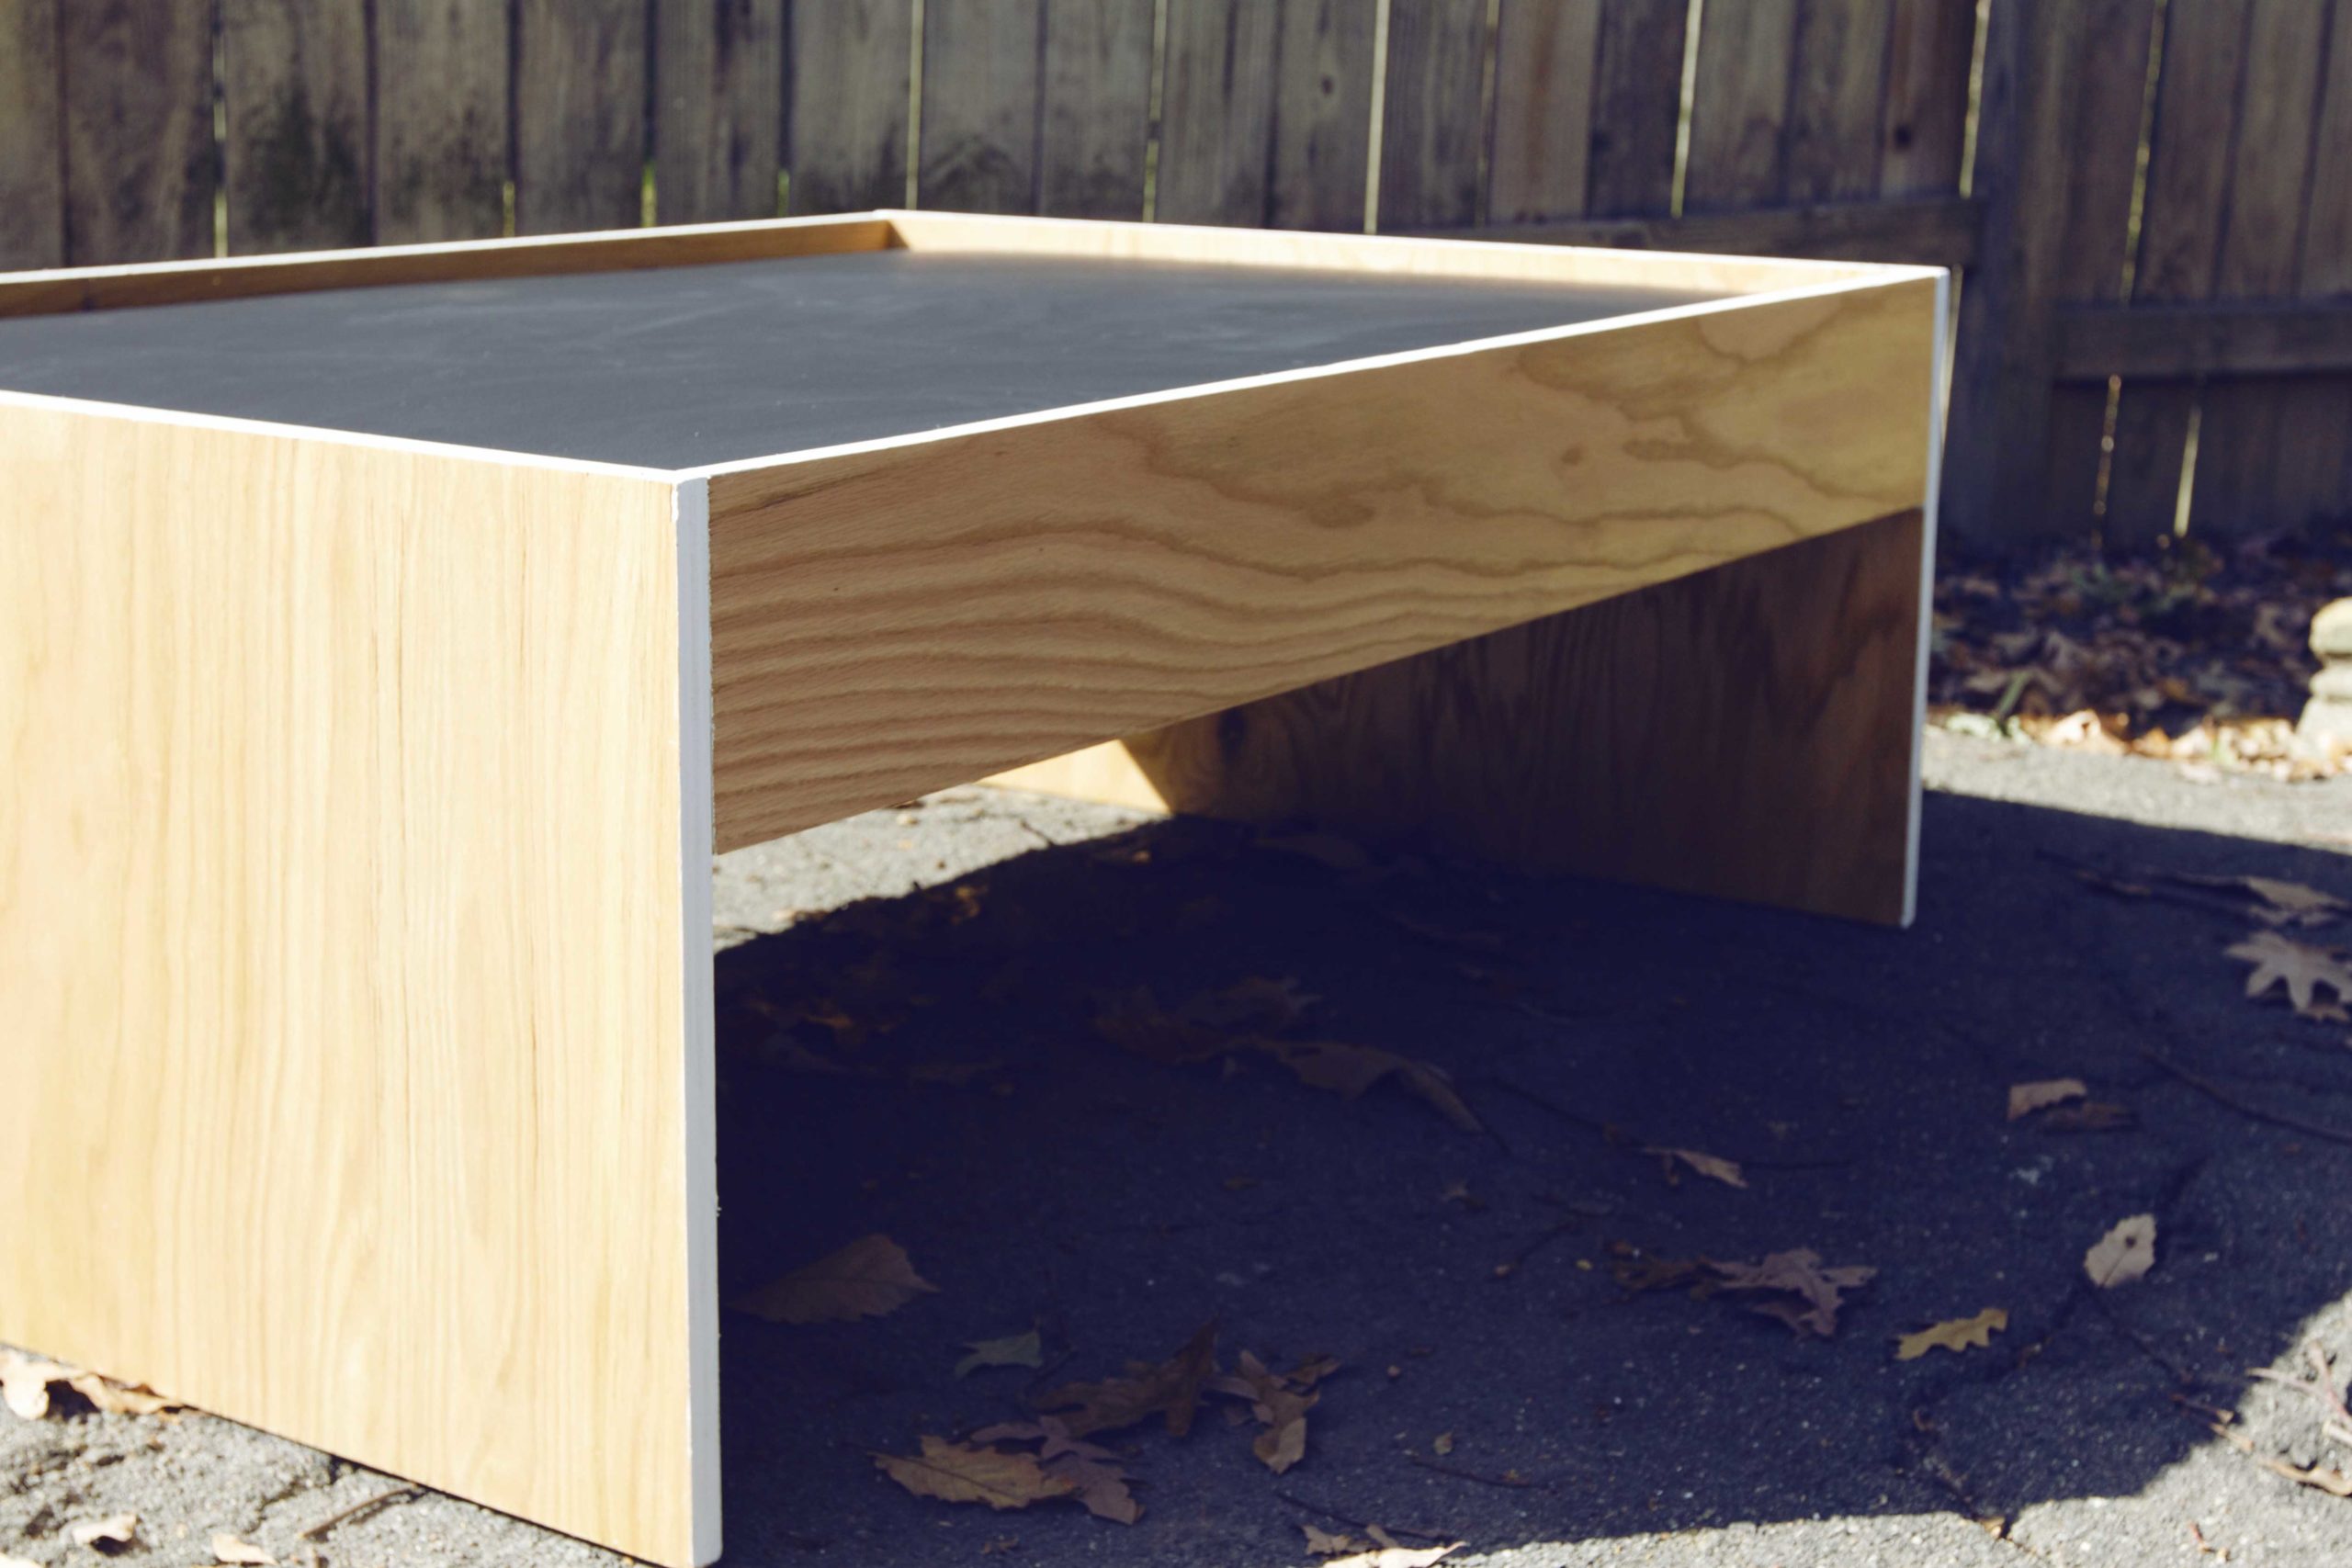
There you have it! Here’s how it looks in the playroom:
Have you ever built something from scratch like this? Had an “I am woman hear me roar” kind of project? I’d love to hear about it!
Related Posts
 MIXING OLD + NEW DESIGN IN HISTORIC HOMESCohesiveness is the end goal of a well-designed home. If you live in an older house that’s been subjected to multiple remodels by previous ...
 What Does Slow Living Mean?An Interview with the Annabode Team Sometimes I wish I could return to my childhood—before the internet, cell phones, and endless channels and ...
 A Complete Guide to Sustainable Design in 2025Sustainable design aims to reduce waste, conserve resources, and encourage human and ecological health. In other words – it’s the way we ...
Popular Articles

TO DO LIST
- Read this book.
- And this one.
- Keep what you need.
- Donate what you don't.
- Design mindfully.

Kristen
| 14 November 2014You go girl! Awesome job.
annabode
| 18 November 2014Thanks Kristen!
sheila
| 16 November 2017So if wanted top could be flush with side pieces to make a craft work area,, correct?
carrie
| 14 November 2014You’re welcome. Can’t wait to make this for my grandson. Great instructions!
annabode
| 18 November 2014Thank you Carrie, and good luck!
Rachel
| 18 November 2014Great tutorial! I’m trying to get more into building things myself, so this is great!
annabode
| 18 November 2014Thanks Rachel! It was pretty easy overall–and it’s always fun mastering new skills!
Caitlin
| 30 December 2014Awesome!! I am SO making one. Silly question, but did you make the drawers as well? If so do you have instructions for them?
annabode
| 30 December 2014Hi Caitlin! I didn’t make the drawers–just recycled them from a previous table from Craigslist. I’m guessing you could probably find “under the bed” drawers at Ikea or the Container Store that would work just as well. Good luck! 🙂
Nadia
| 4 November 2015This is AMAZING! I cannot wait to make this soon! Did you get the wood pieces at Home Depot? Did the chalk paint end up holding up alright or do you think whiteboard paint might work too?
annabode
| 4 November 2015Thanks Nadia! You can use any kind of plywood, from Home Depot, Lowes, or another hardware store. The chalk paint has held up perfectly — not a scratch even with all the playing! I’ve never used whiteboard paint, but I don’t see why it wouldn’t work. Hope that helps!