Before & After: Our Kitchen

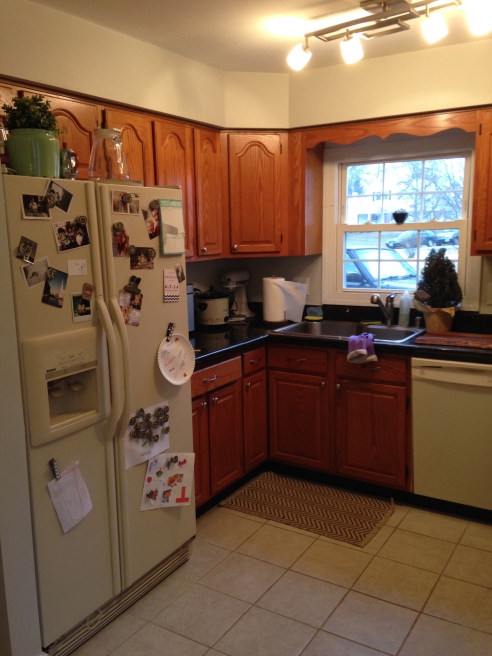
Compared to our previous place, the kitchen in our current home was a dream when we first moved in. Two people could cook in the kitchen at once! The appliances were made during our lifetime! There were no baby cockroaches under our sink! We soaked up the all that luxury for about a year before all that wood finally got on our nerves.
We began to dream of stainless steel replacing the off-white stove and a refrigerator that actually fit our kitchen. Our goal was to make it light and airy–a challenge with black granite countertops, to be sure. My Pinterest board was filled with gorgeous open shelving, white subway tile, and lots and lots of brass.
However, we had a teeny tiny budget. I’m talking miniscule. We certainly couldn’t afford to remodel (sigh), so we came up with a budget and a plan:
- Paint the cabinets
- Add a backsplash
- Replace the appliances
- Switch out the hardware
- Update the light fixture
- Create some open shelving
….all for under $2,000!
Determined, my fiancé set aside a week in December to do the painting. We vowed only to use Craigslist for the appliances, and to do the tiling ourselves.
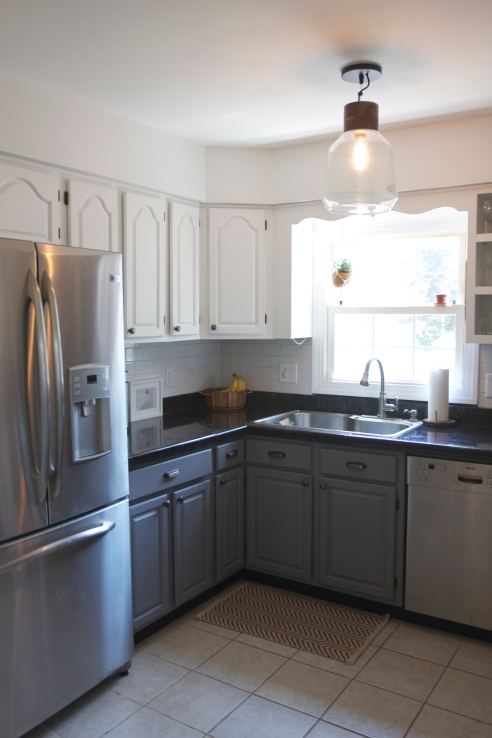
As it was, our kitchen was a pretty dark and dreary place, and I desperately wanted to make the room feel larger, brighter, and taller. We chose to paint the upper cabinets and drywall in the same white paint and added white subway tile below to make the upper half of the room more cohesive.
For the lower cabinets, we used a darker grey to provide contrast and anchor the dark countertops.
Before:

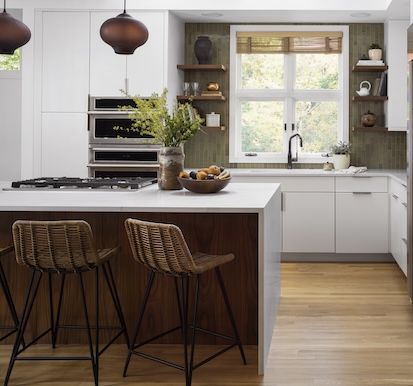
After:

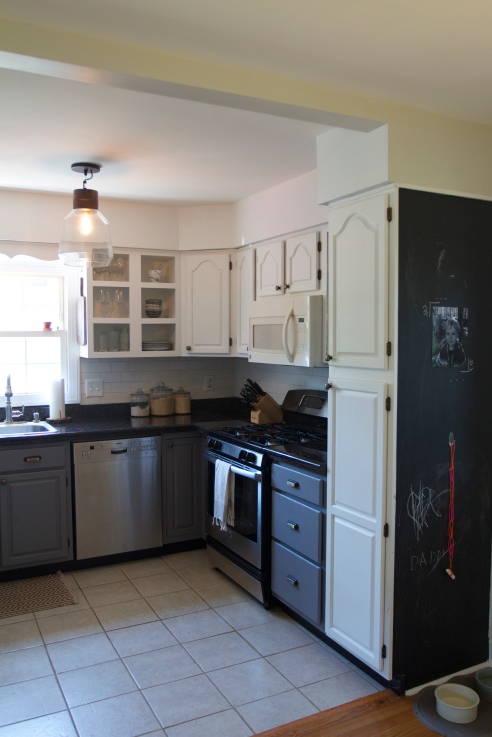
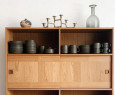
Since we couldn’t install open shelving, we took off the doors of two cabinets and added false pieces to the front of the interior shelves. You’d never know, looking at them, that they weren’t built that way!
While our budget restraints and the nature of Craigslist made this project take a little longer than others (about 3 months), it was well worth the wait!
Before:
After:
We also added a fun little chalkboard wall for our son on the end of one of our cabinets.
I think the final touch will be finding a larger, colorful oriental rug for the floor. I contemplated adding a Roman shade over the window, but decided in the end I liked a cleaner look.
What do you think? Is there anything you would add?
Product guide: Loft Pendant Lamp from CB2 // White Subway Tile from Home Depot // Benjamin Moore paint in Frostine and Storm // Greyson Vintage Brass Hardware from Home Depot //
To see the rest of our house, visit our Before & After page.
Related Posts
 MIXING OLD + NEW DESIGN IN HISTORIC HOMESCohesiveness is the end goal of a well-designed home. If you live in an older house that’s been subjected to multiple remodels by previous owners, a ...
 What Does Slow Living Mean?An Interview with the Annabode Team Sometimes I wish I could return to my childhood—before the internet, cell phones, and endless channels and ...
 A Complete Guide to Sustainable Design in 2025Sustainable design aims to reduce waste, conserve resources, and encourage human and ecological health. In other words – it’s the way we ...

Popular Articles


TO DO LIST
- Read this book.
- And this one.
- Keep what you need.
- Donate what you don't.
- Design mindfully.

sandyc
| 14 August 2014Super inspirational job on a tiny budget. I have similar oak cabinets in my kitchen (I did luck out by getting the simple Shaker style cabinets above and below and a corner sink with two windows so there’s lots of light). Like what you did with the open cabinet. If the curved piece across the sink could be removed, would be great but if not, no prob. I’d add a short valance across the window in some cheerful color(s) to coordinate with a colorful rug (don’t know that I would go oriental) and I’d definitely have a happy green live something in the room (an apple green plant or a bowl of limes or similar). Better Homes & Gardens has a lot of practical projects on their website. Just found your kitchen today in a post from Apartment Therapy and yours is the one I copied into my Kitchen Projects folder.
annabode
| 18 August 2014Thank you so much! I think adding a colorful valance is a great idea, and I agree that the room definitely needs a rug. You can kind of see it in the photo, but there is a hanging plant in front of the window and I usually have a couple other potted plants by the sink as well. So glad you liked my kitchen–good luck with your kitchen projects!
sandyc
| 18 August 2014I understand the valance might be tricky and in fact it might compete with the curved strip joining the front of the cabinets, so maybe scratch that idea. But definitely you need color. I see the little hanging plant now and that and the potted plants will bring in the needed greenery but maybe pots in some neat colors to coordinate with the rug you get. The pots wouldn’t have to all be the same. Melissa at TheInspiredRoom.com does at lot with small window stuff and Pinterest has tons on window herb gardens. I check frequently because although my 2-window corner sink is great for light, I’m somewhat vertically challenged and it’s hard to close curtains for privacy at night or reach over to water plants. I’ll be eager to see a pix of the finished product. You’ve done such a lovely job.
Augustina
| 16 October 2014I love the pendant lighting. I’m interested in buying that, but wonder if it lights the space well. Do you find that you need more lighting?
annabode
| 16 October 2014We have an Edison bulb in it at the moment, which does not give a lot of light. However, we have under cabinet lighting which makes the room very well lit. If you used a different bulb it would probably be much brighter, but it is of course a single-bulb light and is never going to be as bright as a multi-bulb light. Hope that helps–I still love it!
Augustina
| 16 October 2014Thanks!
sherri
| 17 July 2015Hi love the open cupboard look ~ as a portion of my upper cabinets are the same style/colour etc…my others are much older and original….how are you finding the open cupboards with regards to dust etc – I had thought to see if I could find glass doors to replace some of the current ones to open and brighten up the space – not all of them as I don’t want ‘everything’ exposed 🙂 – however your option looks fabulous.
Well done, fresh and inviting! thanks
annabode
| 16 October 2015Hey Sherri,
So do I! I never had a problem with dust, but I did store only pieces we used every day so there was always movement and replacement with clean items. In our new kitchen (here in CO) we’re not even doing uppers, just open shelves and I can’t wait. I think as long as you’re using the items frequently and wipe down the area every once in a while, you should be fine.
Carol Mann
| 3 October 2015Love the transformation – both what you have done, and with the impressively low budget.
I’m wondering how you found the cabinet painting work. Any hints/tips? Did you use an undercoat, or have challenges with even coating/drips?
Thanks!
annabode
| 16 October 2015Hey Carol — thanks! I would say, use an electric sander if you can. That’s the hardest and most time consuming part (removing the original finish). I suppose you could strip them instead of sanding, but that’s the way we did it. Be patient with the painting, too — it’s worth buying a high quality brush or roller and doing multiple coats (or a paint sprayer if you have the space). That avoids drips, and improves the finish.
Reg
| 17 December 2015I love how you painted the upper cabinets white to match the microwave and
for the new appliances to match as well. you painted the lower cabinets grey… very smart.
Looks amazing!
annabode
| 21 December 2015Thanks so much Reg! We debated about upgrading the microwave to stainless steel, but in the end we liked how the old one blended in, just like you say. Plus, it was cheaper!
JOAN
| 4 April 2016I AM VERY IMPRESSED WITH YOUR WORK. LEAVING THE MICROWAVE SEEMS TO MAKE THE SPACE BIGGER RATHER THAN CHOPPING IT UP WITH STAINLESS. I AM TOYING WITH REDOING THE BOTTOM CABINETS IN DARK CHERRY AND THE TOP IN WHITE SO WAS VERY INTERESTED IN YOUR GRAY BELOW AND WHITE ABOVE. GREAT JOB!
annabode
| 5 April 2016Thanks Joan! This was a fun kitchen flip (you should check out our latest one) I love contrasting cabinets too, but wouldn’t recommend mixing wood with painted cabinets — stick with one or the other. Happy decorating!
kARIN bAUCHROWITZ
| 11 April 2016lOVE WHAT YOU DID IN THE FIRST KITCHEN SINCE YOU HAVE REMODELED ANOTHER ONE IN THE MEANTIME, SO MY RECOMMENDATION IS TOO LATE: i WOULD HAVE OPTED FOR A COUNTER-DEPTH FRIDGE TO GAIN MORE SPACE AND FOR A MORE FLUSH APPEARANCE.
annabode
| 11 April 2016Hey Karin — thanks! We actually did go for a counter-depth fridge, that’s what you see in the photos :).
kandy m.
| 23 April 2016I, TOO live in Colorado. I recently sold my townhome in Centennial which had a kitchen nearly identical to yours. Mine was in the Sturbridge development. I found it difficult to come up with a truly useful kitchen space due to the way it was configured. i did improve the appearance greatly by also painting my dark,dated oak cabinets white and adding a dark(almost black) countertop and then new stainless appliances. i was sad to leave!
annabode
| 26 April 2016Sounds like a great kitchen flip! This was our kitchen in Virginia — here’s what we’ve done to our Colorado kitchen: http://www.designsponge.com/2016/01/before-after-a-fixer-upper-home-gets-a-new-kitchen.html
Travis
| 4 August 2016Really like this idea and thinking about doing the same thing in my kitchen. Could you share the cabinet painting process you followed or possibly a link to a DIY guide that you used? Do you have a paint recommendation and did you remove all cabinets when you painted or leave them up?
I got one bid for painting my kitchen cabinets and it was 4k =\
Heather
| 23 August 2016I have virtually the same kitchen. However, i still have not painted my cabinets, you did a BEAUTIFUL job! I am inspired. I am curious about what you did with a rug. I am using an antIque persian rug in mine. It makes all the difference, i also used a vIntage, floral scarf as a valance, it doesn’t compete, and lets light in.
Well done, seriously. I hope you still love it.
Alice
| 9 May 2017Wow! Great job!
Sally
| 30 January 2019What an inspiration! I love the way you chose white for the upper cabinets and gray for the lower. YOur taste is exquisite.I have the same style cabinet doors and your photos have given me such great ideas for updating.