Kitchen Reno Part IV: We Have Walls Again!
It’s been a while since I posted about our kitchen renovation, mostly because as soon as we finished we dove headfirst into a million other projects (see a glimpse of them on Instagram). Our kitchen has in fact been finished for months, so excuse me if the next few posts go veeeeery quickly as I attempt to catch up!
Read the full kitchen renovation series.
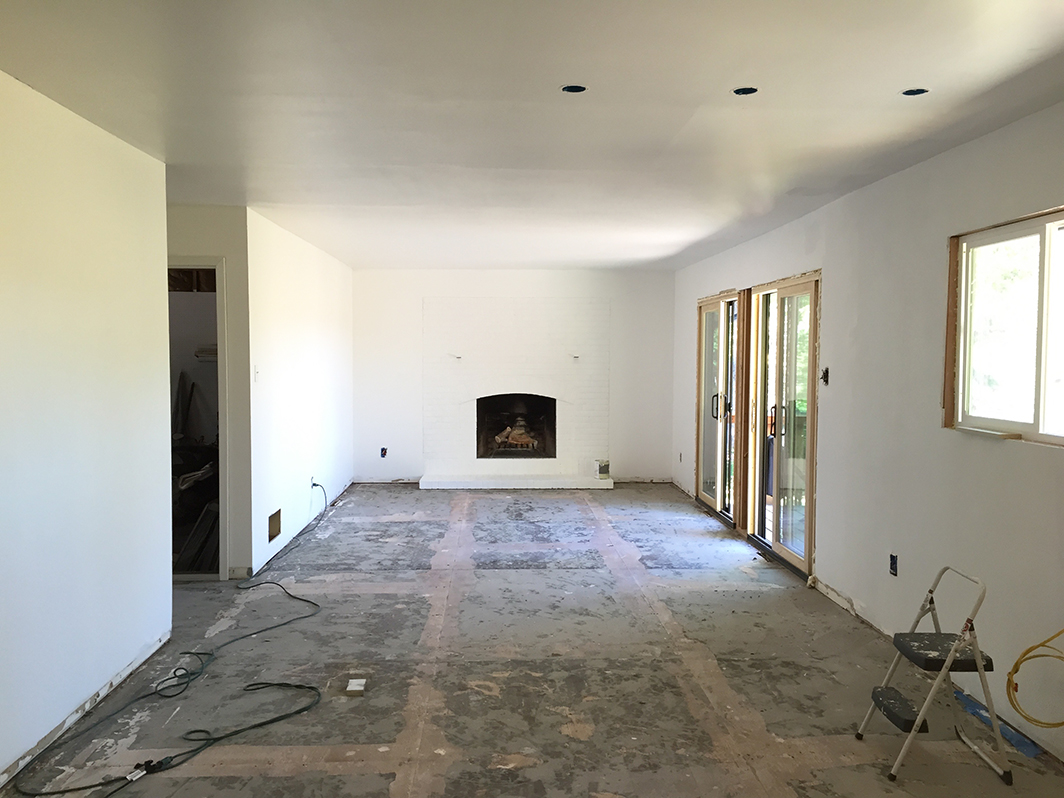
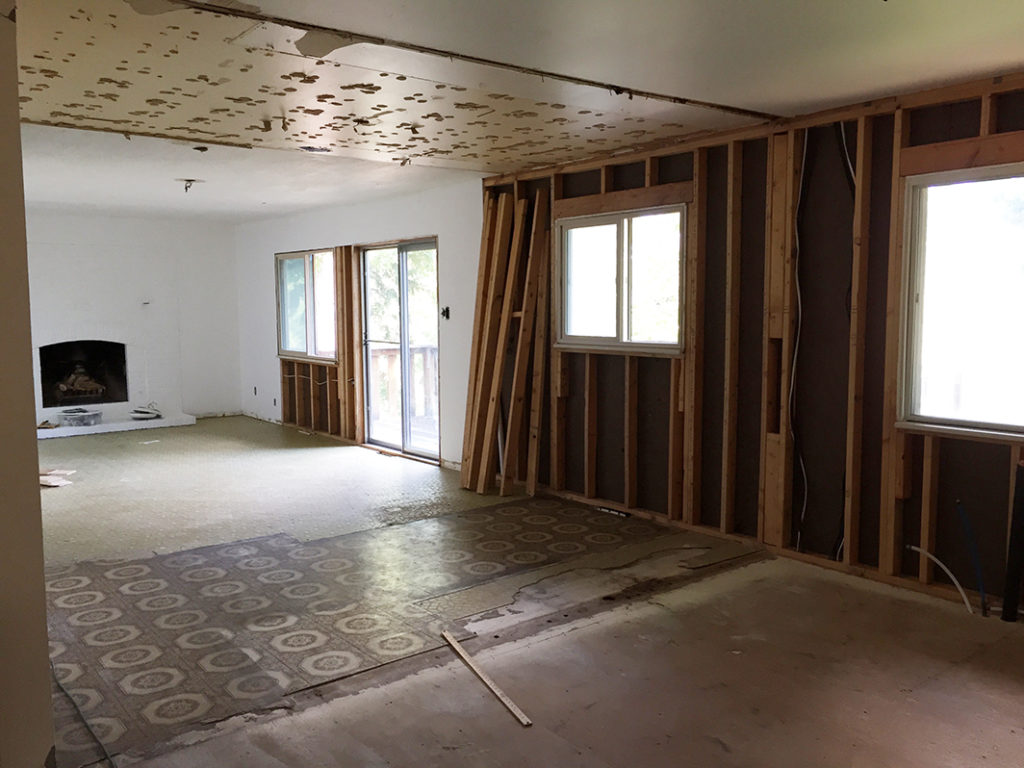
We left off with the asbestos abatement, which meant we were down to the studs. The next steps were to:
- Remove the wall dividing the former dining room and kitchen
- Take down the ceiling tiles from the old kitchen ceiling
- Remove popcorn ceiling in living room, and repair the ceiling of the combined three rooms
- Replace the windows (the one on the right had to be raised to fit our cabinets)
- Rip up the linoleum
- Move the plumbing
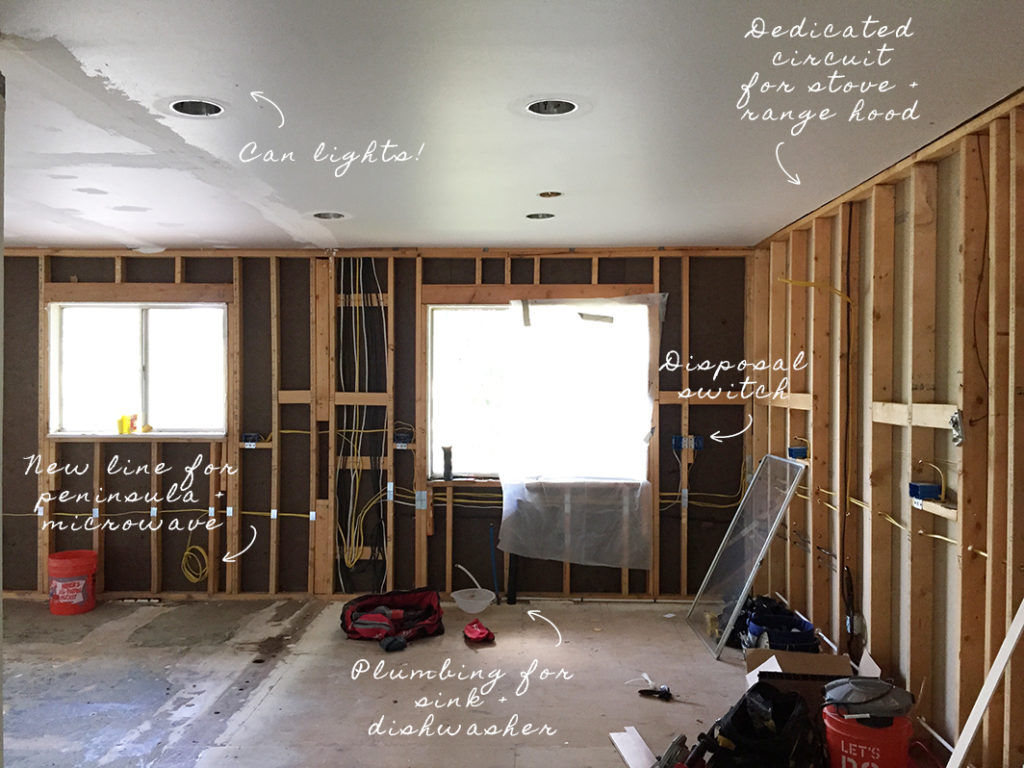
- Install new electrical: four can lights, three pendant lights, circuit for stove, wiring for range hood, garbage disposal switch, and required outlets
- Install new insulation
- Hang new drywall, mud, and sand
- Paint visible areas
Here’s a handy visual:
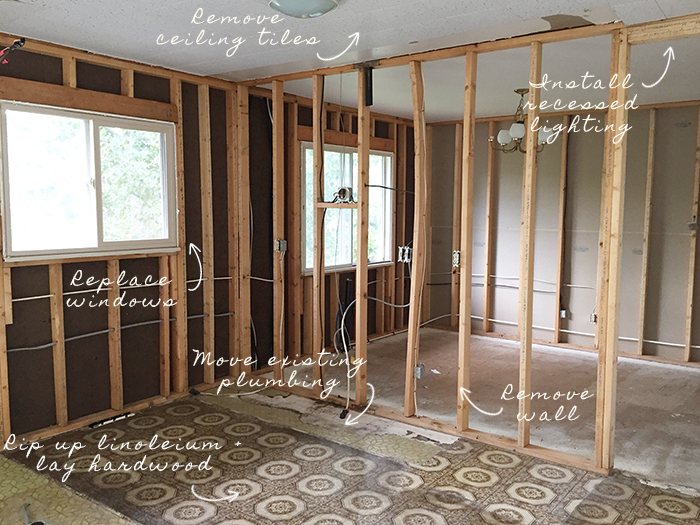 Basically, it was a long list.
If you missed the kitchen design post, here was our intended layout:
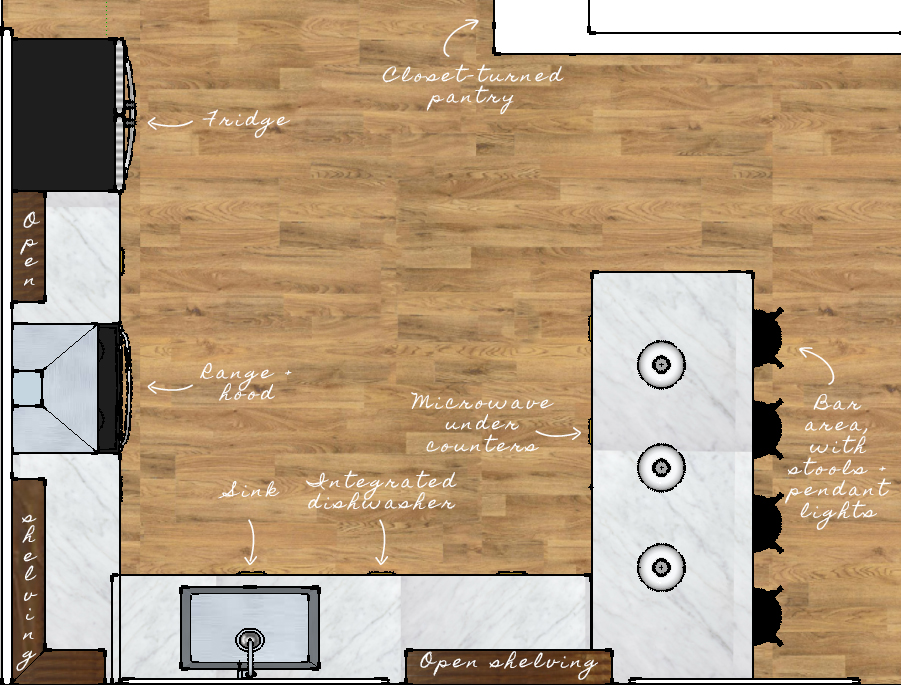
The two windows you see in the photo are behind the sink and peninsula. The wall is between the two.
I could have written a post for each of these steps, but there’s so much information on the internet about how to remodel a kitchen the DIY way. Instead, I’ll give you a brief rundown of how we did it, including tips and tricks we learned along the way and our favorite resources (and some mistakes we made as well).
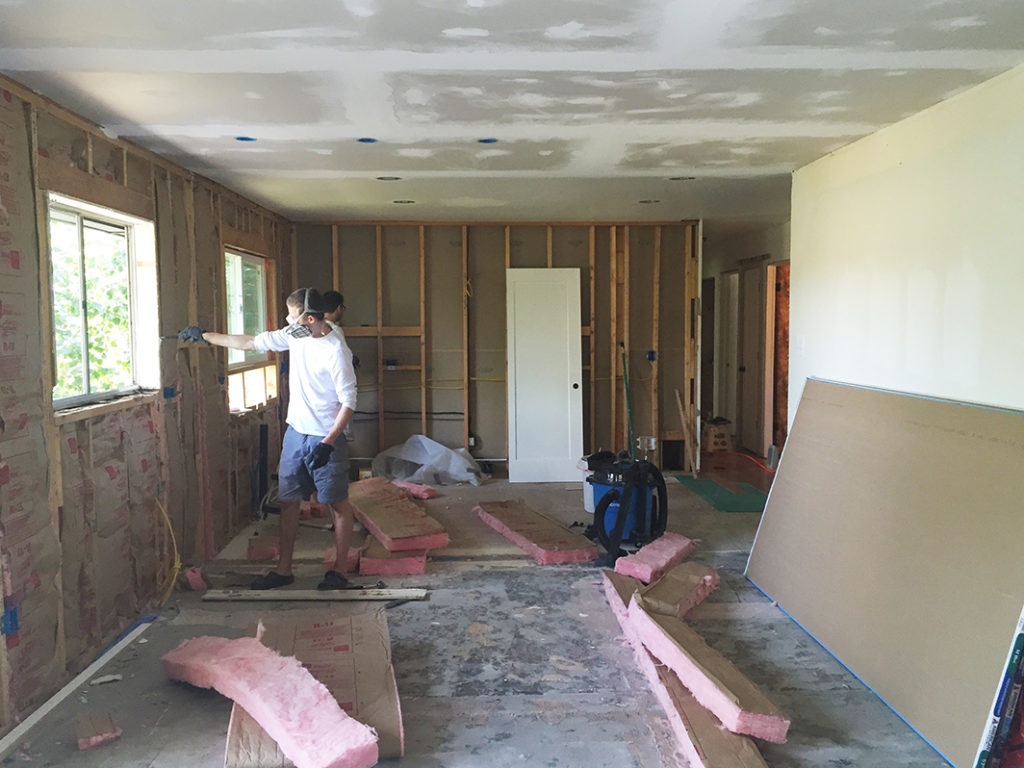
This felt like a perfect excuse for a GIF so…here was our progress in August!
Then, Austin removed the studs from the dividing wall with a mallet and a crowbar. It’s amazing what a difference this small step made — the room became enormous!
Now came our first major challenge — the ceiling. We were essentially combining three rooms into one (family, kitchen, and dining) and as the house gods would have it, there was a different type of ceiling in each. The family room had what looked like a popcorn ceiling, the kitchen had the tiles, and the dining room was just drywall.
No problem, we said! We’ll just google how to remove a popcorn ceiling, patch any holes the staples left in the kitchen ceiling, and call it a day! Right?
Wrong. We scraped and scraped that baby but it just. wouldn’t. budge. It was not in fact popcorn, but something else entirely (we also tested this for asbestos and it was negative). We even tried sanding, but with no luck.
Exasperated, we asked our electrical contractor who suggested we skim-coat the family room and kitchen ceilings. Skim coating is a very misleading term in my opinion, but it just means hanging 1/4″ drywall over the surface. Luckily for us the ceiling was sloped enough that we could skim coat just those two areas and still have it match up to the dining room ceiling. So we covered that disaster up! And when I say we, I mean our contractor did it because by that time we had our hands full and we just wanted to get it done.
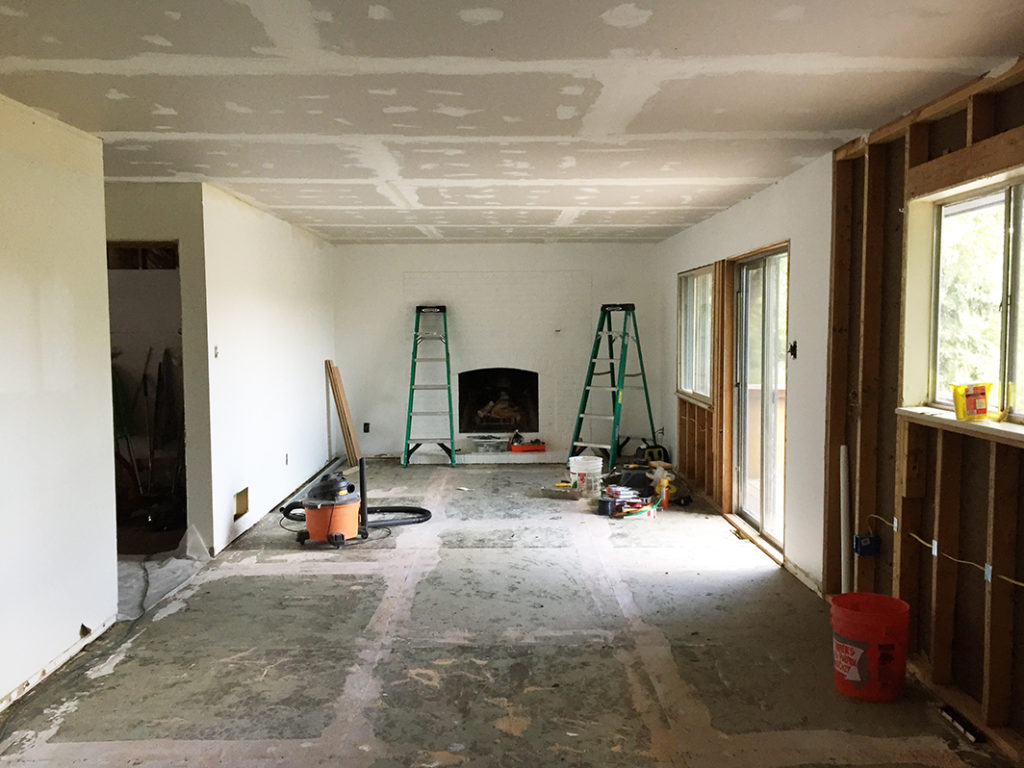
Smooth ceiling and floors!
Instead, we turned our attention to the TWO layers of linoleum that needed to come up, which Austin handled — renting a tile ripper from Home Depot and attacking it over two days. He says of everything we’ve done on the house so far, that was by far the most difficult and labor-intensive. If we had to do it again, this might be one task we’d hire out.
Here’s what the kitchen looked like after our electrical contractor, Ben “The Electric Guy”, installed everything:
 Next came insulation. For this part, my only tip is to WEAR A MASK. Austin made the mistake of not wearing one at first and was ill and coughing for days.
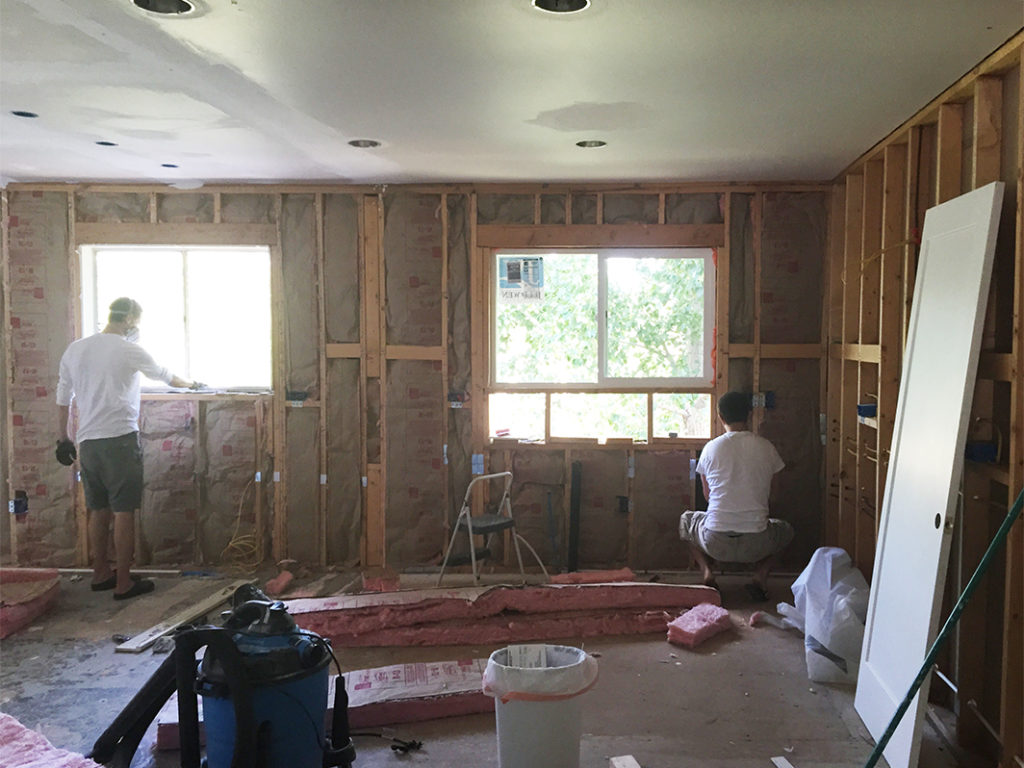 We also installed the new windows, and sealed them with spray foam*.
*affiliate link
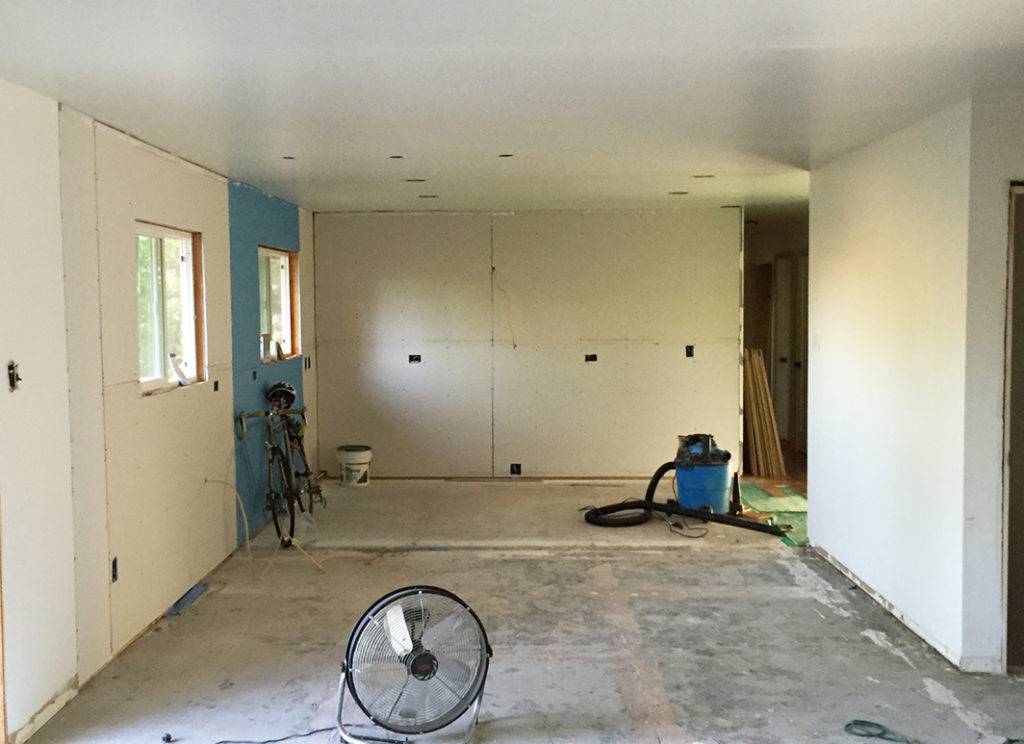
 After that, Austin and a buddy hung the new drywall. We used cement board behind the sink and dishwasher area in case of leaks, and regular ol’ drywall everywhere else.
 I confess I wasn’t much physical help up to this point, as I was running after our four-year-old, researching how to actually do all of these projects, sourcing products, and putting the finishing touches on the kitchen design. But I DID tape, mud, sand, and paint all the new drywall! I had never done it before and found this post by Young House Love very helpful.
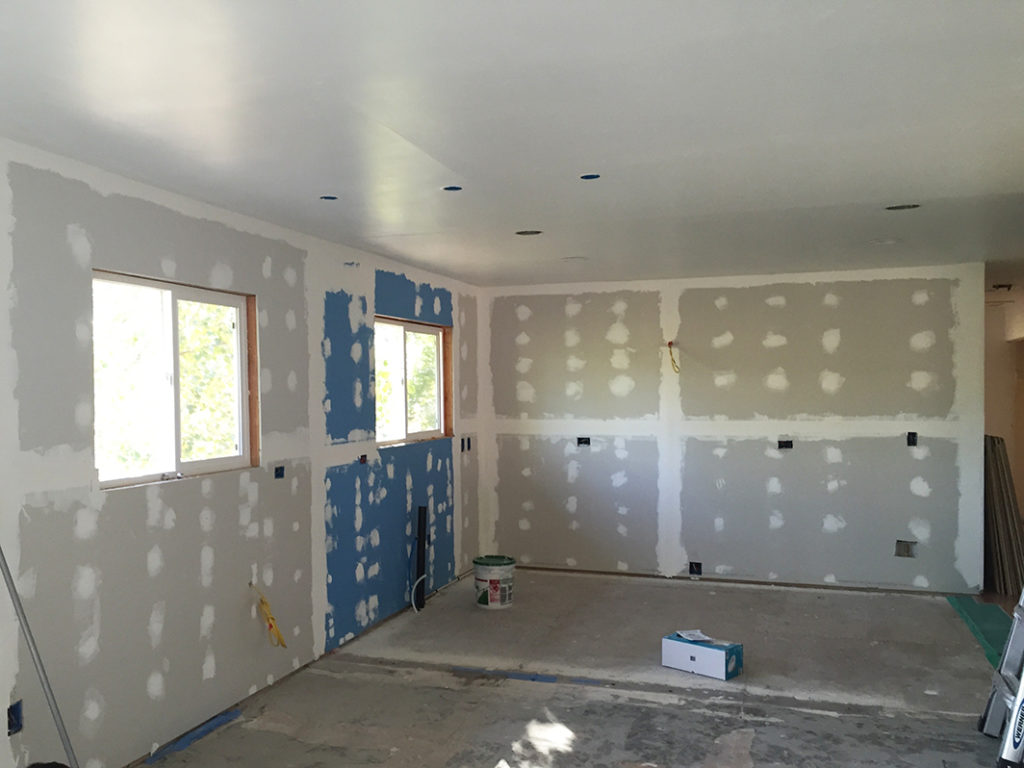 Finishing drywall is not for the impatient (aka, me). This, and painting trim, are my least favorite tasks to date.
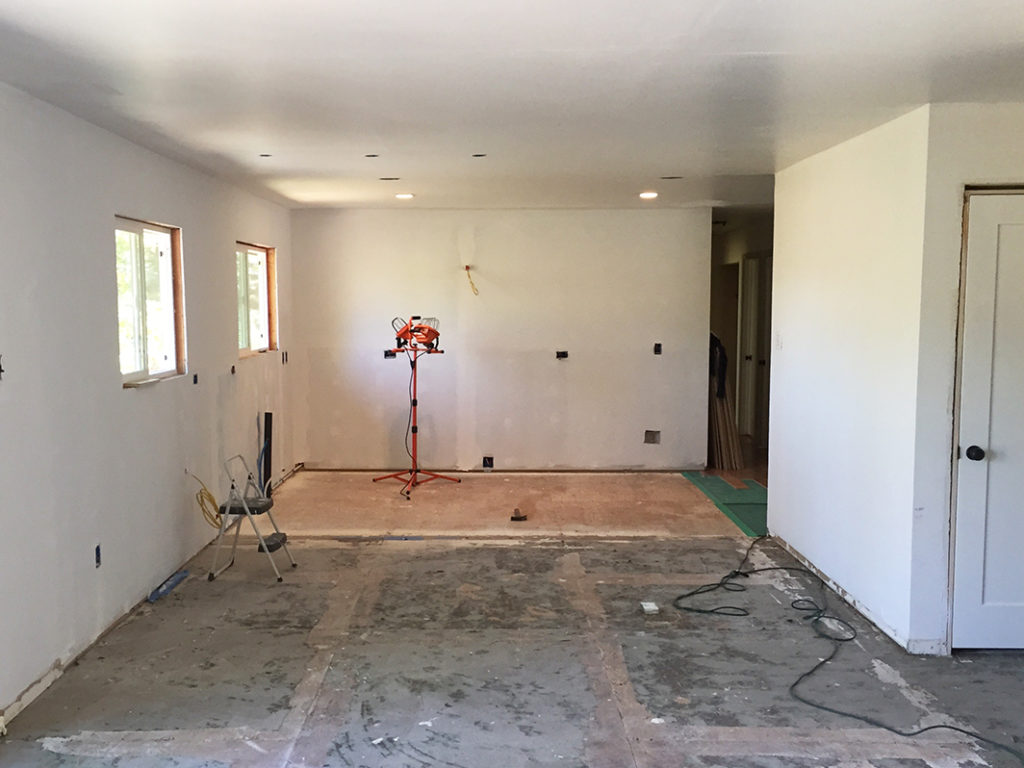 But we were so relieved to be rid of all that 1970s brown and yellow!
 If you’re going to DIY a renovation project, it helps to know and be honest about your limitations. As I mentioned, we did hire an electrical contractor as well as a plumber because those two were just way beyond our skill levels at that point. We found both by using Thumbtack, which is seriously the Universe’s gift to homeowners. It’s 100% free and you get responses and quotes almost instantly from pros in your area that want the job. Yes please! (This post is in no way sponsored by Thumbtack by the way, I just love it that much).
That being said, you can find everything on the internet and there is so much quality information out there about home projects. At the risk of sounding like a motivational poster…if you have the time to do the research and the patience to do the tasks, you can accomplish almost anything (always keeping safety in mind though!). We had ZERO experience before we started — just a stubborn determination to save some money. Although with our first go-around we’ve sacrificed quality in some areas, for us the reward of tackling a huge challenge and coming out alive on the other side (and ready for more!) is totally worth it.
How far do you go with your DIY projects? When do you draw the line and call in a pro?
Related Posts
 MIXING OLD + NEW DESIGN IN HISTORIC HOMESCohesiveness is the end goal of a well-designed home. If you live in an older house that’s been subjected to multiple remodels by previous ...
 What Does Slow Living Mean?An Interview with the Annabode Team Sometimes I wish I could return to my childhood—before the internet, cell phones, and endless channels and ...
 A Complete Guide to Sustainable Design in 2025Sustainable design aims to reduce waste, conserve resources, and encourage human and ecological health. In other words – it’s the way we ...


Popular Articles


TO DO LIST
- Read this book.
- And this one.
- Keep what you need.
- Donate what you don't.
- Design mindfully.

Rachel
| 30 August 2016Just removing the the walls makes this room look so much bigger. I can’t wait to see the finished product. Thank you for sharing the tips!
stacy
| 2 June 2017Hi! My husband and i have designed this exact layout for our kitchen. i thought it was just so cool when i saw it on Instagram and now i found your blog. i would like to know the dimensions of your kitchen. we are debating on putting an island in the center…
eMoov
| 13 June 2017You are sure to be proud of your work. This kitchen is simple but soon to look elegant. Indeed, you don’t have to be too much on your kitchen renovation project. All you need is to find the right colors and materials for it.