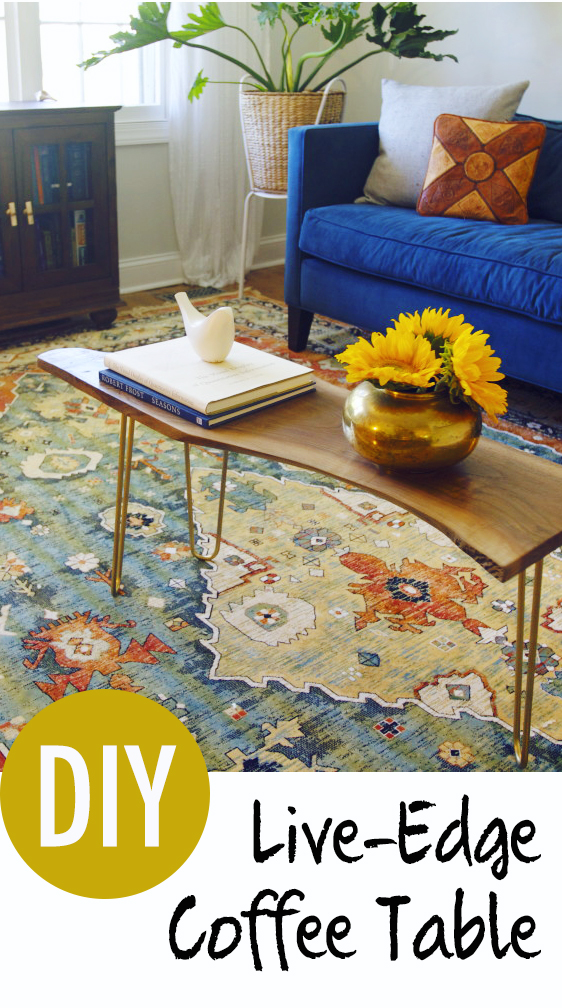
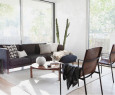
DIY Live Edge Table
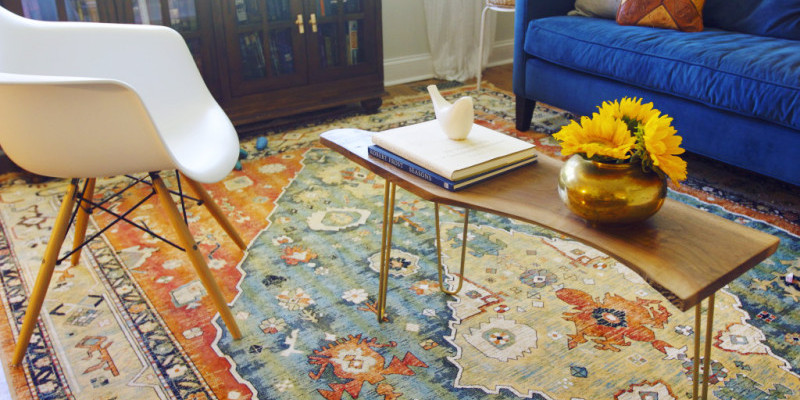
In my last post, I brought up how mid-century designer George Nakashima has inspired today’s popularity for live-edge tables. These days such tables are between $400-1200…not fun. When I discovered this, I said screw it–I’ll make my own, and I’ll show you how to do it too!
Follow the steps below to create a DIY live edge table for less than $150.
DIY Live Edge Table
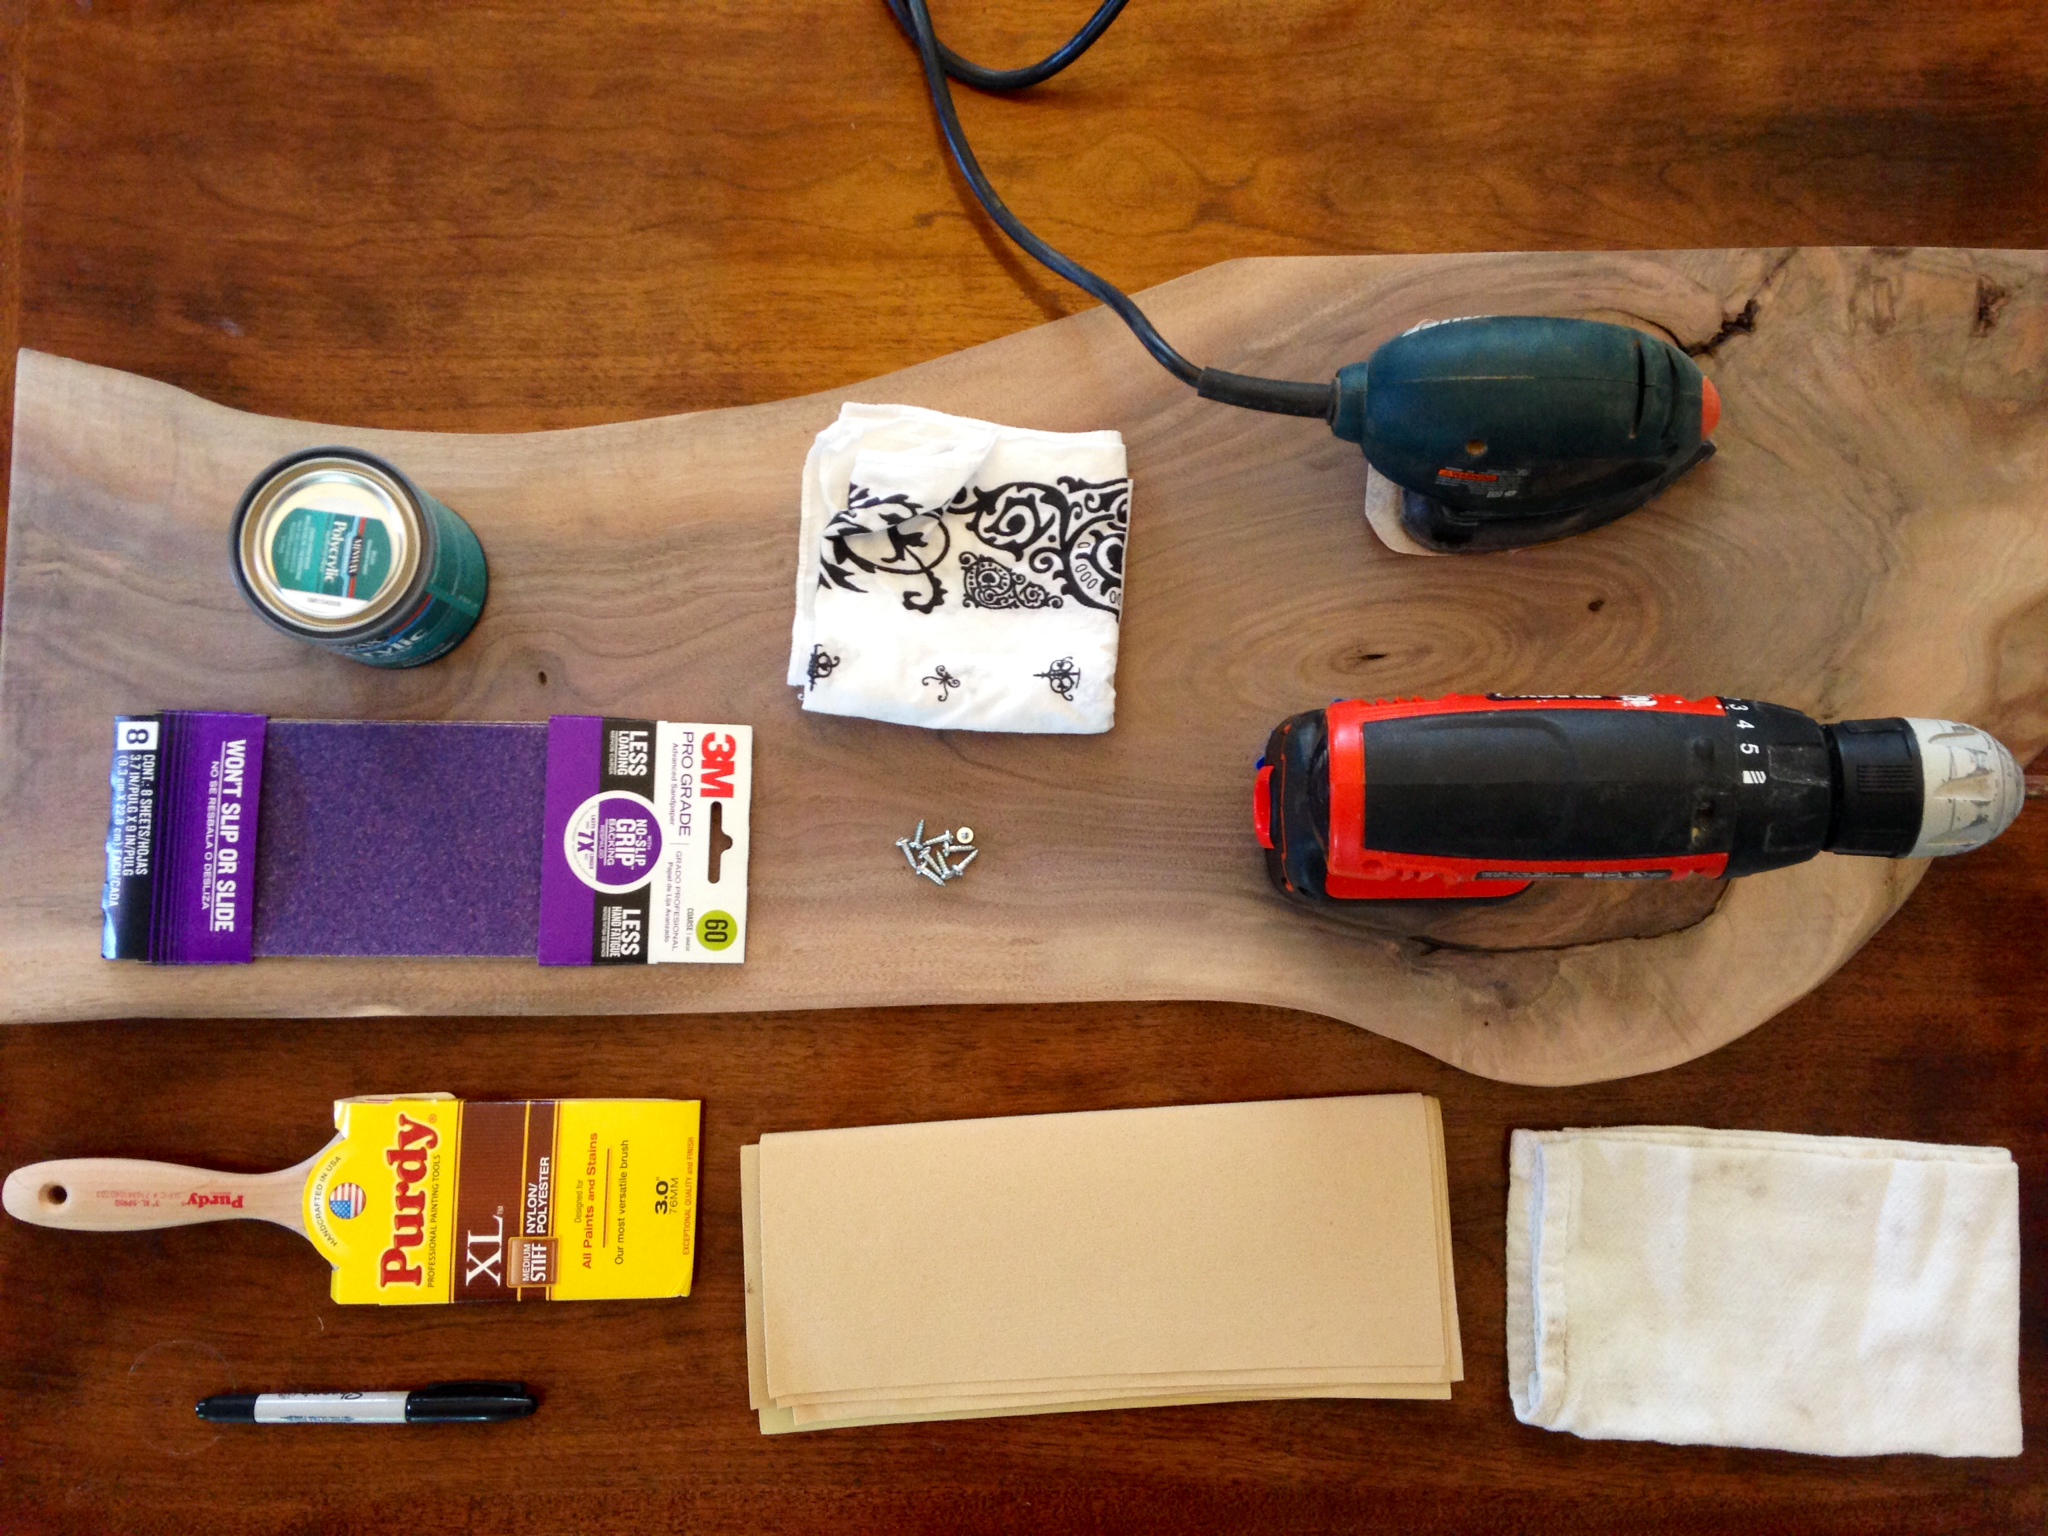
Supplies:
- 1 live-edge slab, at least 12″ wide, ($40-$80)
- Half pint Minwax Polycrylic in Satin, ($9)
- 1 high-quality synthetic brush (such as Purdy), ($12)
- Sandpaper in 60 or 80, 150, & 220, ($3-10)
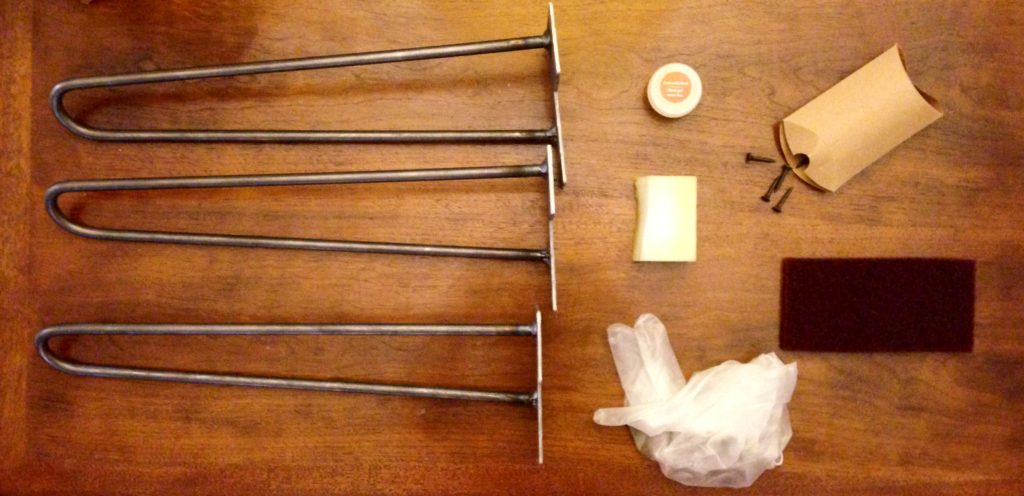
- 3 16-inch Hairpin legs, ($49)
- These legs come with the appropriate screws (1/2-inch wood screws), latex gloves, sealing wax, steel wool, and a sponge
- Rags
- A sharpie
- Large piece of cardboard
- Optional:
- Metallic gold spray paint, $3.76
- Clear enamel spray paint, $3.76
- 9 washers for the wood screws
Equipment:
- Electric sander
- Drill
- A bandana/mask and goggles
- A can-do attitude!
First, find a good place to do your project that is ventilated and dry (outside please–don’t sand in your house!). Put on the mask or tie the bandana over your mouth, and put on the goggles.(Confession: I wore my glasses, and I survived. But put on some goggles as a precaution).
Start by sanding your entire board with the 60 or 80 sandpaper and the electric sander. I used 80 on the flat surface of my board, and used the 60 for the nooks and crevices on the edges.
Note: DO NOT DO THIS ALL BY HAND, OR YOU WILL HATE ME FOREVER. If you don’t have an electric sander and you really like DIY projects, consider getting one on Craigslist. Just don’t get the one I have, it sucks.
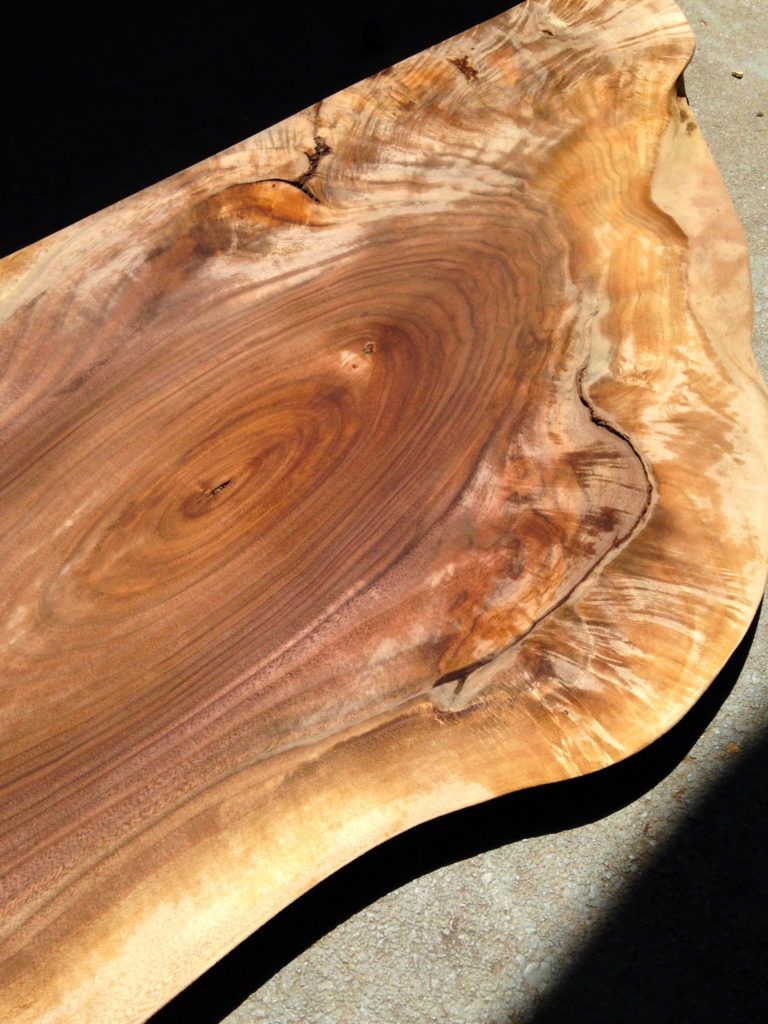
If there is a thick area of bark, it may help to quickly chisel it off with a hammer and nail. As the bark is soft, it comes off quite easily–or you can choose to leave it on. Both ways look great!
After you have finished sanding the whole board, wipe it clean with a damp rag.
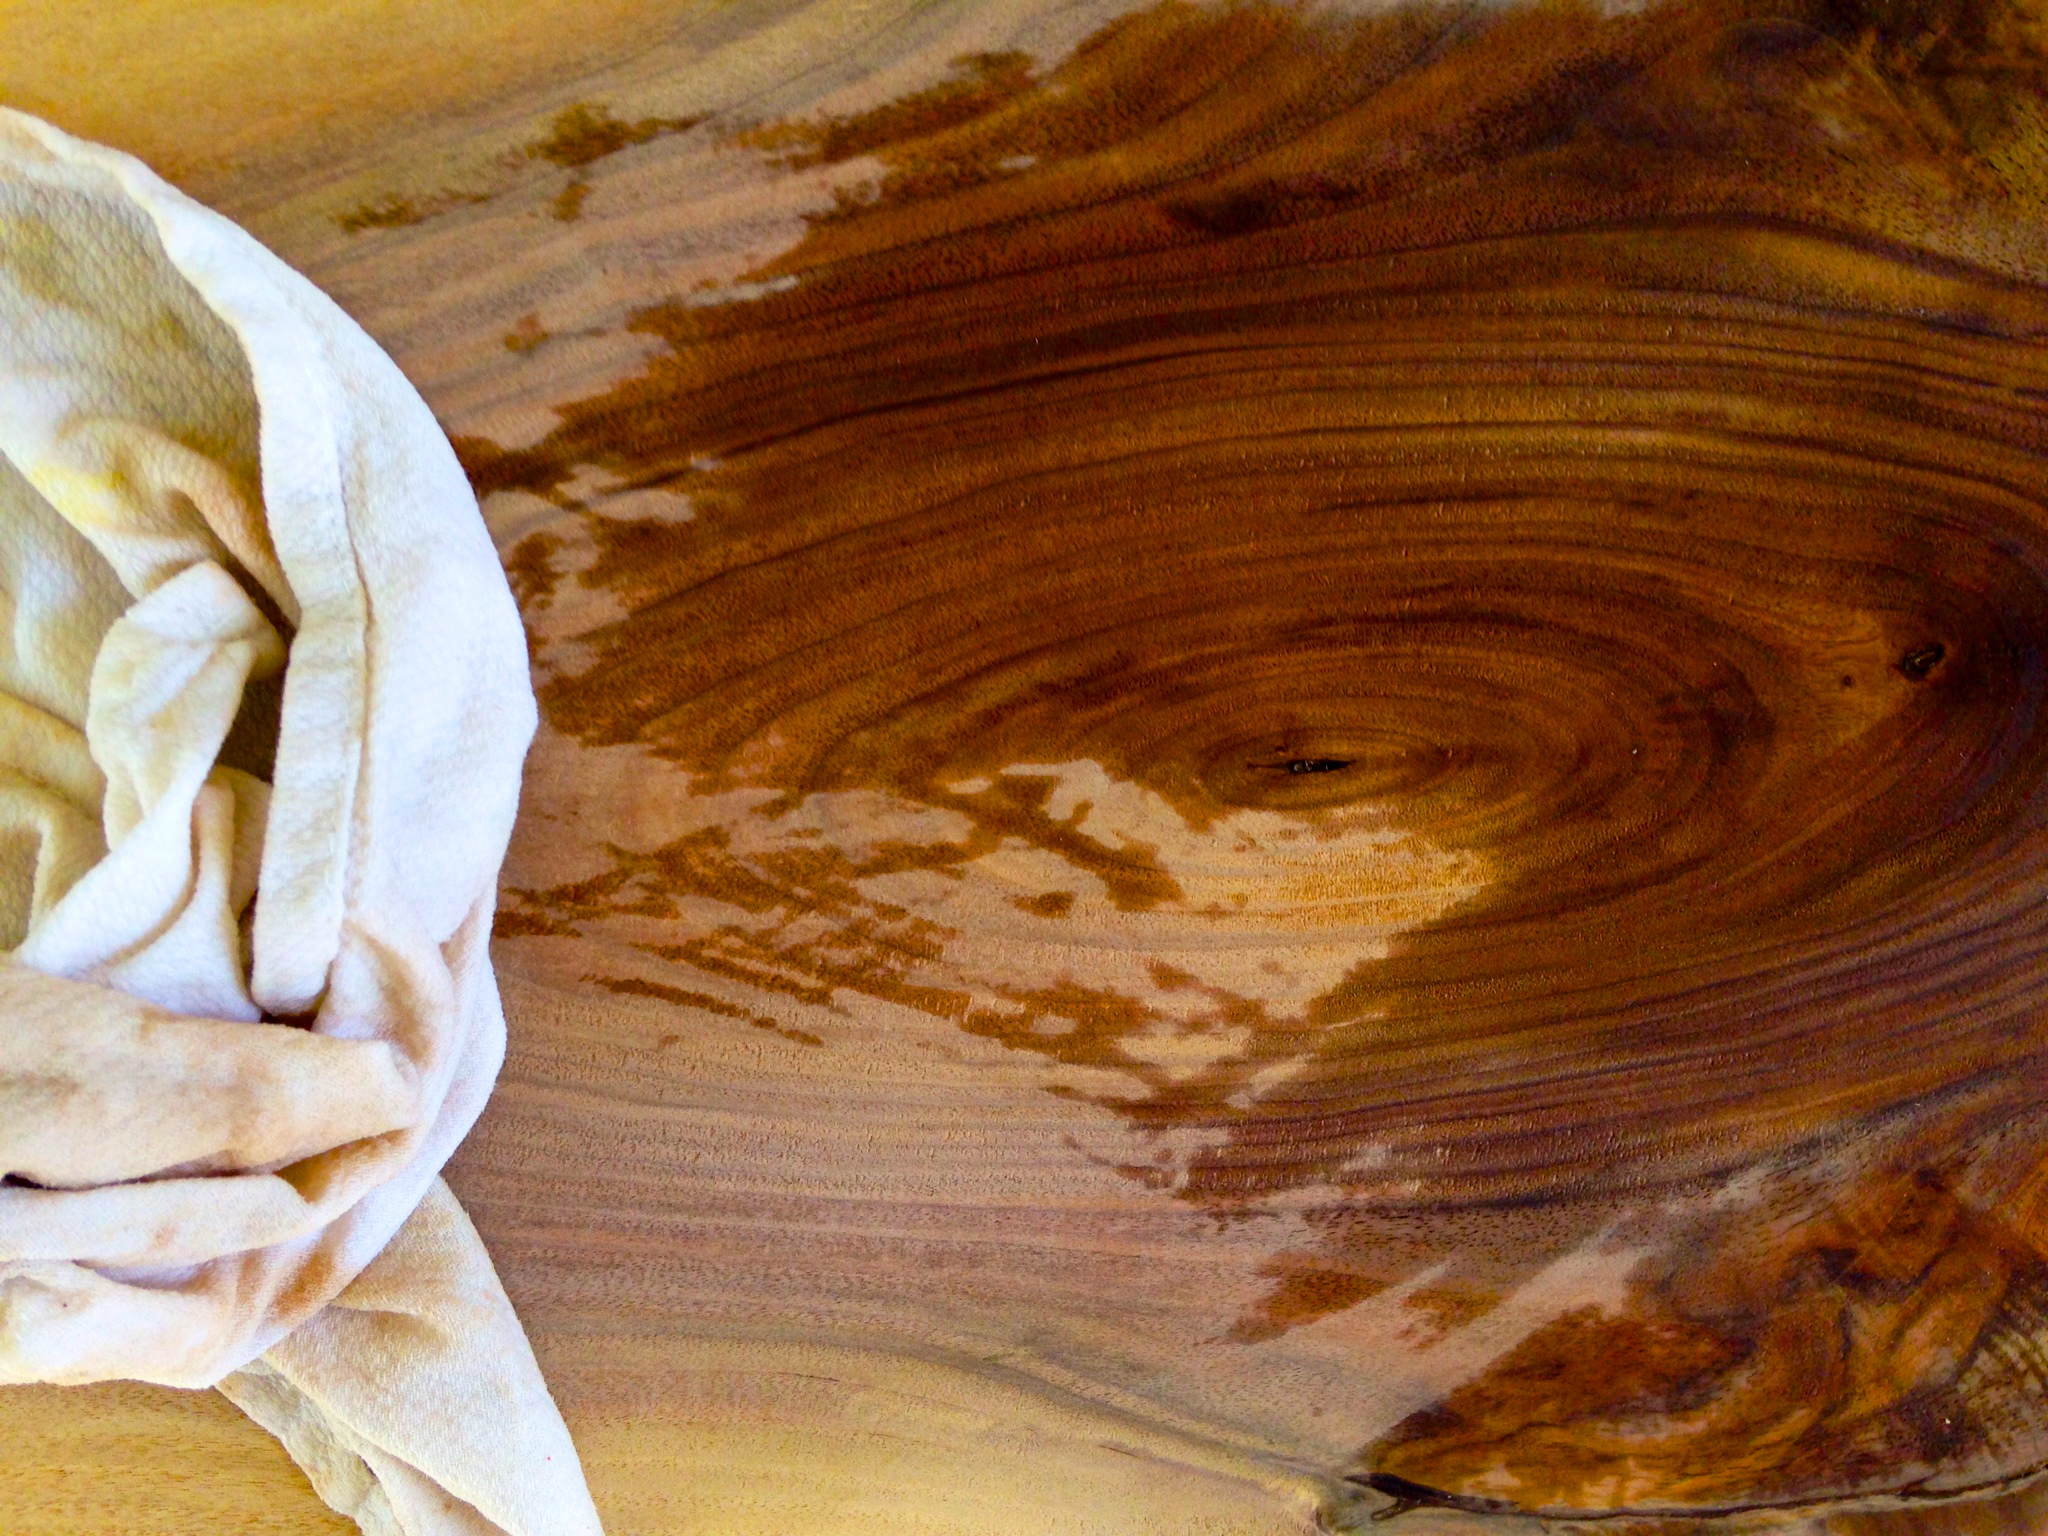
Then sand it again with the 150. Wipe again, let dry, and sand with the 220. Wipe again, and let dry. The board should look pretty awesome by now, and feel baby-smooth.
After the board is completely clean and dry, set up your area so that you can apply the sealer. If you’re working outside, be conscious of dust particles or other items that could settle into the finish.
Note: READ THE DIRECTIONS ON THE BACK OF THE CAN AND FOLLOW ACCORDINGLY.
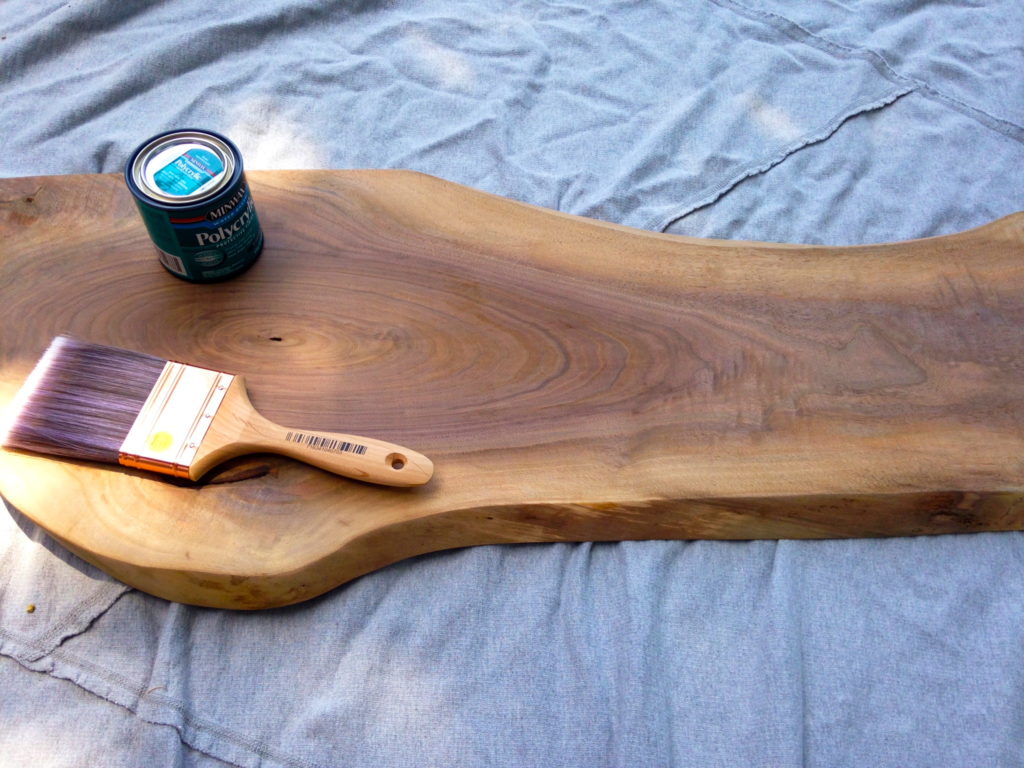
I used polycrylic for this project. There is a lot of debate over which is better, as many people find that polycrylic can make a bubbly finish. However, polycrylic contains significantly lower levels of VOCs than polyurethane, is low odor, and can be cleaned up with soap and water. Any synthetic finish you put on a piece of wood is going to off-gass continuously, so I chose my family’s health over the risk of an imperfect finish. Nakashima embraced his pieces’ imperfections, and so can I! And anyways it came out perfectly, no bubbles.
Lie your board with the bottom side facing up (that way if you mess up, you get a second chance on the top). Get a small amount of sealer on your brush and start making long, light strokes on your slab. Make sure all your strokes are in the direction of the grain, and your final strokes are one long sweep from end to end. Keep the coat very thin, and don’t forget the edges. I immediately flipped my slab over, leant it against my house, and sealed the top. It didn’t make a mark, but if it did, who cares? No one’s going to see the bottom.
Wash your brush with warm soapy water, and let the slab dry for 2 hours. Afterwards, sand with the 220 grit sandpaper, wipe with a damp cloth, and let dry. Apply another coat of sealer in the same manner as before (make sure your brush is dry, too). Let dry another two hours (and wash that brush again!).
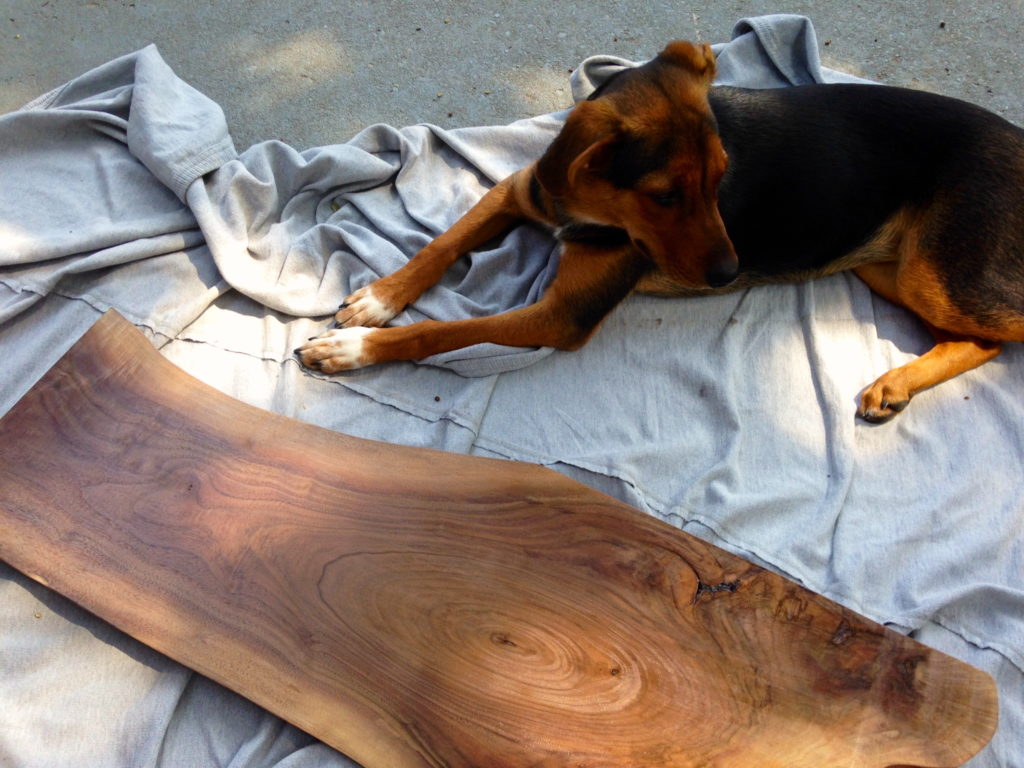
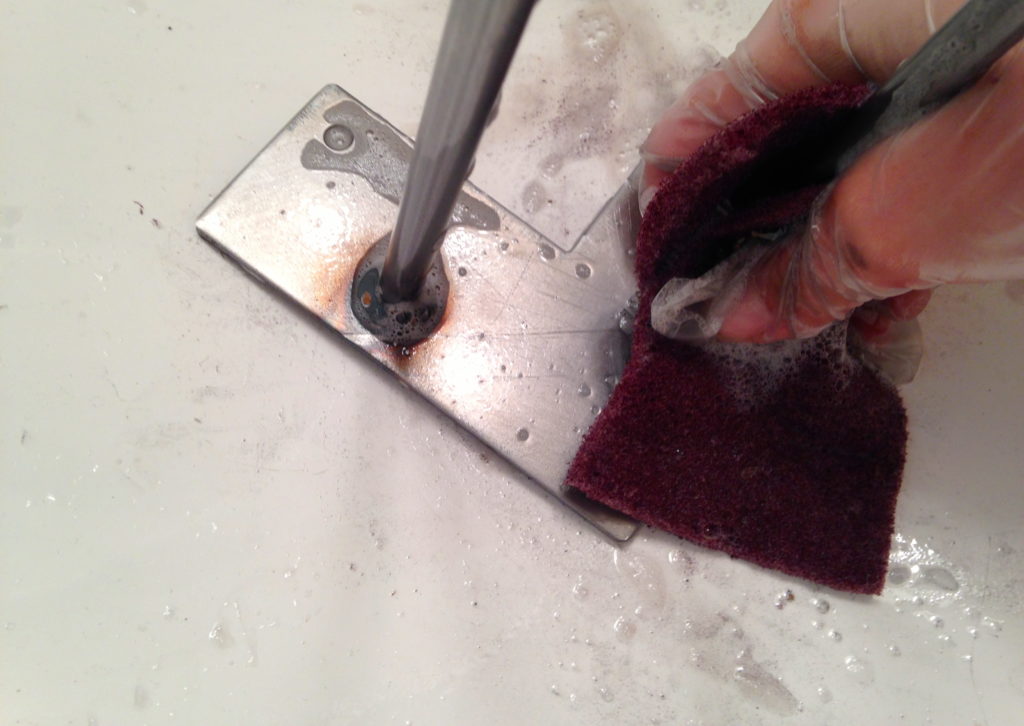
While you’re waiting for the table to dry, clean the hairpin legs with soap, water, and the steel wool. Wipe with a paper towel and lay them down on a piece of cardboard outside. Using the sponge provided, apply the sealing wax to all surfaces and then wipe clean.
If you’d like the legs to look like brass, spray them with the gold spray paint and let dry. Wait 15 minutes and apply another coat. Again, READ THE DIRECTIONS on the spray paint).
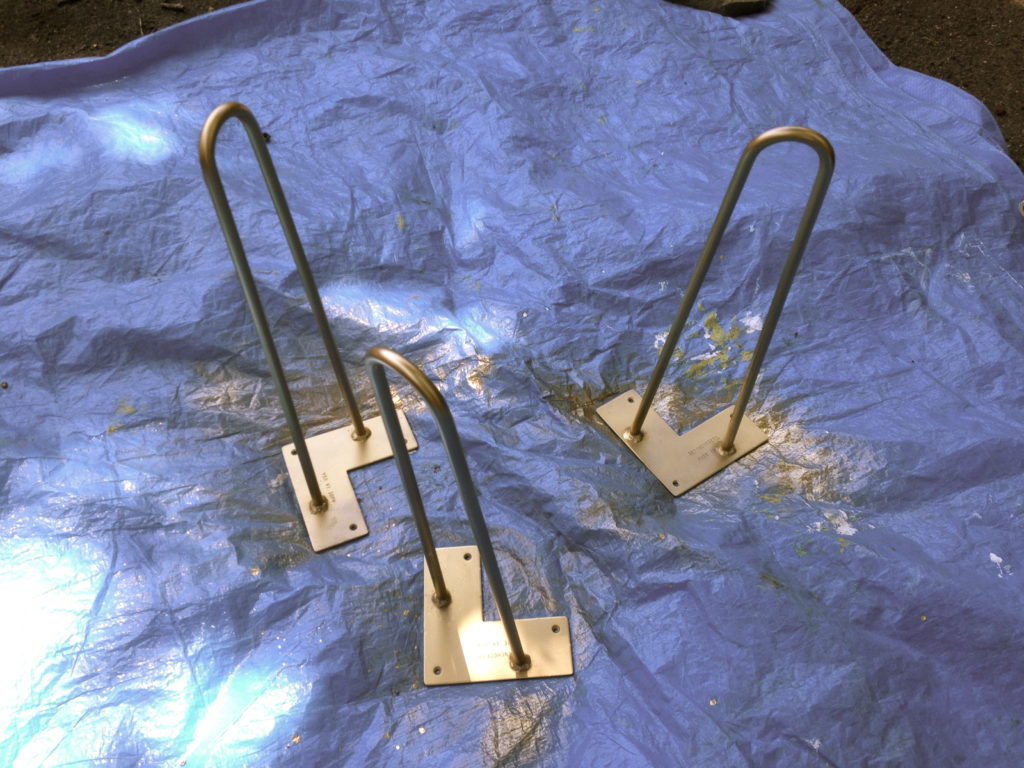
Spray the hairpin legs with the clear enamel and let dry for at least 30 minutes. If you prefer their natural look, skip the spray paint and move on to the next step.
Now flip your board over so that the top is face-down on a soft surface. Position the hairpin legs according to how you’d like them to look. I chose to keep the legs at 90 degree angles and to keep the two that were on the same side in line with each other, but it’s really up to you. Make sure there is at least 1/2″ between each leg and the edge. Mark the screw holes with a sharpie, and remove the legs.
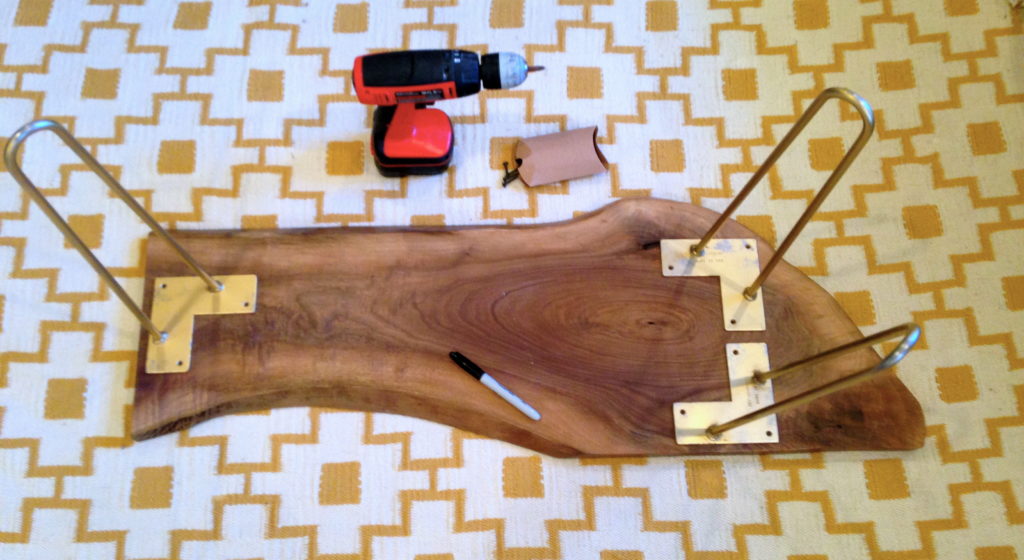
Using a 7/64 bit, drill a hole over each mark. Switch to a phillips bit, reposition the legs, and drill the screws in. Now turn the table right side up, and admire your handiwork :).
Note: I used washers on my screws, as I was afraid of drilling too far through the slab
Voìla! You did it! You made a hairpin leg table! I knew you could. Pat yourself on the back, and enjoy your general awesomeness :).
Related Posts
 MIXING OLD + NEW DESIGN IN HISTORIC HOMESCohesiveness is the end goal of a well-designed home. If you live in an older house that’s been subjected to multiple remodels by previous ...
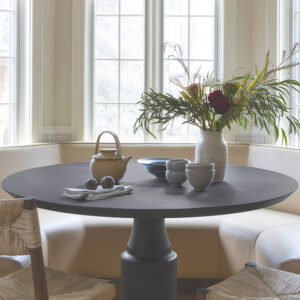 What Does Slow Living Mean?An Interview with the Annabode Team Sometimes I wish I could return to my childhood—before the internet, cell phones, and endless channels and ...
 A Complete Guide to Sustainable Design in 2025Sustainable design aims to reduce waste, conserve resources, and encourage human and ecological health. In other words – it’s the way we ...
Popular Articles

TO DO LIST
- Read this book.
- And this one.
- Keep what you need.
- Donate what you don't.
- Design mindfully.

ljbn
| 6 July 2014I’ve always wanted one of these tables! I can’t wait to try my hand at this project, thanks so much!
Annabode.
| 7 July 2014You’re very welcome! Let me know how it goes 🙂
thesunshinewindow
| 24 July 2014The table looks so chic! Now I have to look for an excuse to make it 🙂
Annabode.
| 24 July 2014Thank you! That’s how I feel about every DIY I see–wish I had a bigger house! The great thing about this project though is that you can adapt it to anything–tables, stools, side tables, benches. You could even make a small one as a gift.
Sara
| 12 October 2014How did you find the piece of live edge?
annabode
| 12 October 2014Hi Sara! I purchased it on ebay. If you click on the link in the ‘Supplies’ list, it will take you to the seller. The company just started their own website as well: https://whitecreekcraftlumber.com.
Andrea
| 9 February 2015Hi Anna,
Thanks for linking our website for live edge lumber. You’ll find even more of our products on http://www.whitecreekcraftlumber.com. Great live edge slabs for tables, stools, benches and more.
Best,
White Creek Craft Lumber Team
annabode
| 19 February 2015Thanks for sharing the link! I’ll definitely be using you guys again in the future!
Jessika
| 21 May 2015I’m going to be trying this in a few weeks. I’m a little scared to screw up, but hopefully it turns out.
annabode
| 2 June 2015Good luck Jessika! Snap a pic, I’d love to see! 🙂
Betty Barrett
| 9 March 2016Thanks so much for sharing this project!
Veronica
| 30 March 2016Can you please tell me where you bought your rug? I love it! I’m scouring the interNet for it and having No lucK 🙁 What style is it? Thanks!!
annabode
| 30 March 2016Hi Veronica, here is the link (it’s an affiliate). 🙂
Kati
| 14 August 2016Hey! Almost done with our table and it looks great. Thanks for the very helpful instructions. On a side nOte, where did you get your rug? We love it!
Margarita
| 30 November 2016Thank you so much!!! I`m so excited to make it and was terrified about prices for ready ones!
Jena
| 9 November 2017Thank you so much for this article. My husband & I sell Live Edge Lumber for a living. So we DEFINITELy support Do-It-Yourself projects at a cheaper price. We advertise mainly on the Grand Rapids, michigan CRAIGSLISt for local pick-up, we found that shipping just cost too much for our big slabs, however now you got me thinking we might be able to ship smaller stuff. thanks again