DIY Quickie: 5-minute Tassel Necklace


About a week ago while I was visiting my family in New Hampshire, I published a post about how to make a modern wall banner. It was a really fun project, but I was left with a good amount of leather cord. Although my three-year-old enjoyed using it as a leash for his stuffed animals, I really wanted to use it in another DIY project. Waste not want not, am I right?
I’ve been loving tassels lately, especially on jewelry, so I thought now would be the perfect time to try my hand at it. And it was surprisingly quick, cheap, and easy (my three favorite words when it comes to DIY)!
Read on to learn how to make a fabulous tassel necklace in less than five minutes!
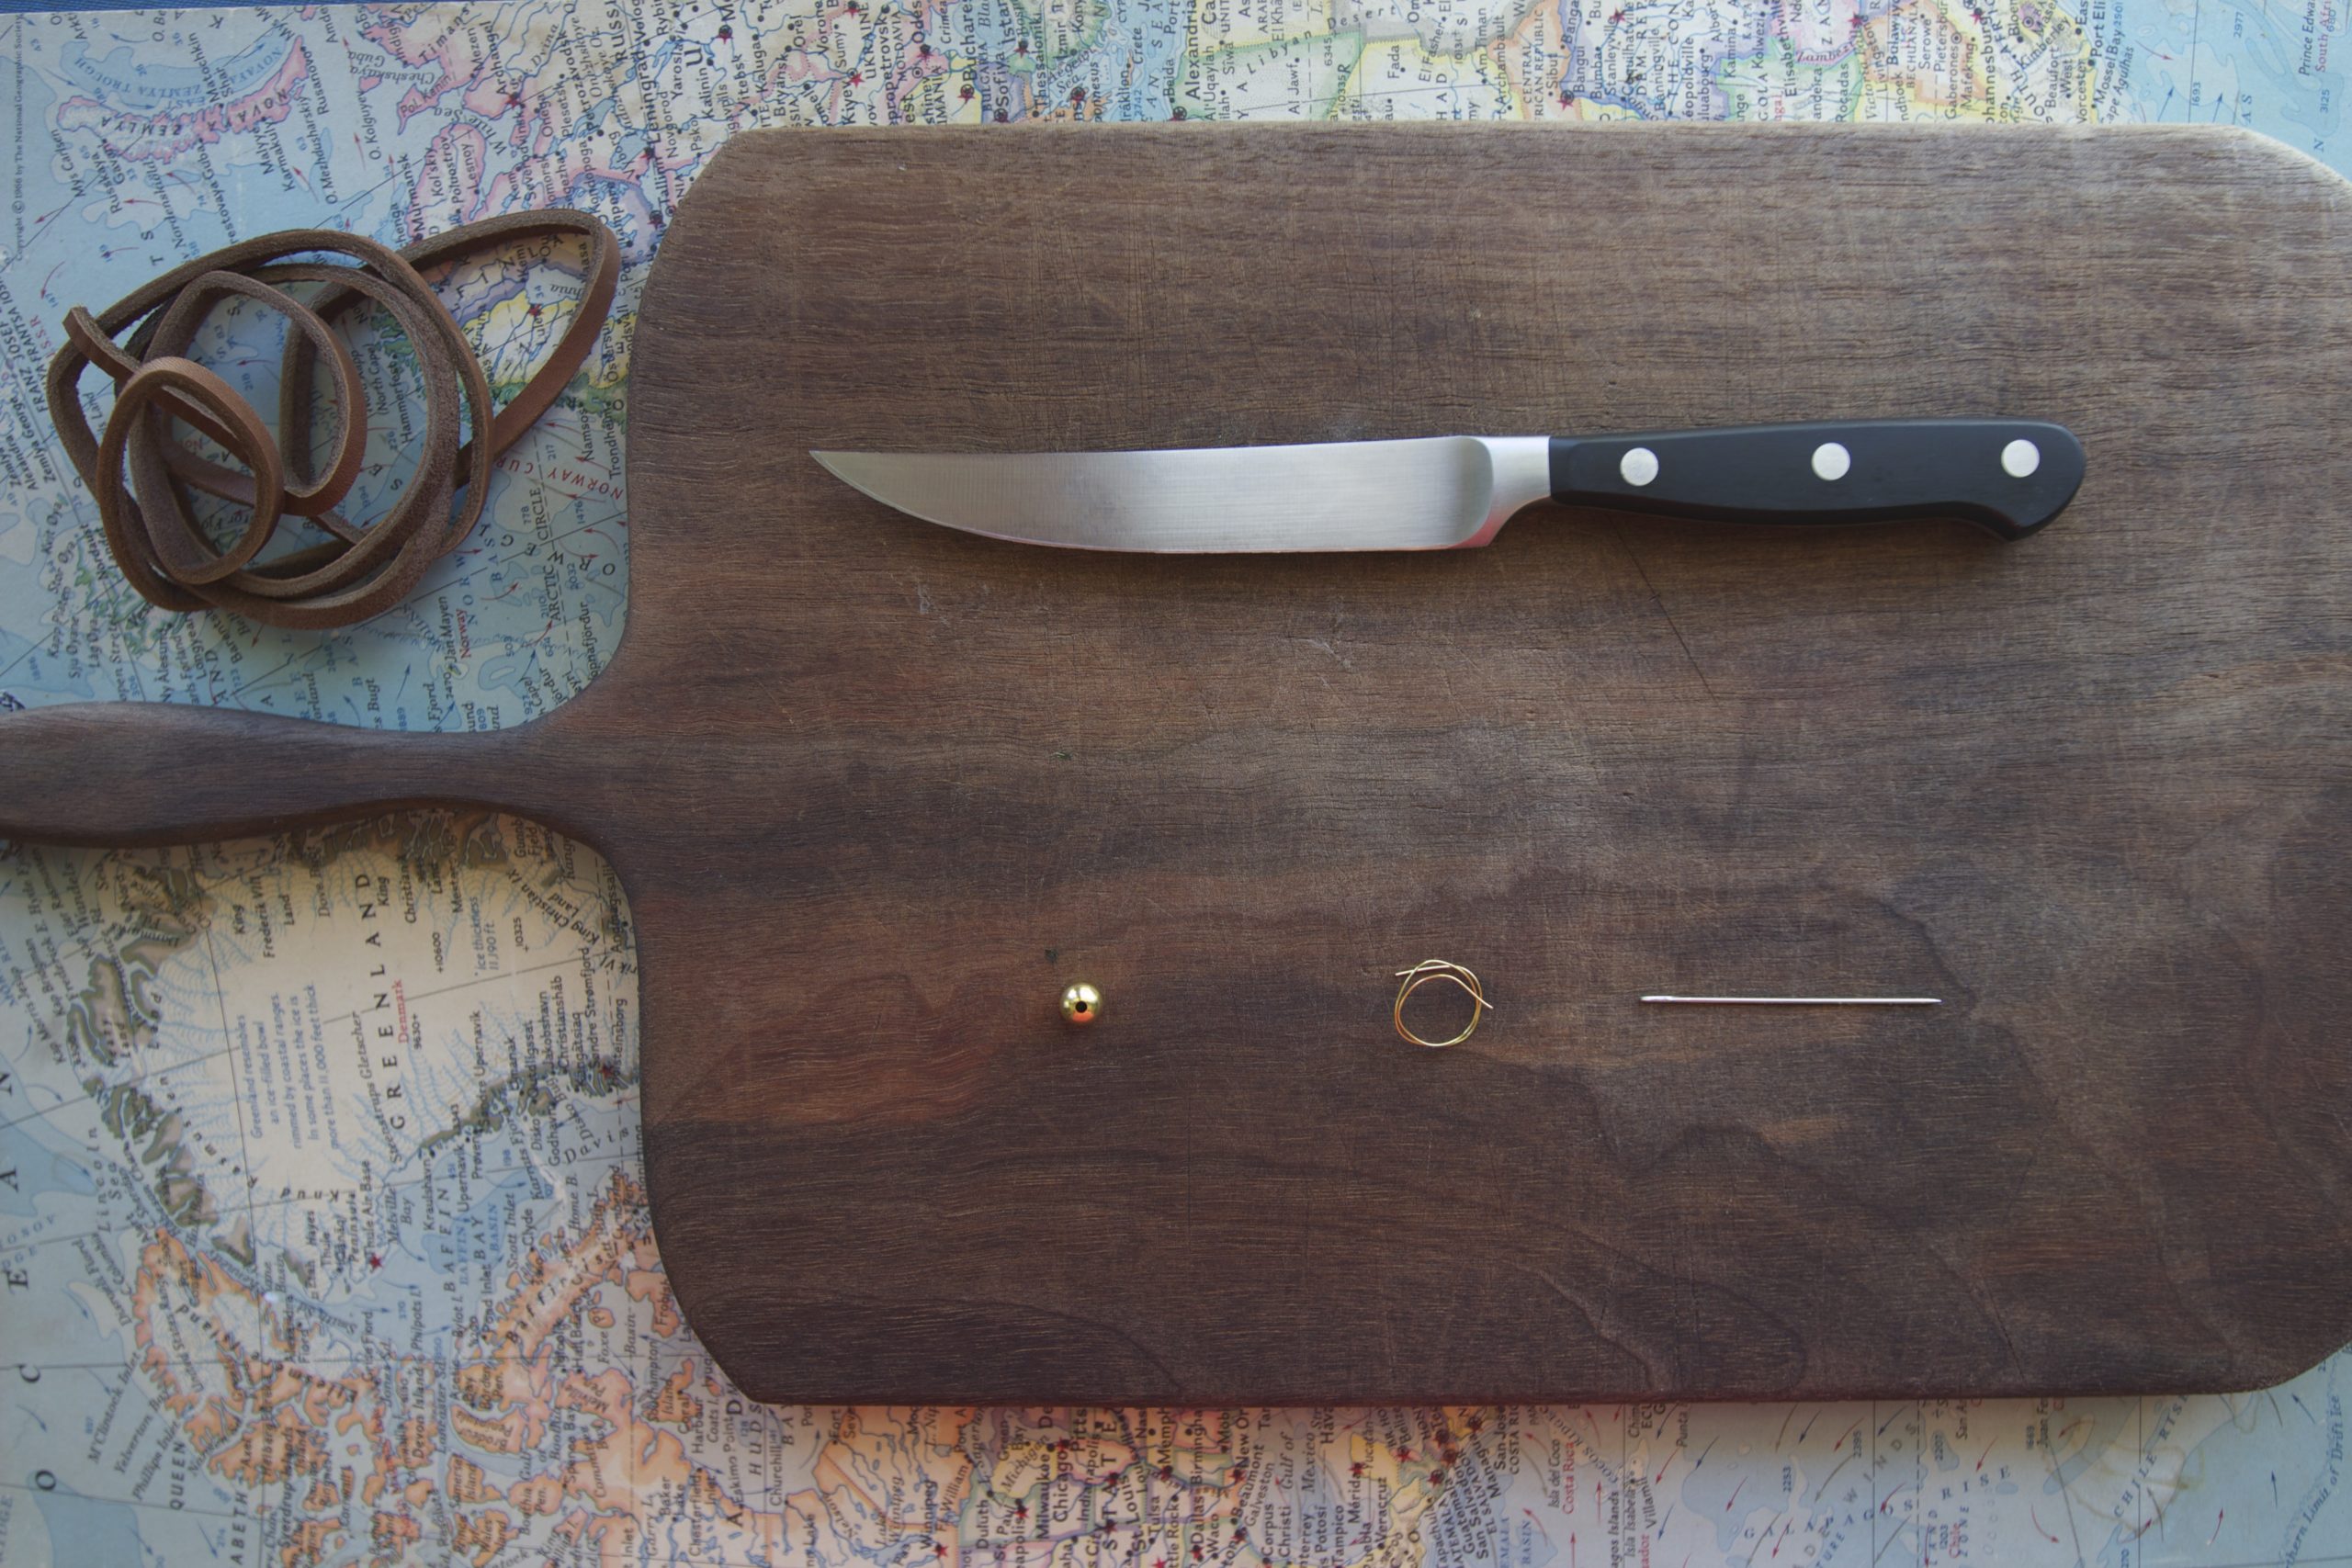
Supplies:
- Leather cord
- Brass wire, 24 gauge
- A gold chain (I repurposed one I already owned)
- 1 bead end cap, gold or brass
- I found these at The Potomac Bead Company, but you can use almost any kind of bead end cap as long as it has a hole on the top. Mine was $0.50.
Equipment:
- Cutting board
- Knife
- Scissors
- Large needle
- Optional:
- Needle-nose pliers
- Something thin and cylindrical (I used a skewer)
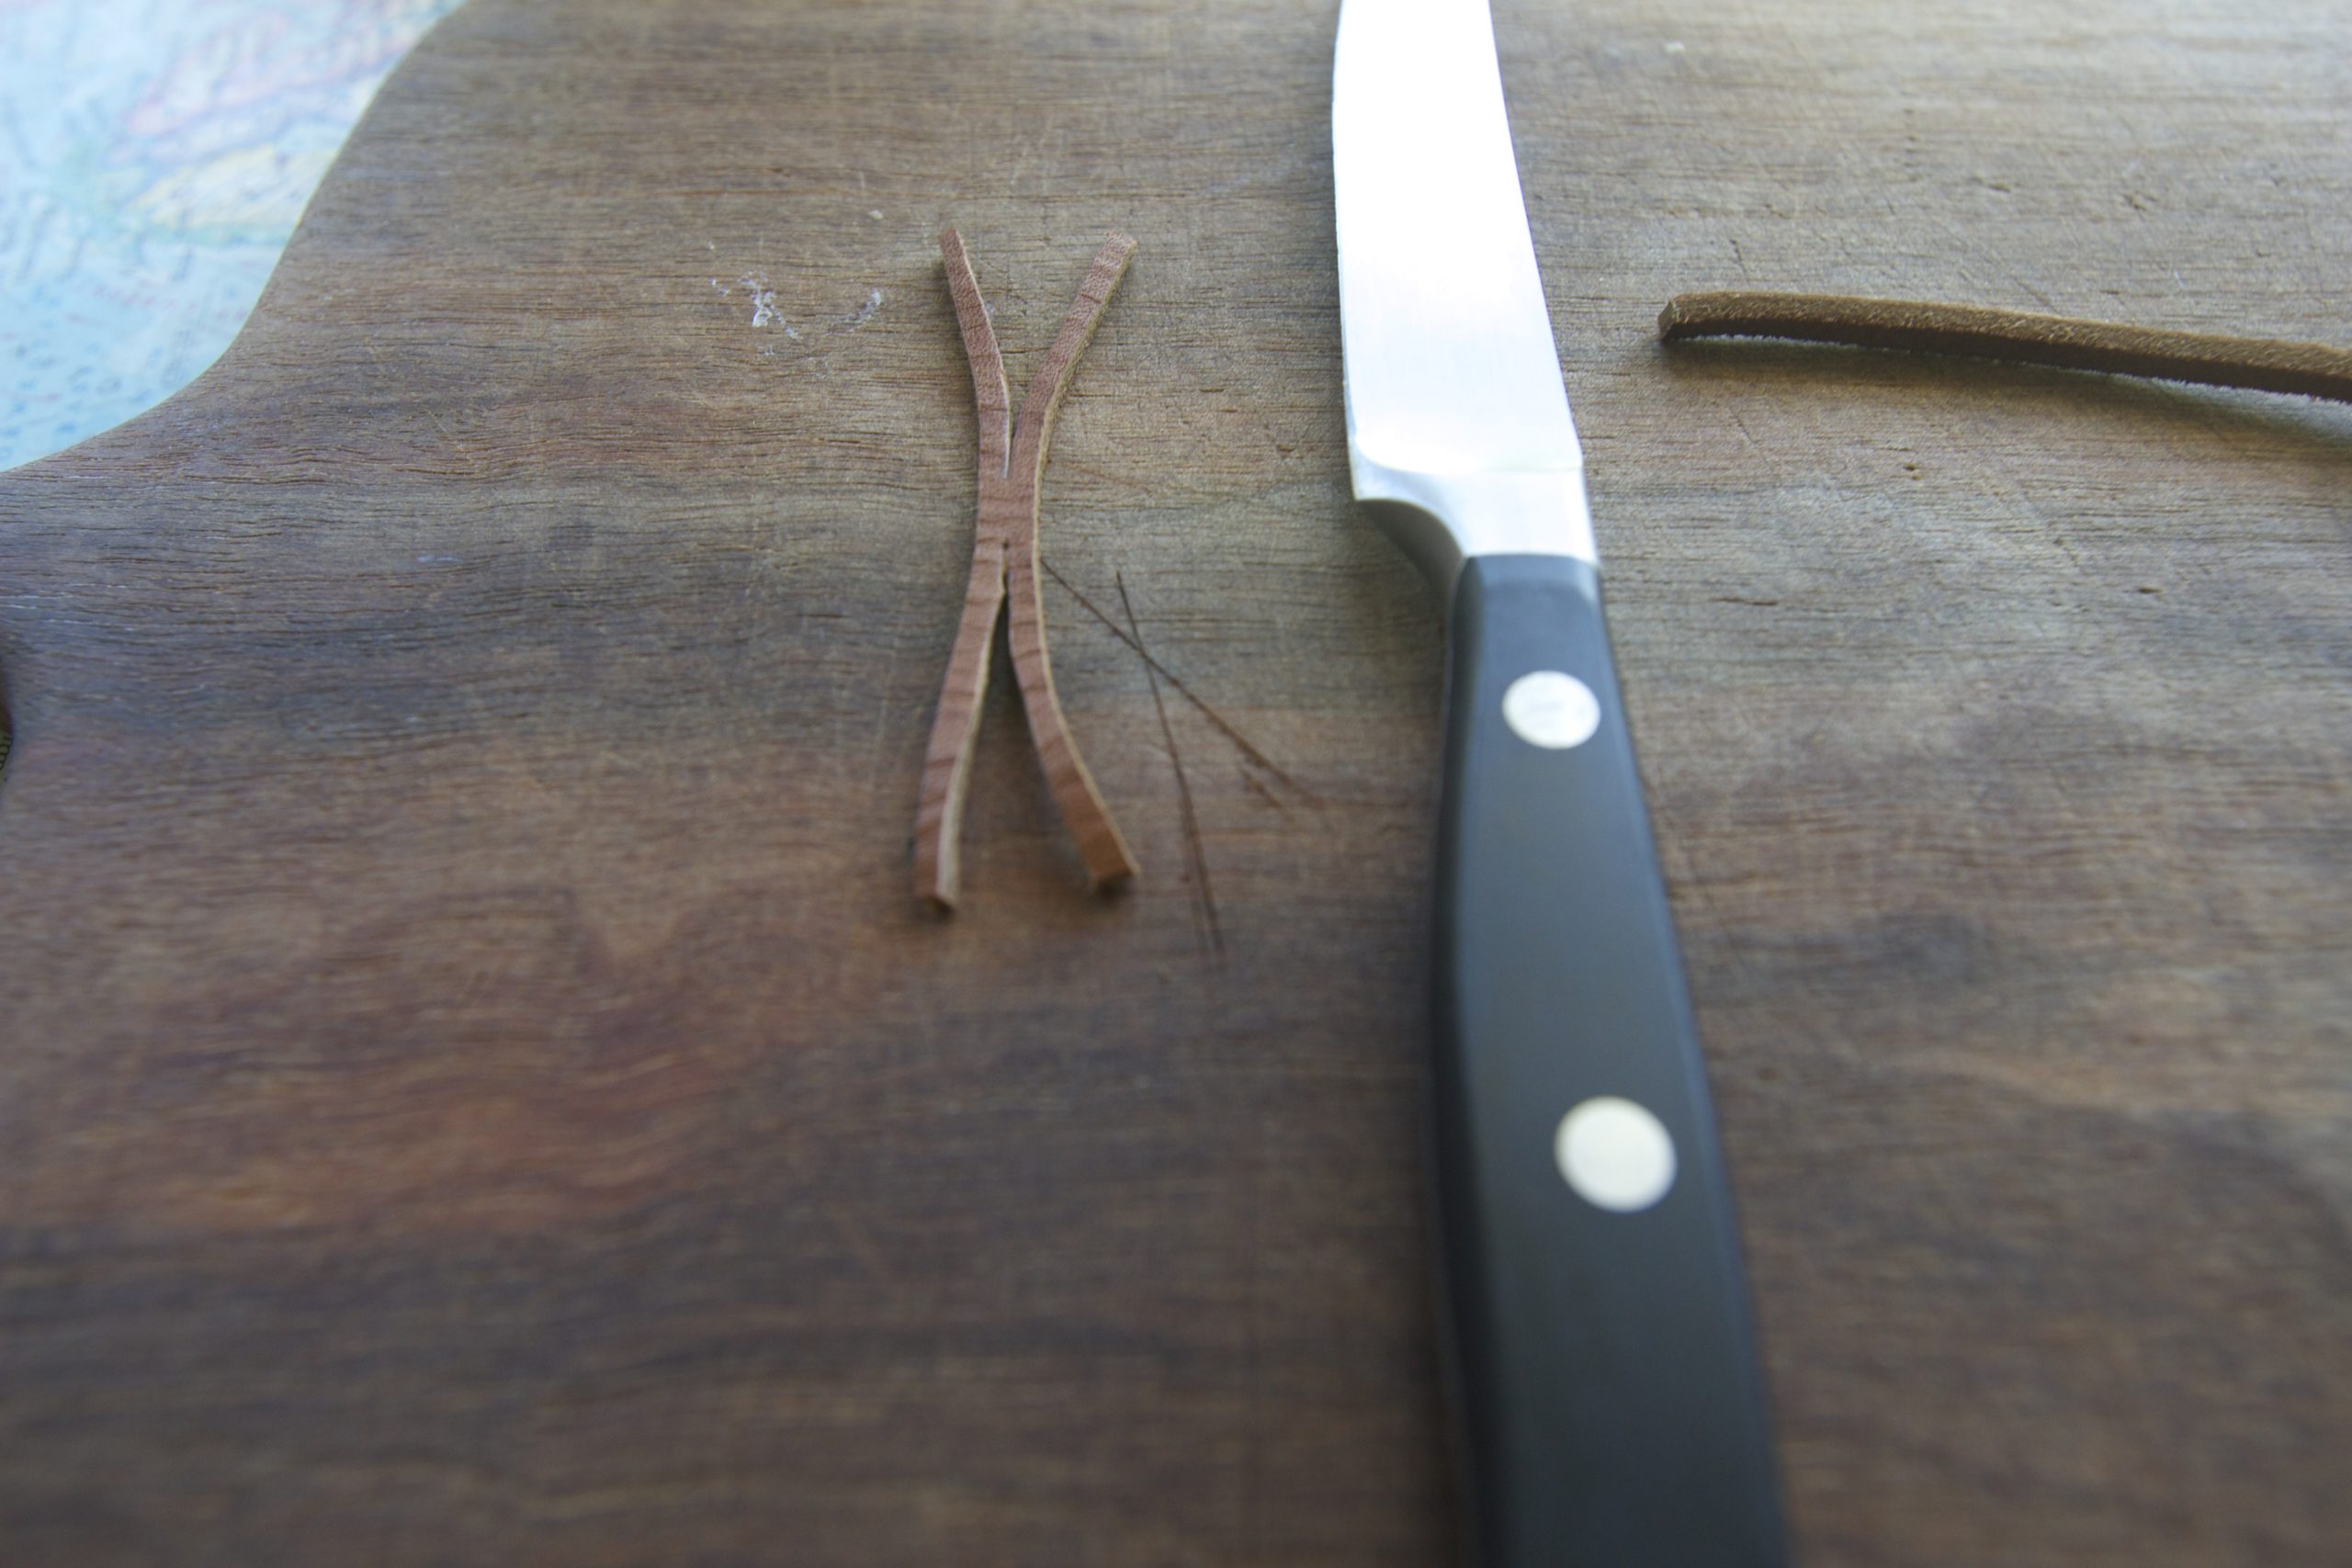
First, lay your leather cord on the cutting board. Cut a piece about 3″ in length with your knife. Then, starting just below the center, cut a line down the middle of the cord–splitting it in two. Repeat on the top, again avoiding the center. The cord should form a wonky letter “X”.
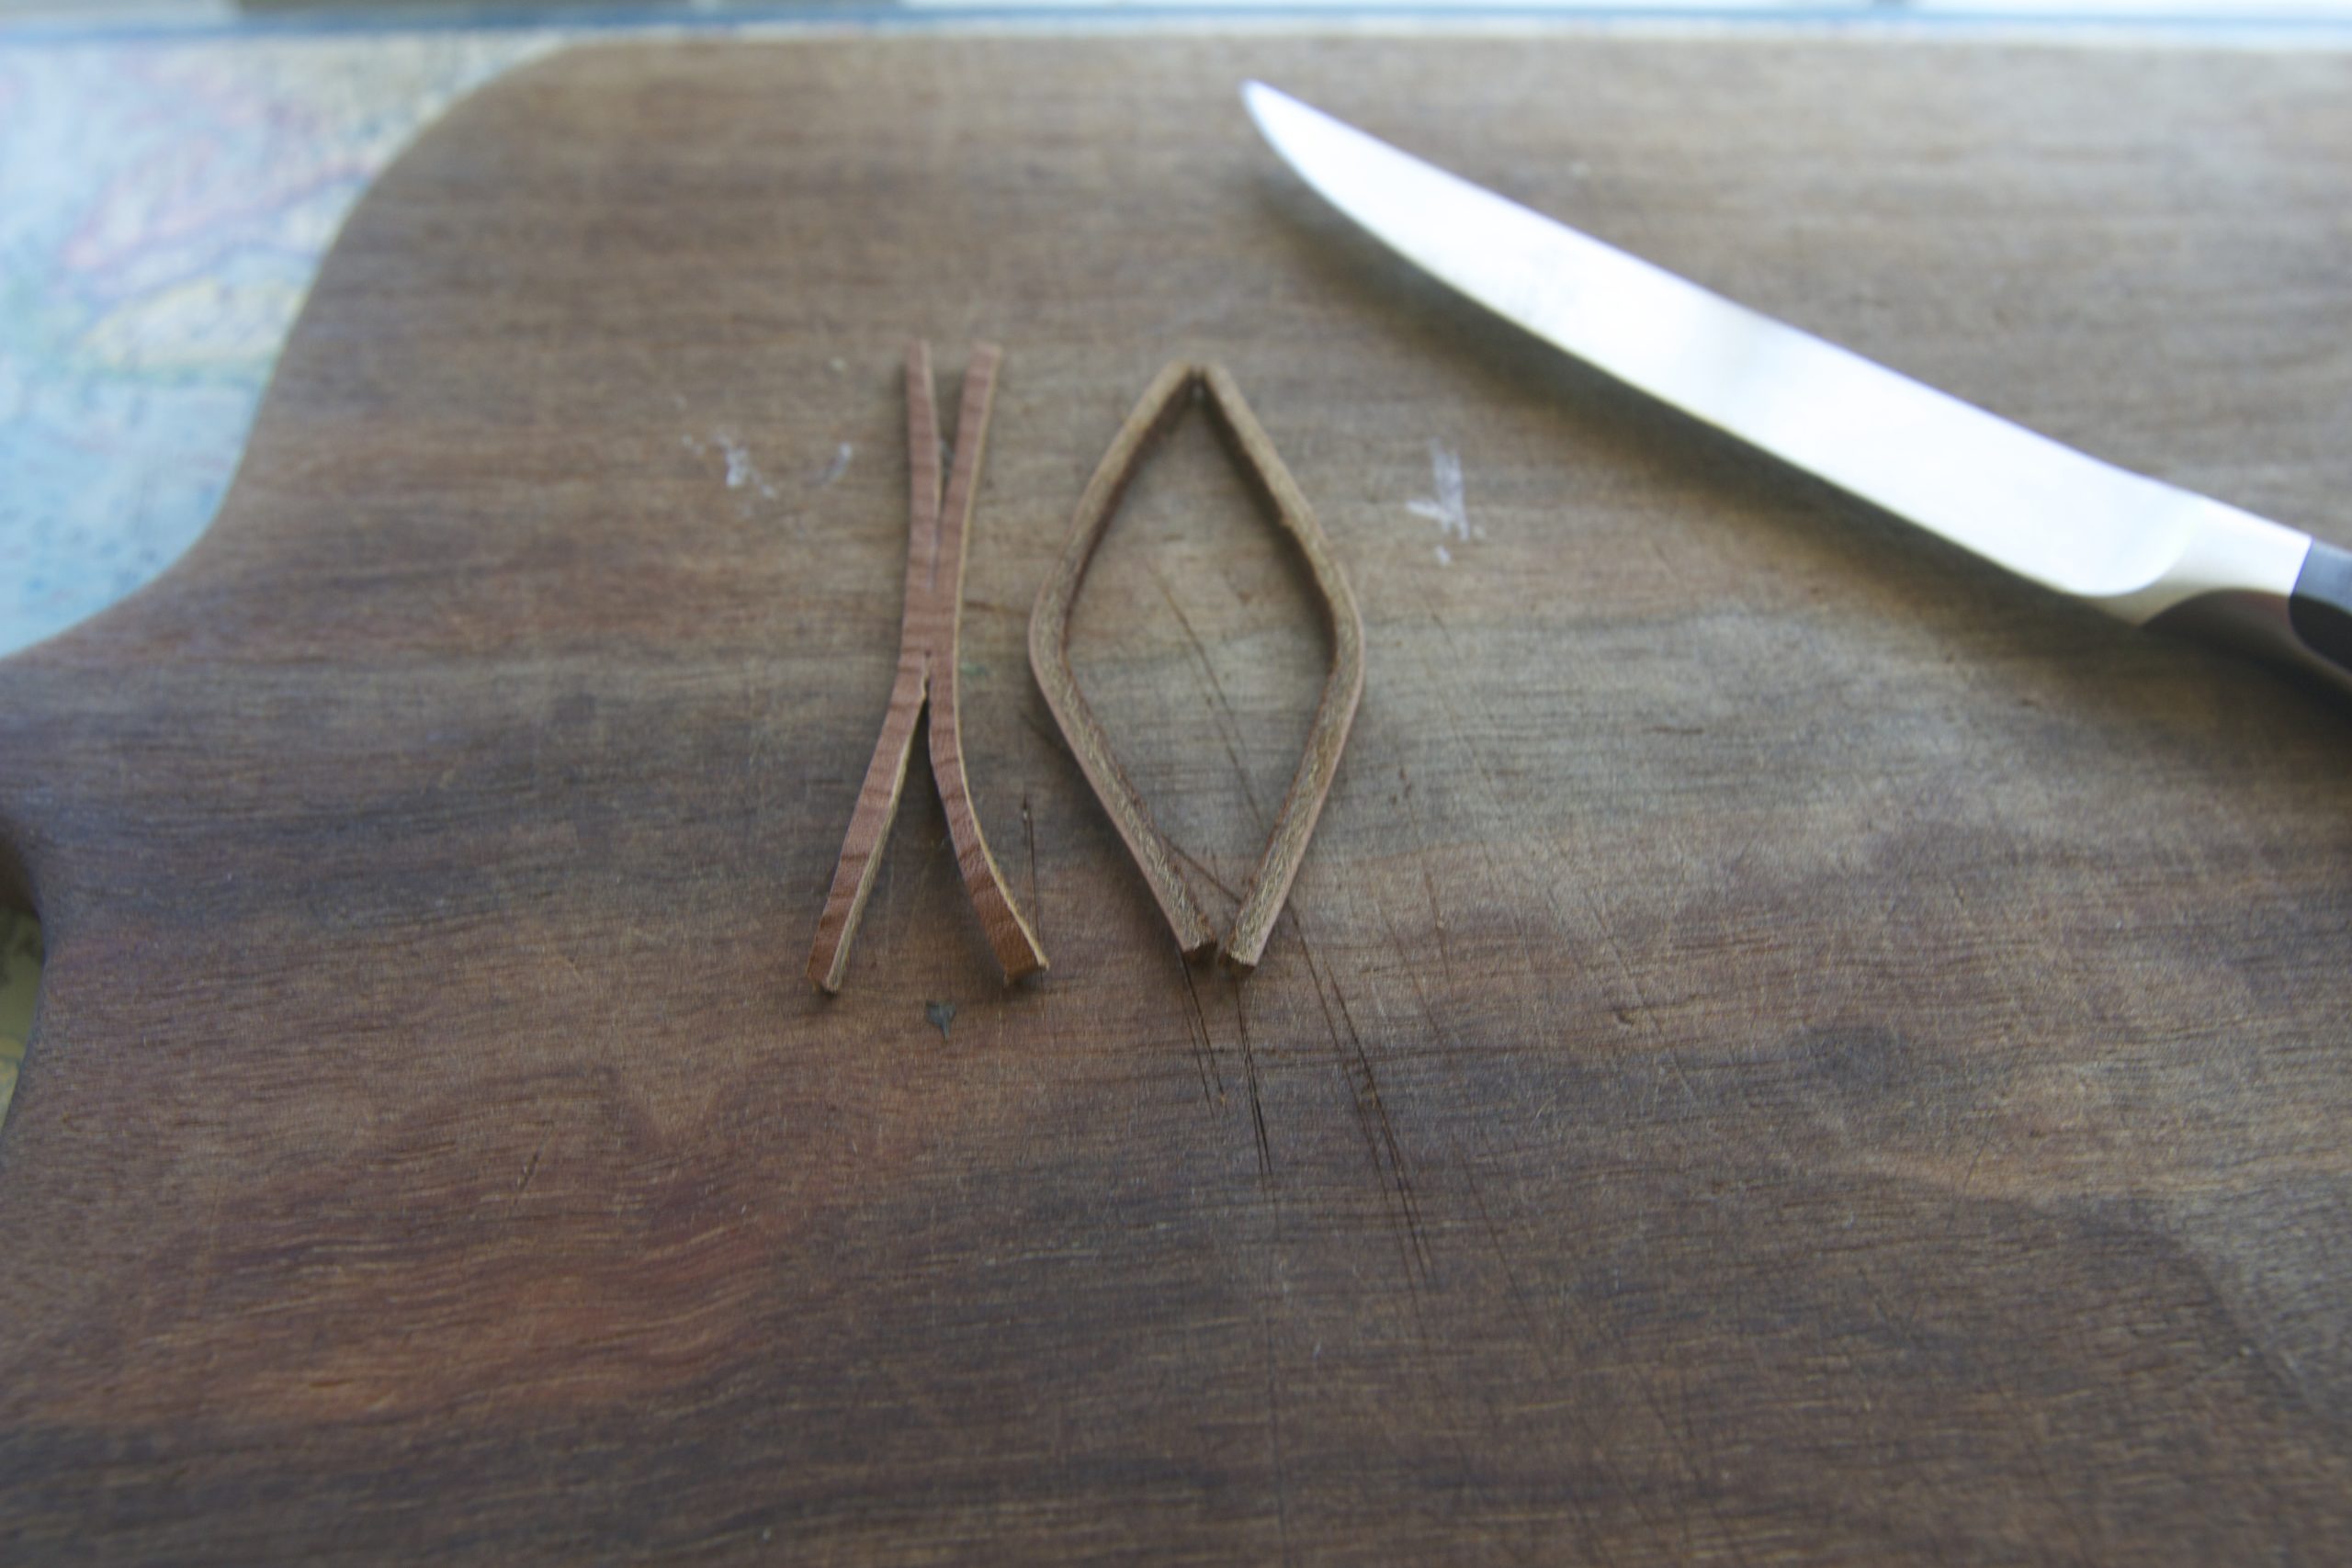
Cut another piece of cord the same length as the first. Cut this piece in half, this time cutting all the way down the center.
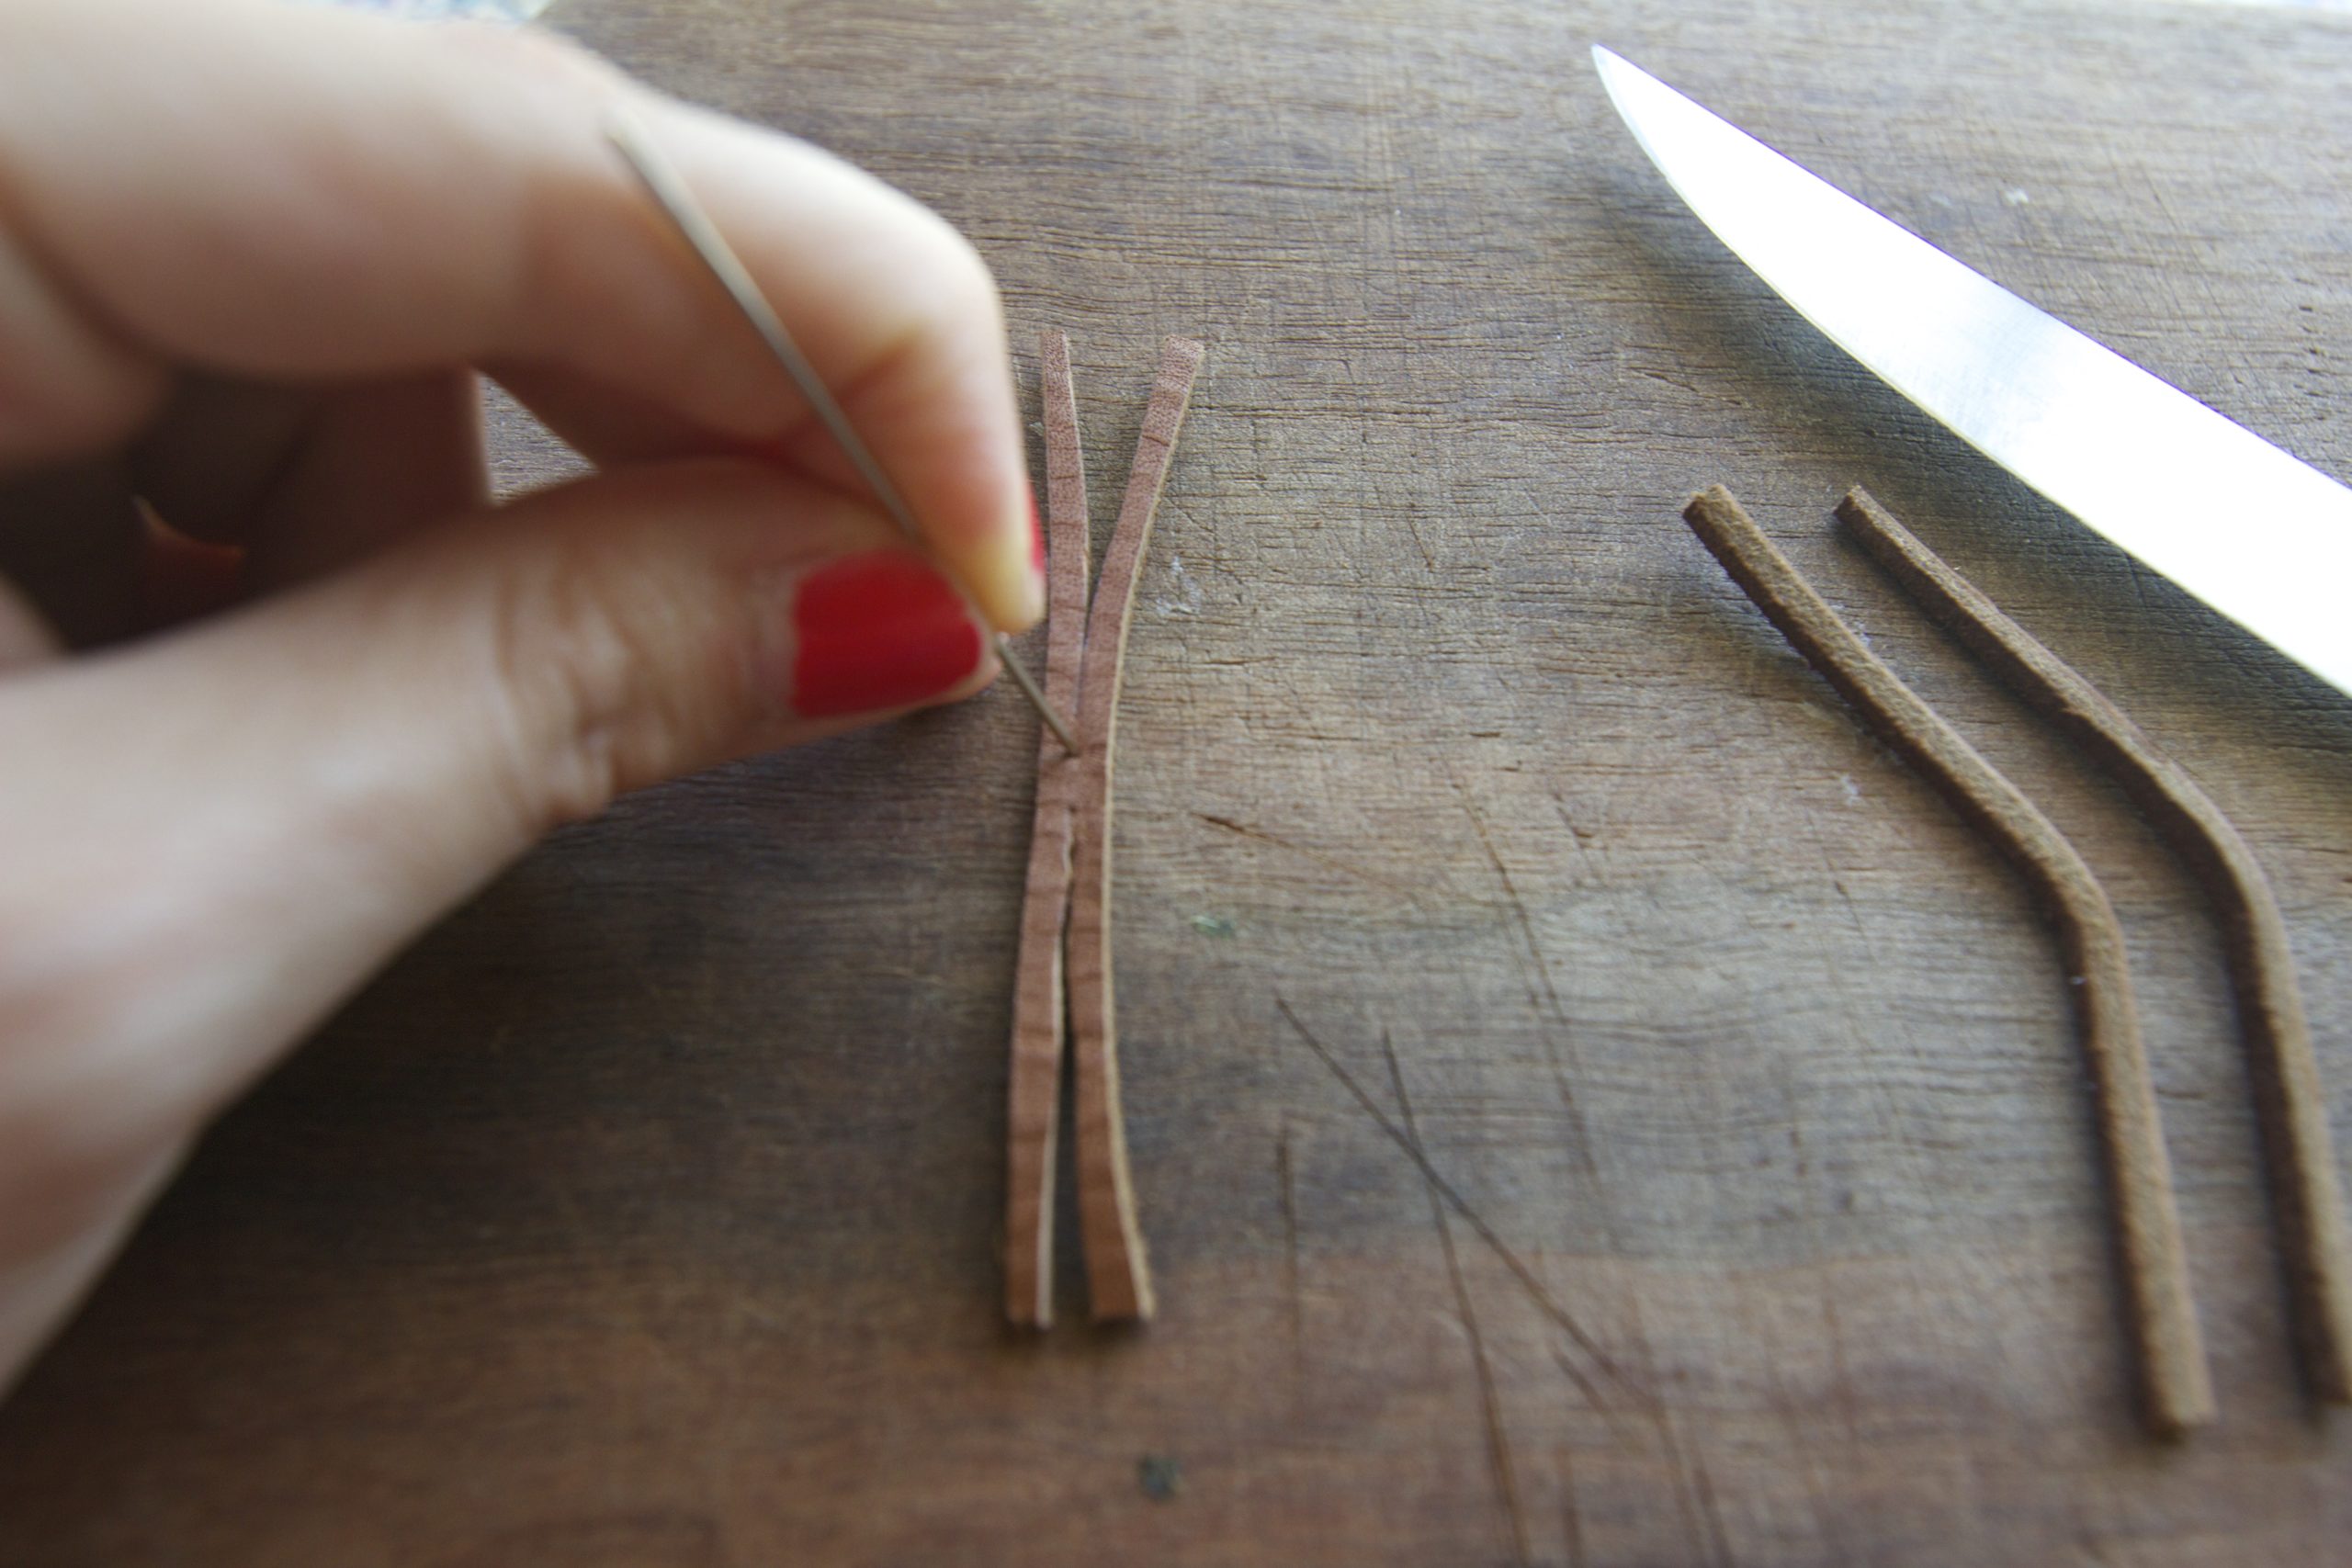
Take your needle and pierce a hole through the center of the original, X-shaped piece of leather. Remove, and then take one of the new thin leather pieces and do the same in the center. Discard the other thin piece of leather cord.
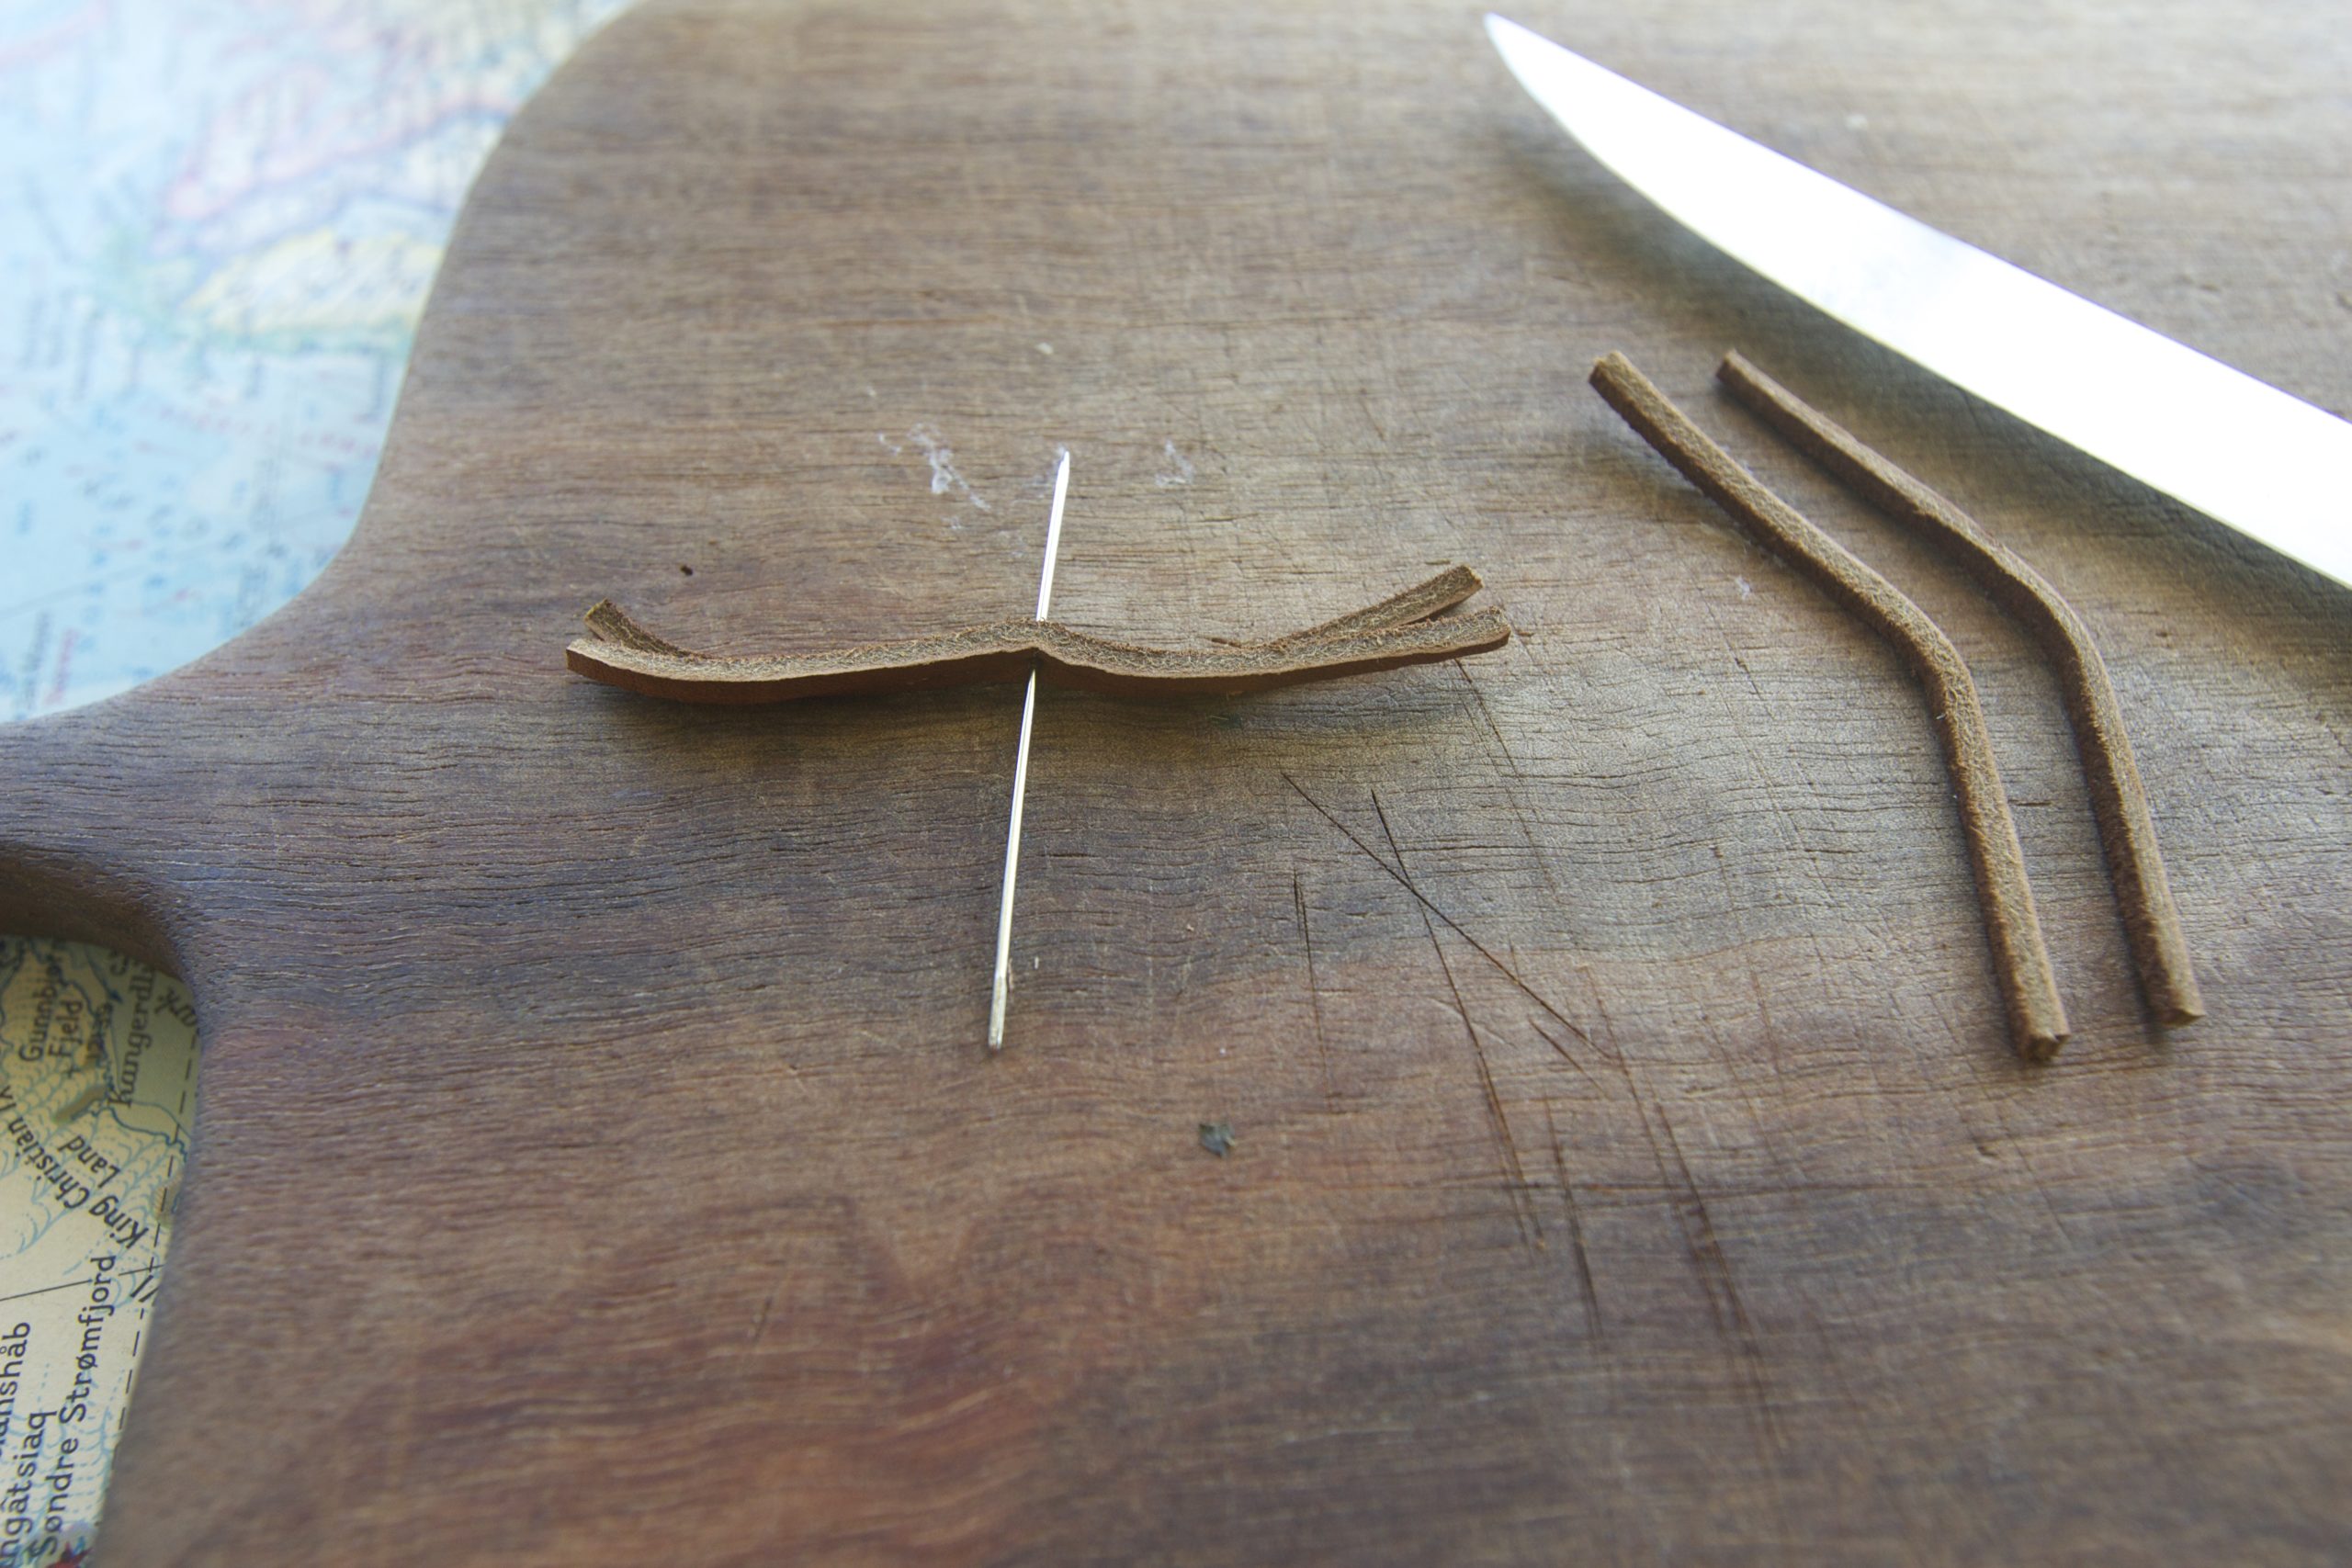
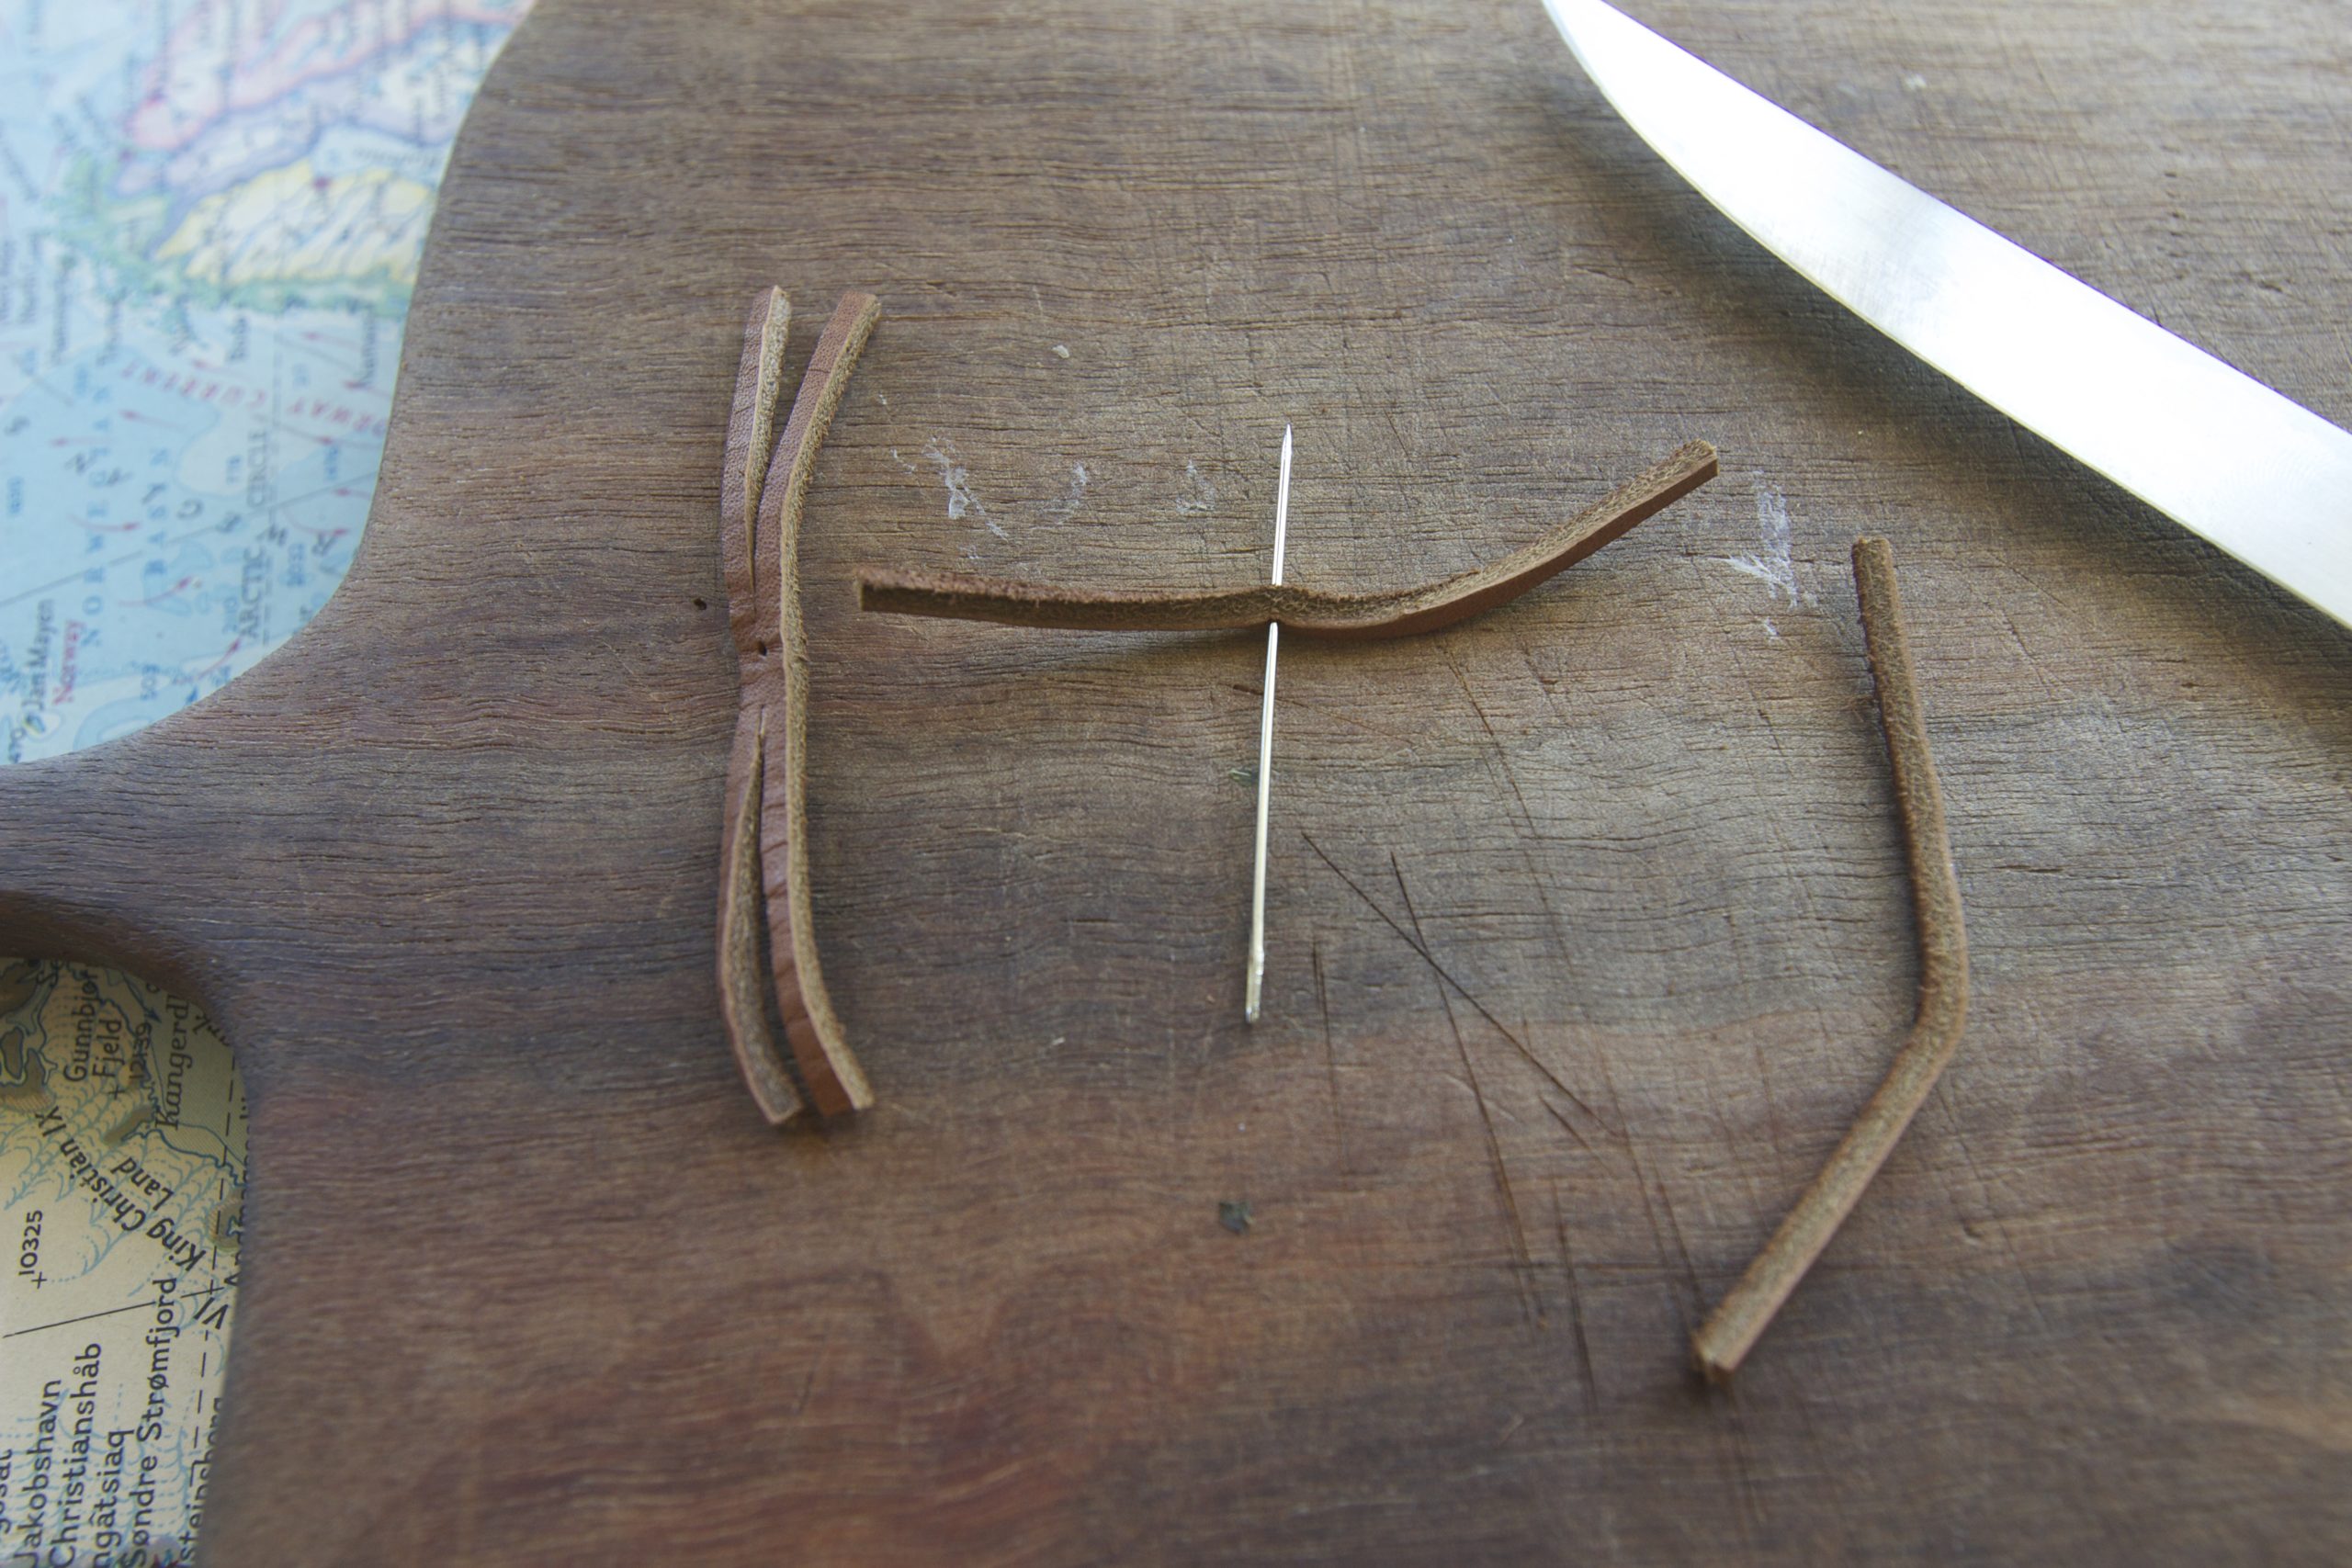
Cut a piece of wire about 3″ long, and insert it into the single leather cord piece (make sure the underside of the leather is on the bottom). Then, thread the X-shaped piece onto the wire as well (again checking that the underside is on the bottom!).
Leaving about a 2″ tail, wrap the bottom end of the wire several times around the cord pieces.
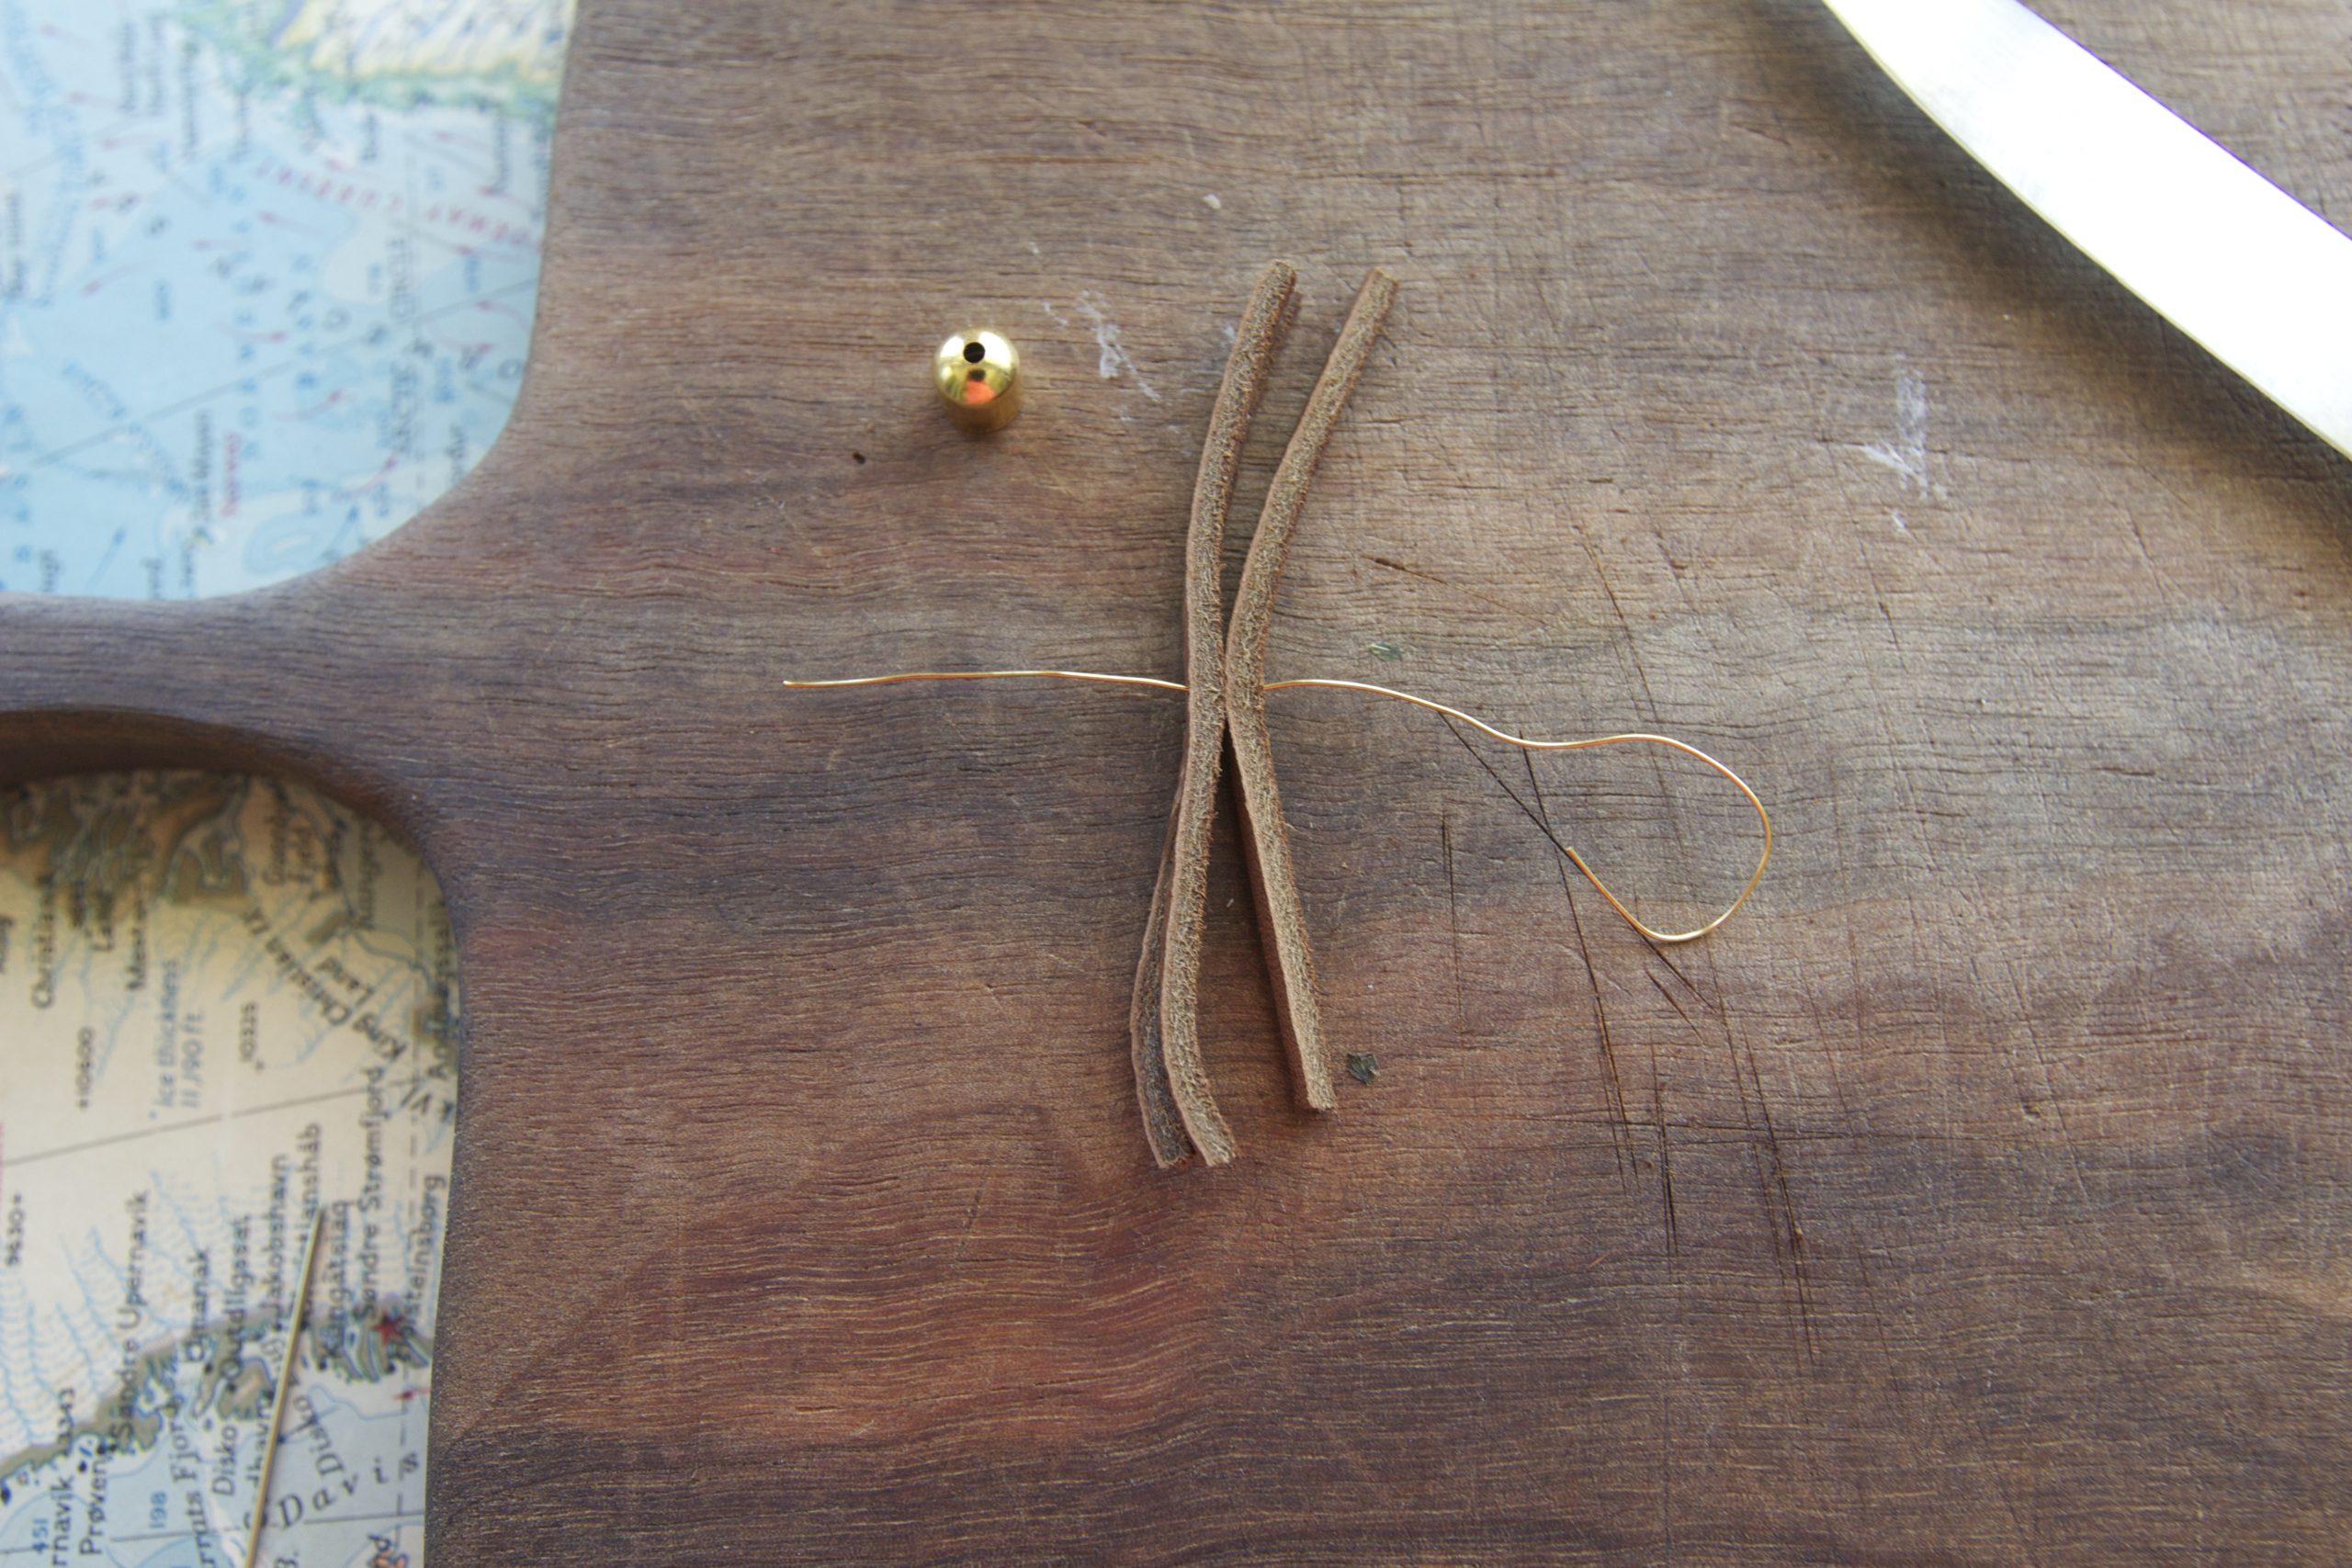
Thread the wire tail through the bottom of the end cap and out the top. If you have your cylindrical object, wrap the wire around it before tucking it back inside the cap. If not, make a loop, tuck the wire back through, and just do the next part slowly. There should be a long tail out the end cap, rather than a large loop.

Using your pliers or your fingers, pull your new wire loop until the leather is brought up into the end cap, making sure that the long wire tail does not get pulled back through the hole.

Then pull the wire tail until it is taught around your cylinder, or makes a small loop. Trim the tail so that it does not show.

If the leather fringe has become uneven, trim it again with your knife and cutting board.

Ta da! Easy, simple, cheap, DIY loveliness. Throw it on a chain and you’ll be fabulous.
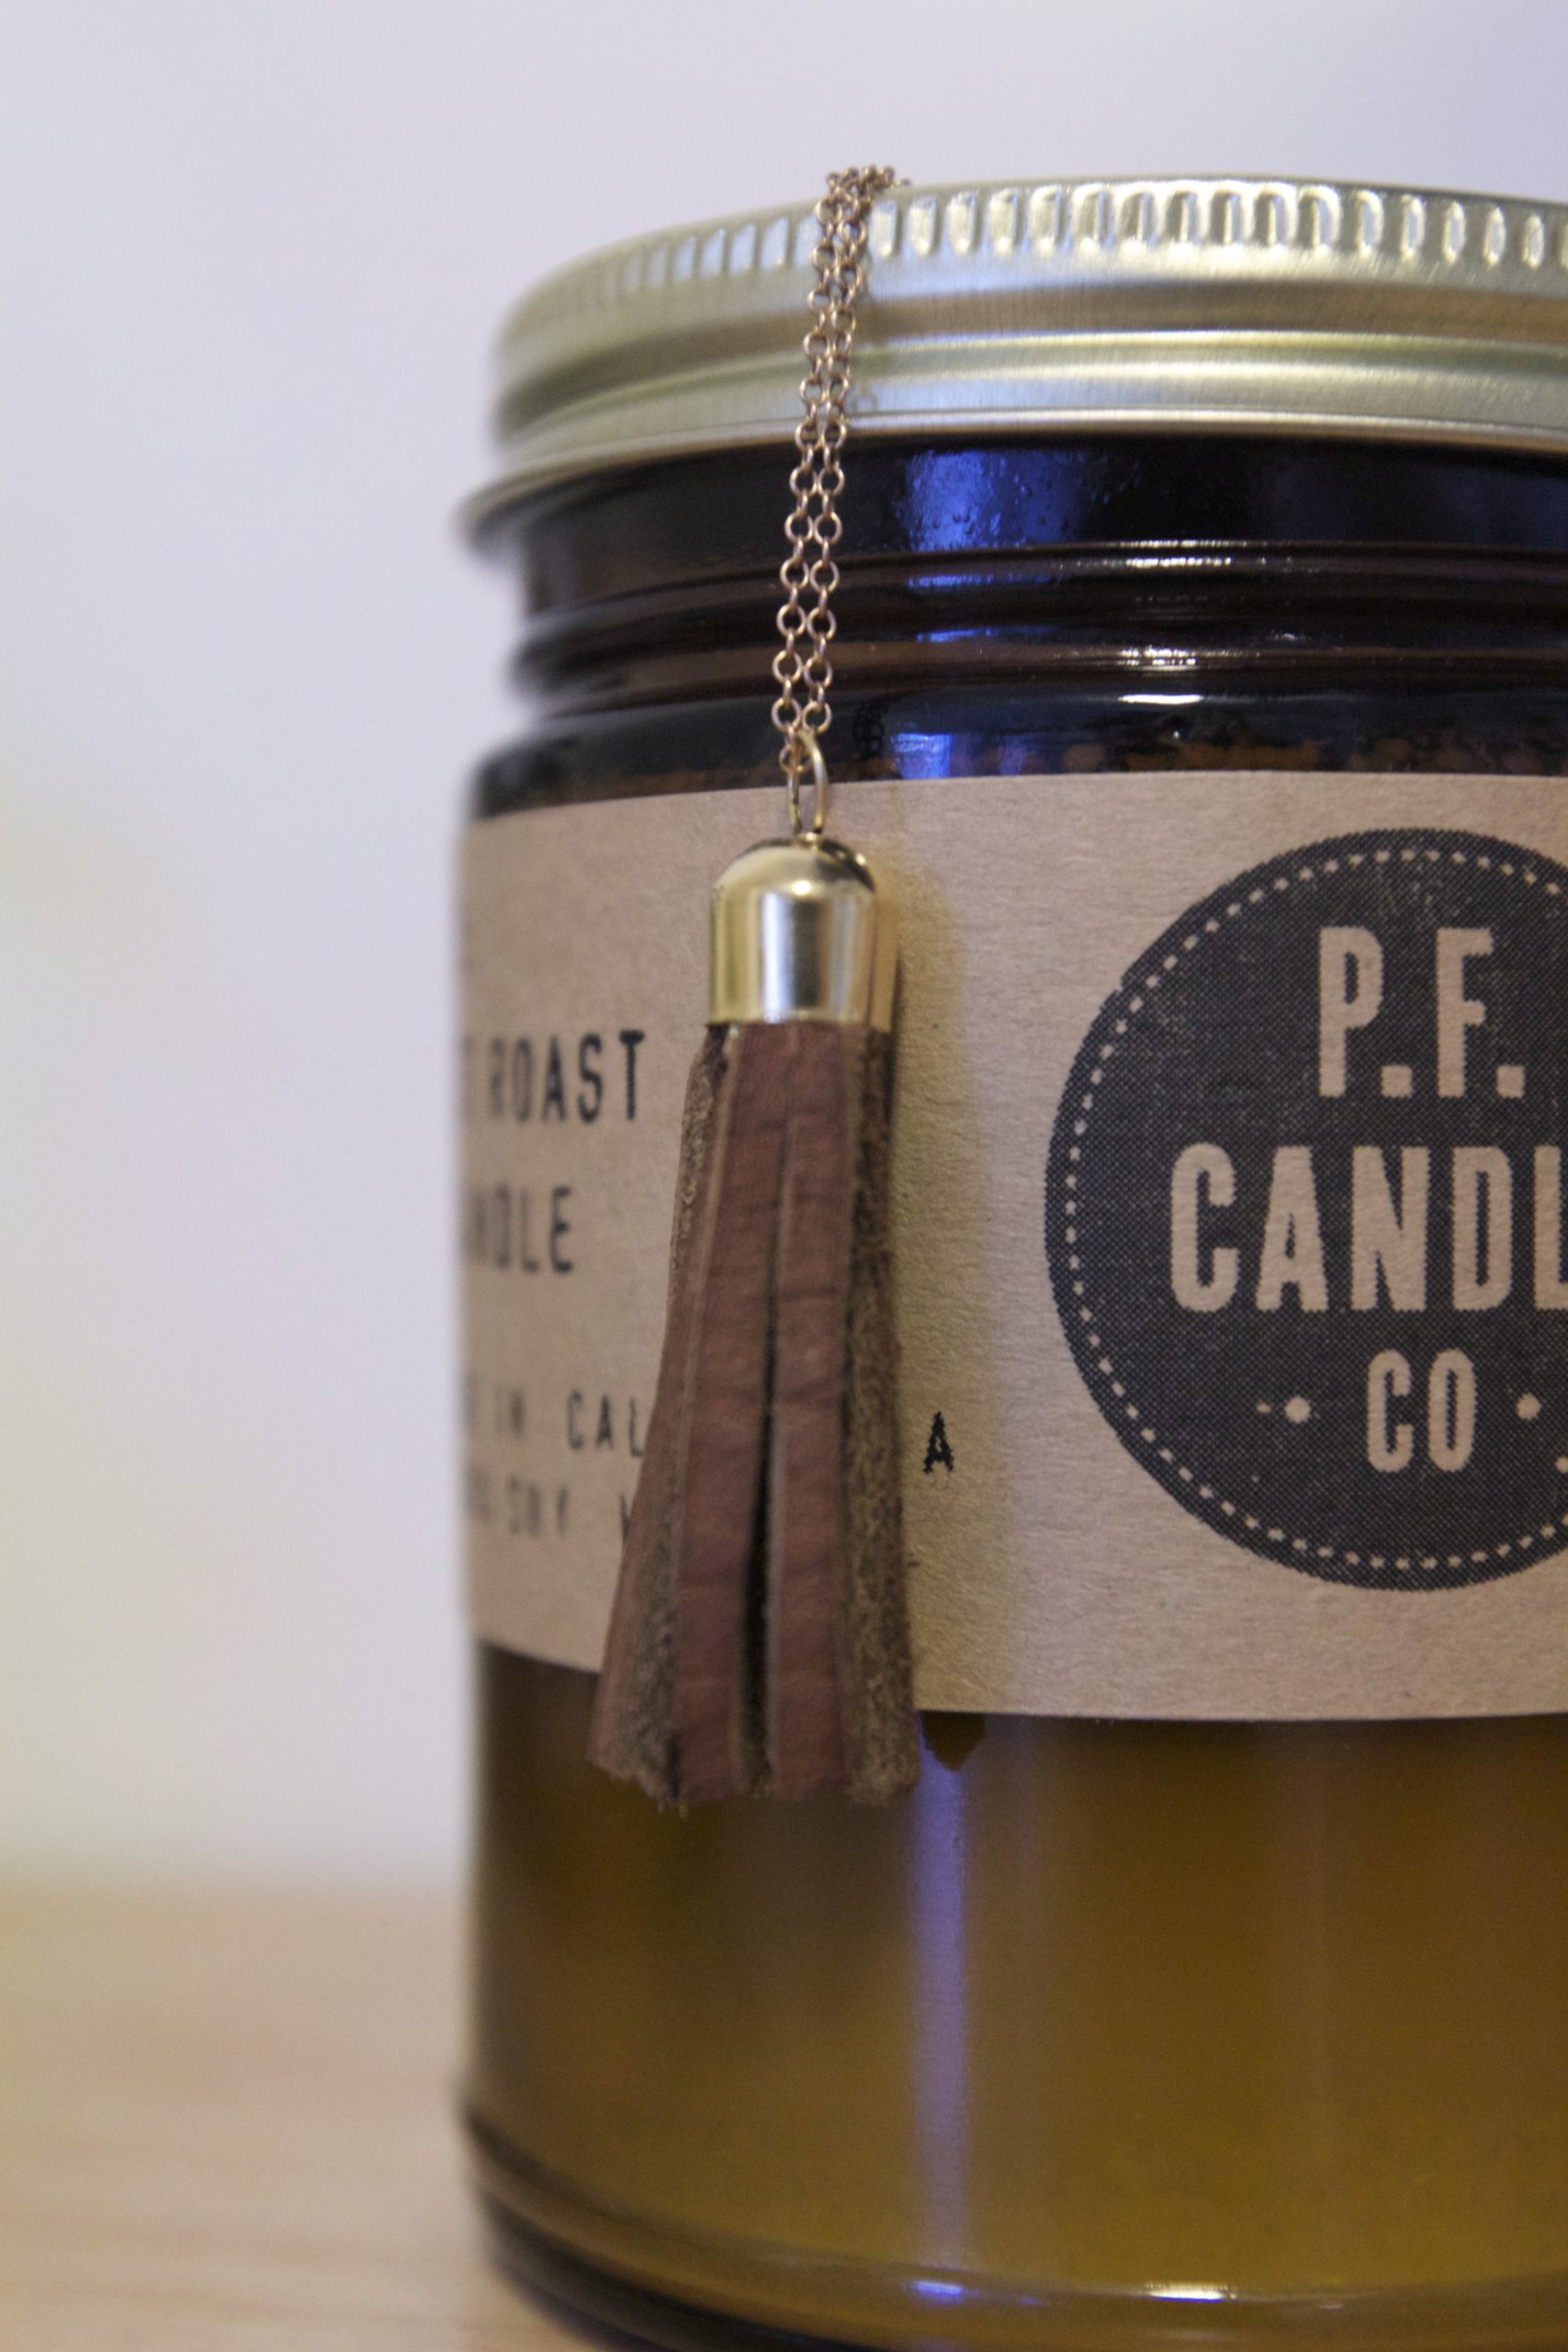
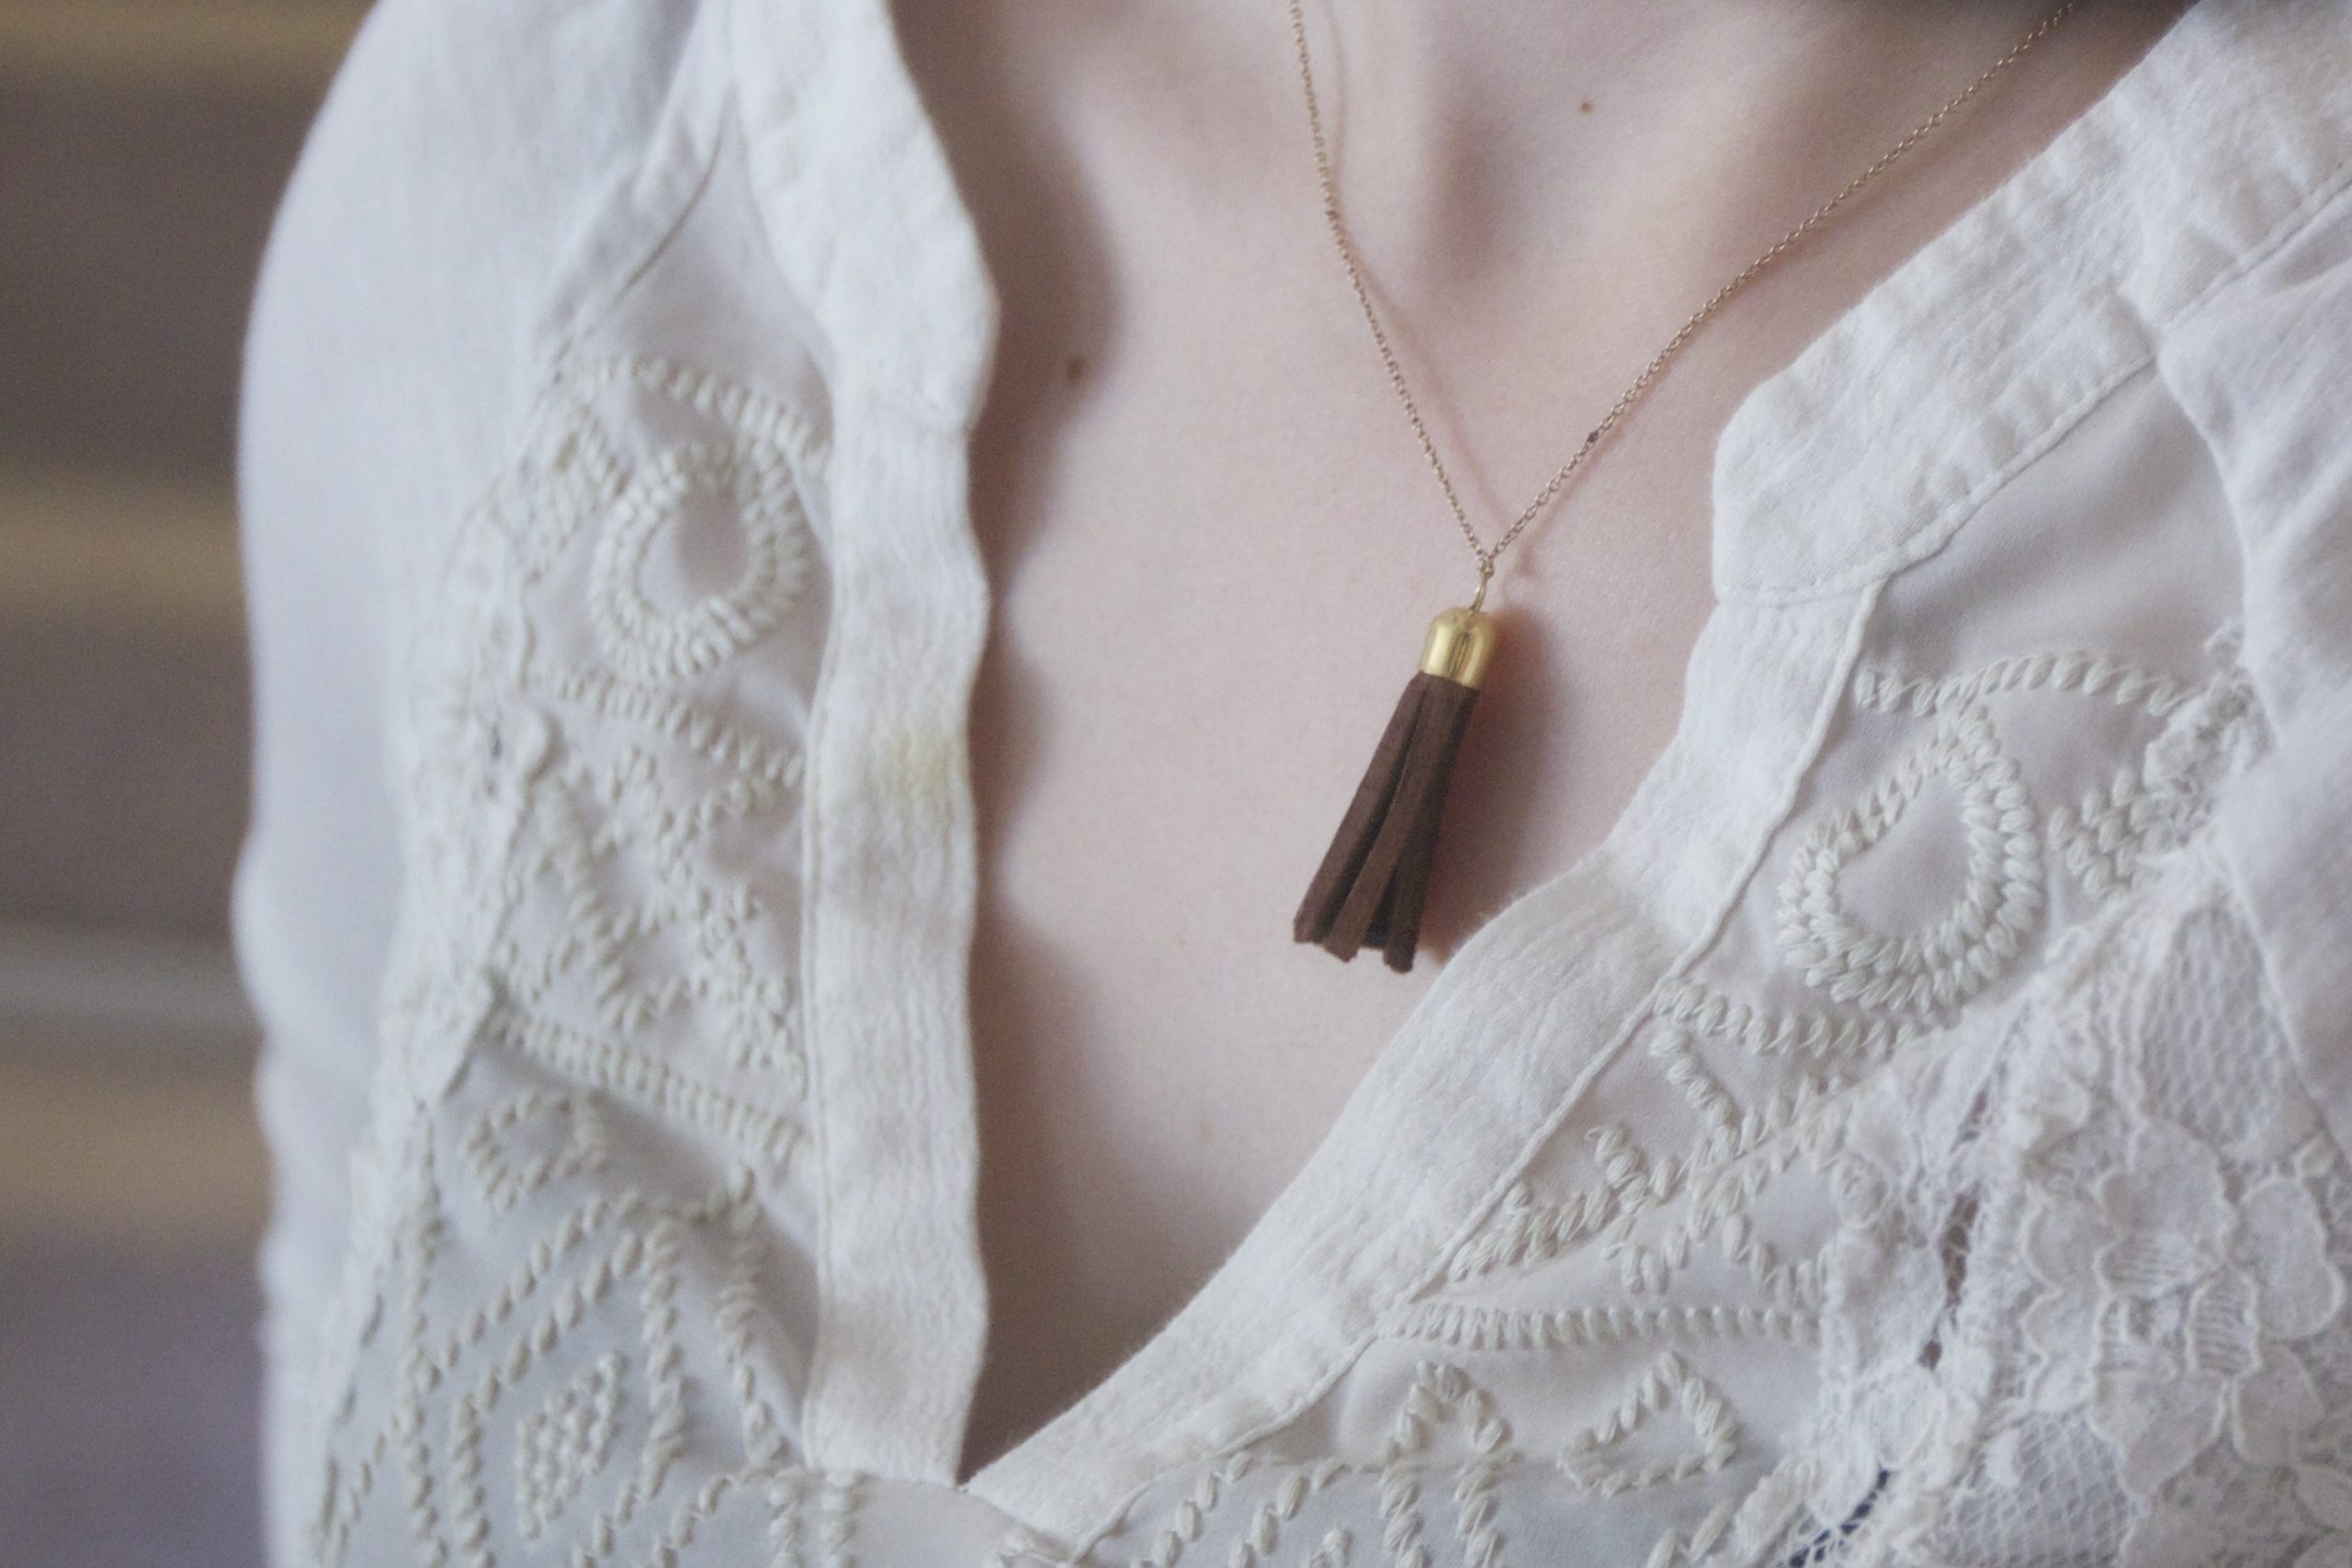
I’m going to rummage around for a longer chain, because I think tassels work better on long necklaces. I also have some beautiful beads now, because I am a terrible DIY shopper and always come home with 5 more items than I went out for…so a beaded necklace with tassels DIY is on its way!
Do any of you make your own jewelry? Know of any great necklace DIYs to share? I wanna hear it 🙂


