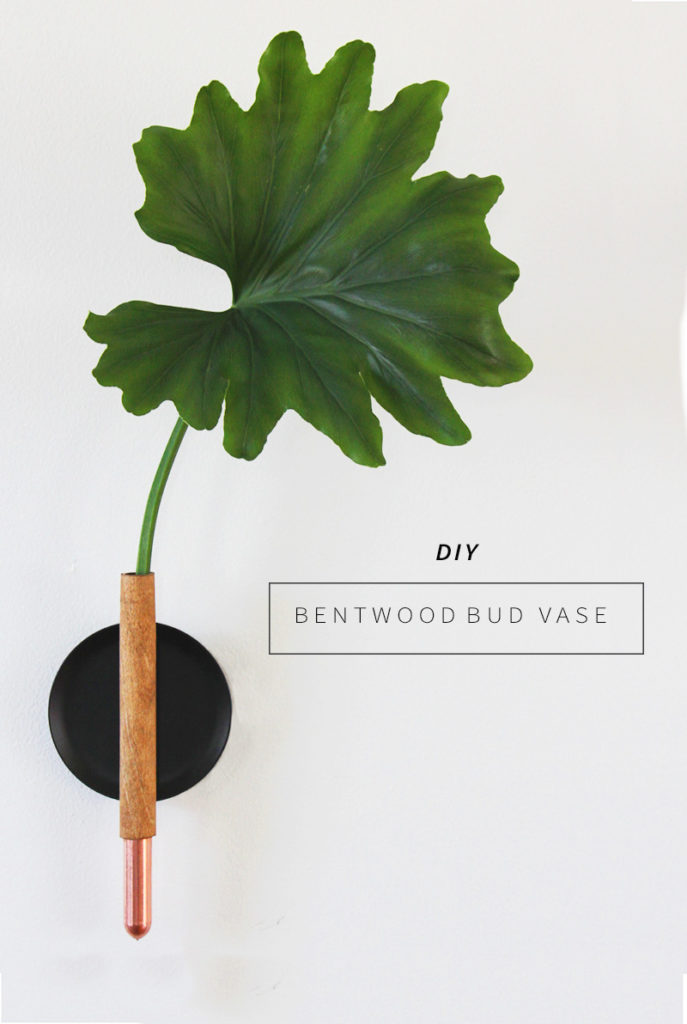
DIY Bentwood Bud Vase
Anyone who’s seen me with a jar of spaghetti sauce knows I like a challenge. And when Colleen and Karisa challenged me and four other bloggers to make something out of craft wood, I was hooked! The rules were simple: make something awesome for the wall, using the kind of craft wood found at stores like Michaels. Fresh off my DIY craft wood door wedge, I was ready to put another idea to work: bentwood!
Recently, #designdecoded has made me brush up on my Eames history–and I’ve had molded plywood on the brain, so to speak. So when I walked into Michaels and saw a whole section of craft plywood (what?!) I knew I had to use it. And not just use it, bend it. To my will. 😉
And so, this DIY bentwood bud vase was born:
Supplies
- Craft plywood
- Metal candle plate, 4″
- Copper air chamber, 1/2″ x 8″
- Wire
- A strong adhesive (I used Liquid Nails)
- Wood stain
- Rubber bands
- Paintbrush
- Vinegar + salt
- Optional: Minwax polycrylic
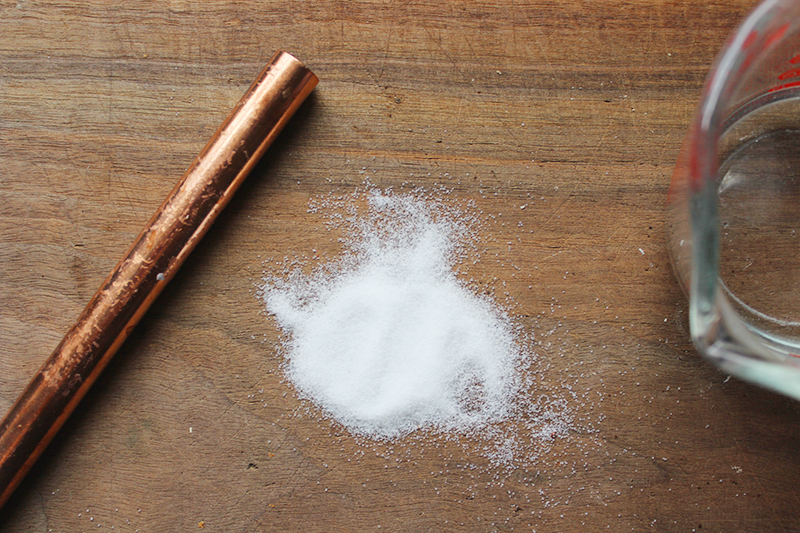
First, polish the copper air chamber with salt and vinegar. Rinse and let dry.
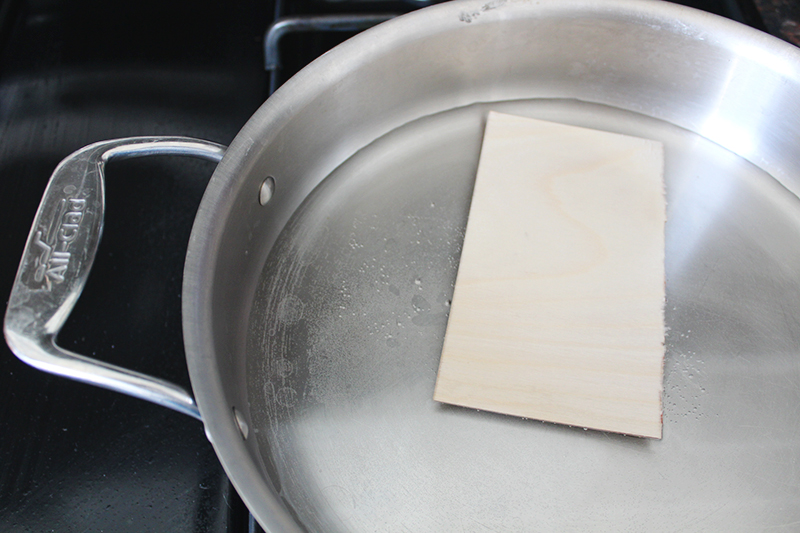
Then, use scissors to cut a piece of craft plywood that is wide enough to just barely wrap around the air chamber. Pop it into a pot of water, and simmer for 5 minutes.
Carefully remove the plywood from the pot and wrap around the air chamber (if it resists, boil it longer!). Secure with rubber bands and let dry.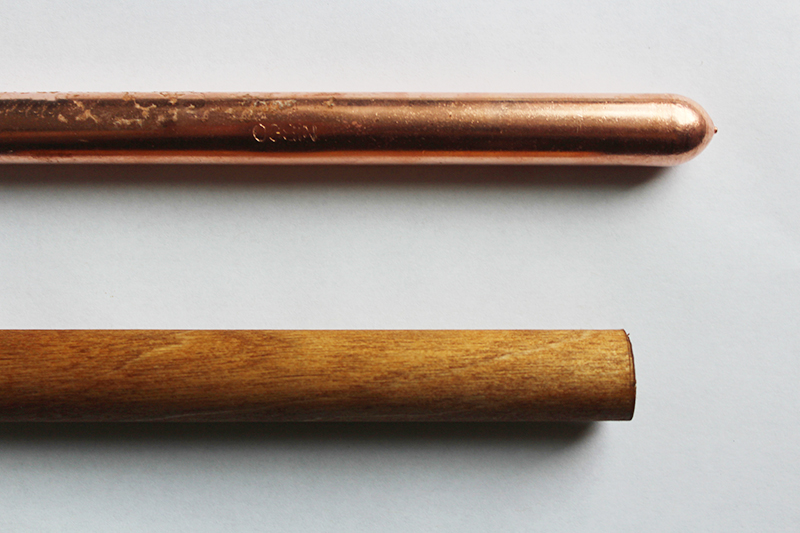
Once the plywood is completely dry, remove the rubber bands and slide the plywood off of the air chamber. It should retain its shape. Stain the plywood and apply the polycrylic, if using. Let dry.
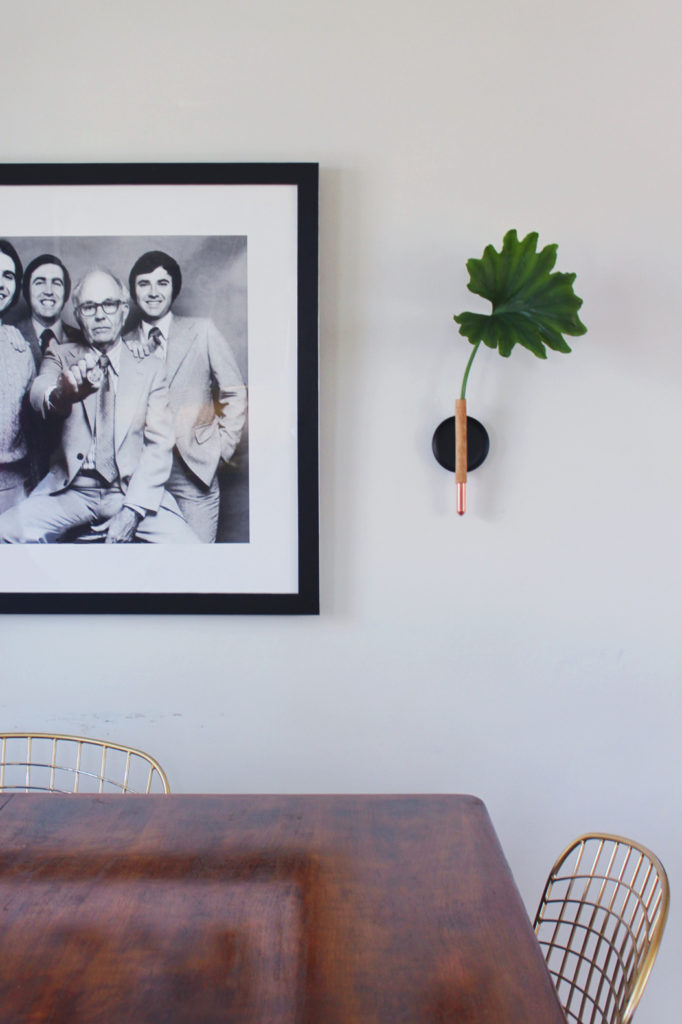
Lay the air chamber across the candle plate so that it is centered, and a longer length extends below the plate than above. Cut two lengths of wire about 12″ long and wrap each around the air chamber, where it touches the edges of the candle plate.
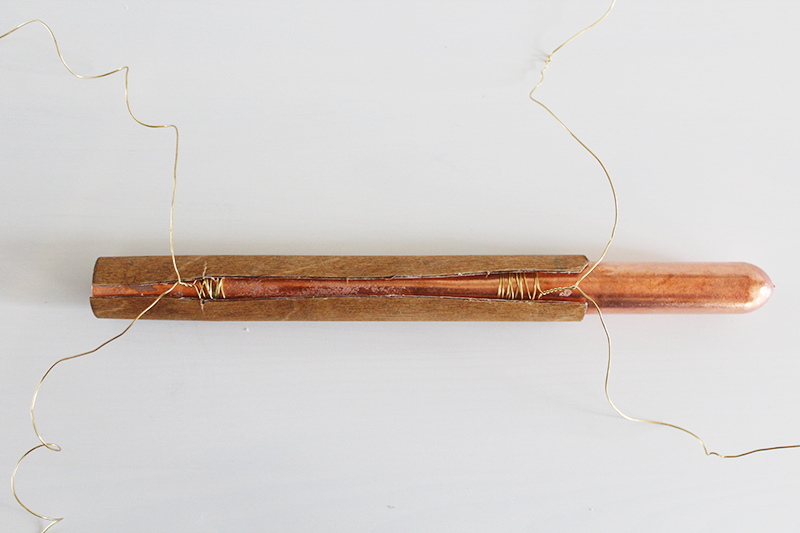
Using the paintbrush, apply adhesive to the inside of the bentwood and wrap it around the air chamber, leaving some exposed copper below and covering the wrapped wire. Wrap in rubber bands and let dry completely.
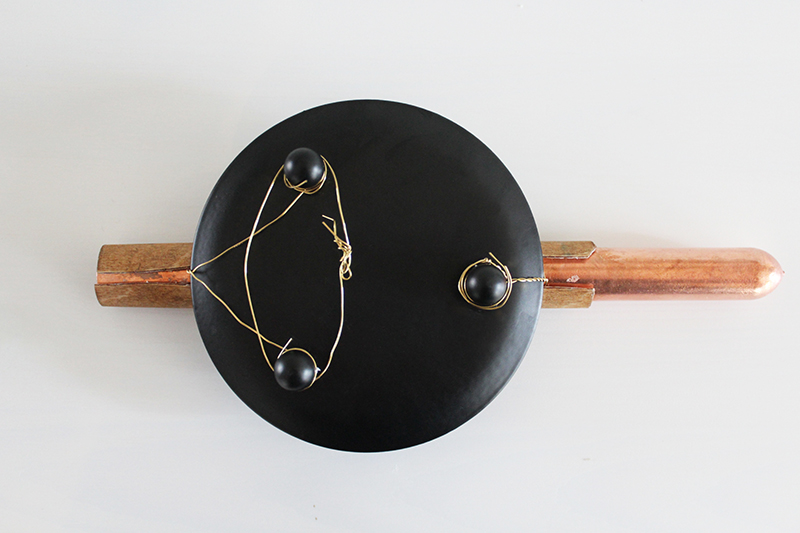
Remove the rubber bands. Take the upper wires and split them, wrapping each one around the top two feet on the bottom of the candle plate. Take the bottom wires and wrap them around the top foot.
Cut another length of wire several inches long. Make a loop, and place around the top two feet, creating a hanger.
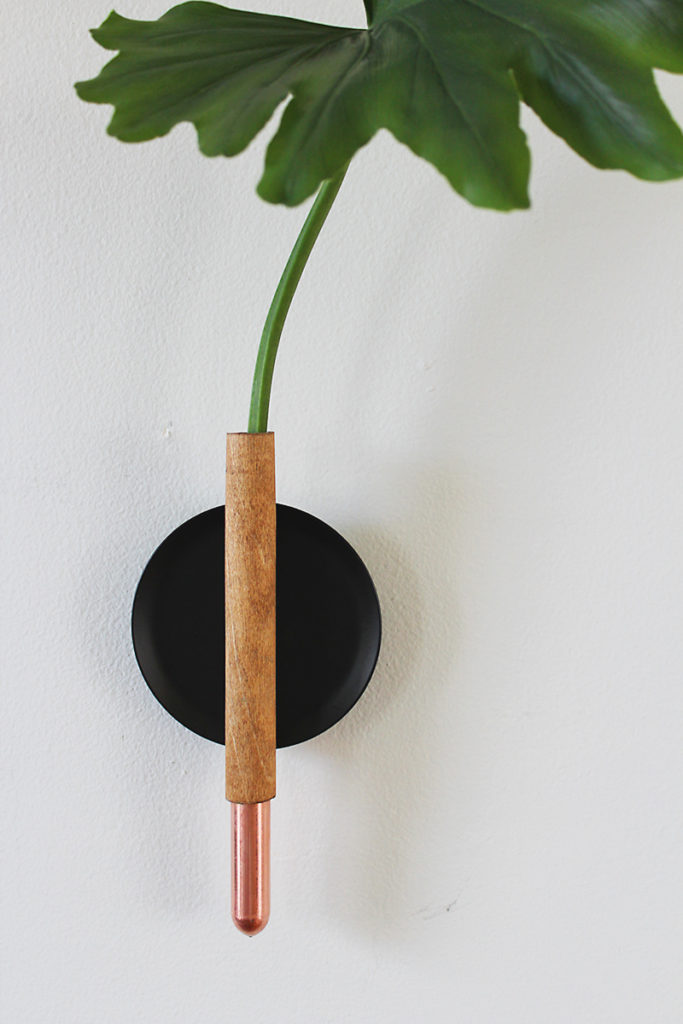
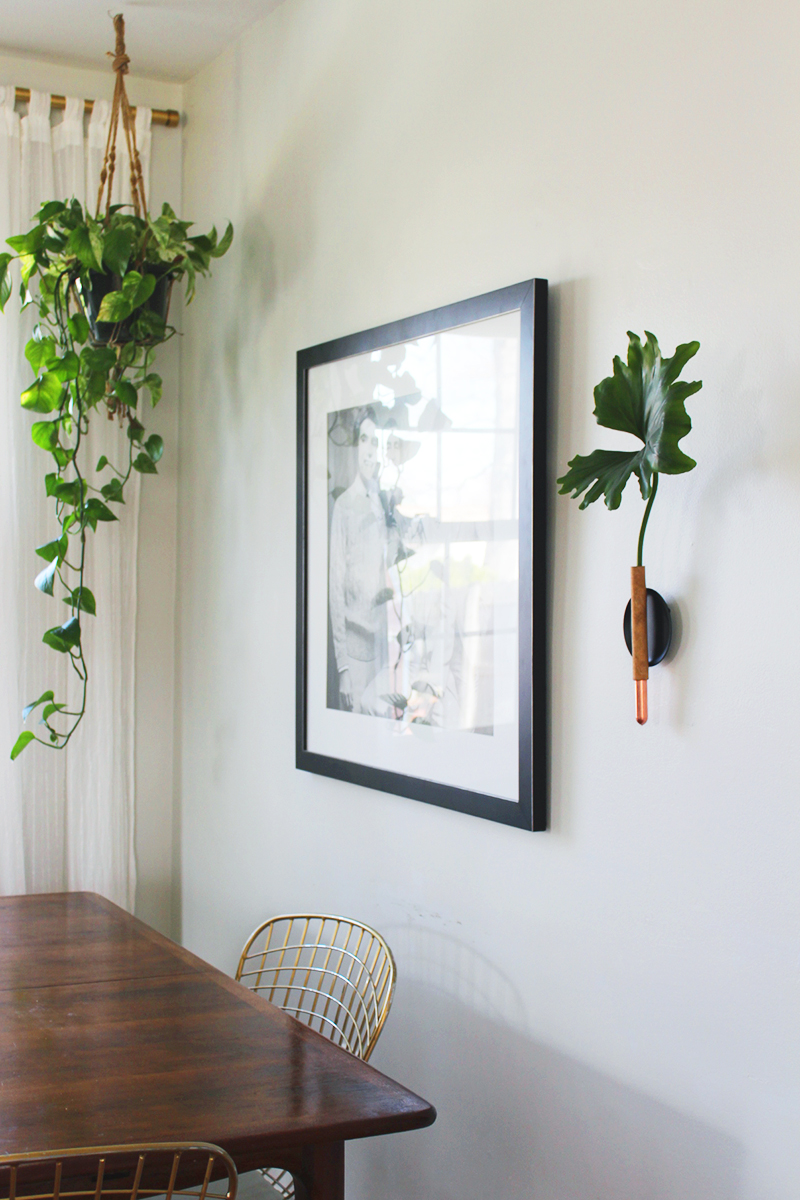
Affix to the wall, fill with water, and add your favorite kind of stem!
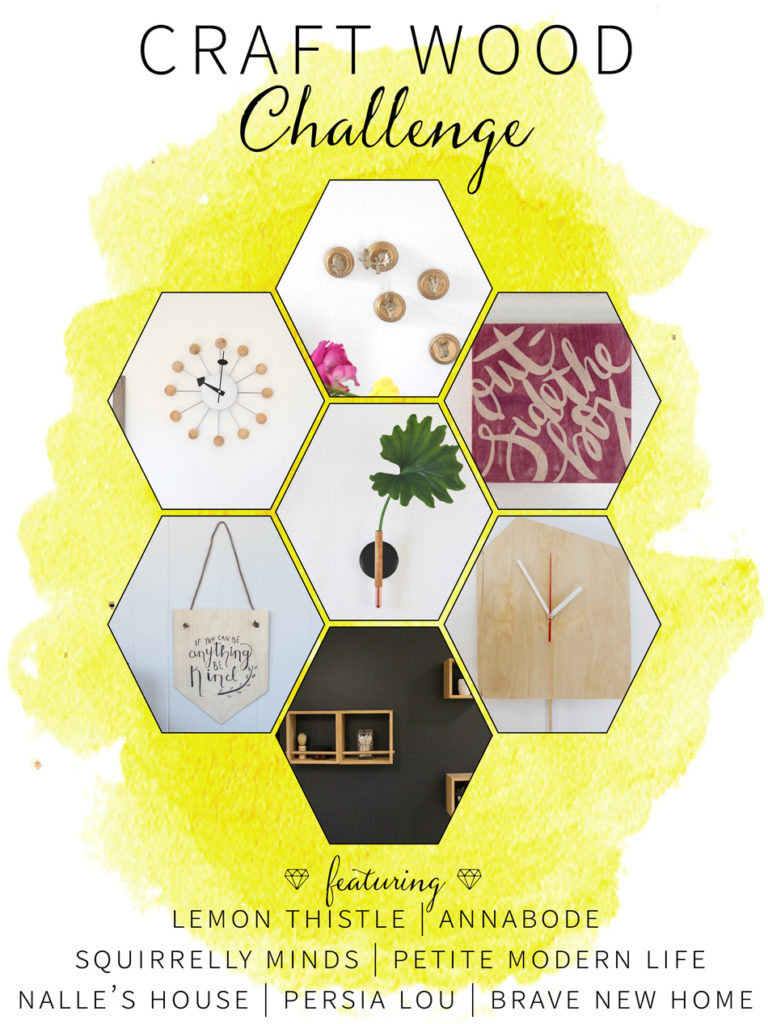
Don’t miss the other projects by the talented ladies of the Craft Wood Challenge!
Annabode: DIY Bud Vase | Nalle’s House: Mid-Century Modern Ball Clock | Brave New Home: DIY Wooden Modern Cuckoo Clock | Lemon Thistle: Birch Plywood Wall Hanging | Petite Modern Life: DIY Craft Wood Shelves | Persia Lou: Inkodye Wood Wall Art | Squirrelly Minds: DIY Animal Head Mounts
Related Posts
 MIXING OLD + NEW DESIGN IN HISTORIC HOMESCohesiveness is the end goal of a well-designed home. If you live in an older house that’s been subjected to multiple remodels by previous ...
 What Does Slow Living Mean?An Interview with the Annabode Team Sometimes I wish I could return to my childhood—before the internet, cell phones, and endless channels and ...
 A Complete Guide to Sustainable Design in 2025Sustainable design aims to reduce waste, conserve resources, and encourage human and ecological health. In other words – it’s the way we ...
Popular Articles


TO DO LIST
- Read this book.
- And this one.
- Keep what you need.
- Donate what you don't.
- Design mindfully.

cassie
| 8 April 2015love this- the touch of copper is awesome!
Anu
| 8 April 2015It turned out beautifully! Absolutely love how simple it is!
Amy W
| 8 April 2015You are so creative! Pinned this awesome idea.
Kristen
| 8 April 2015So cool! I had no idea you could do that to the wood via boiling, etc. Love the copper.
Jennifer @ Brave New Home
| 8 April 2015What an interesting technique! The finished result is so perfect. Thanks for sharing!
Ashley@Biggerthanthethreeofus
| 8 April 2015Really love this and I had NO idea that you could boil plywood to get it to warp. Genius!
Colleen Pastoor
| 8 April 2015This is amazing! I can’t believe you bent the plywood- My mind is blown!
Ama
| 8 April 2015Simple and elegant! I just love it!
Tan of Squirrelly Minds
| 8 April 2015Bent wood? You just blew my mind. And I just love the hint of copper!
Shannon Churchill
| 13 April 2015So beautiful Anna! Love your clean, simple (and oh so pretty) style!
shelly
| 28 April 2015I just love this! I had no idea you could so easily bend plywood!
Georgia @ Silver Spiral Studio
| 5 June 2015These are so great!! Thanks for sharing!!
annabode
| 16 June 2015Thanks so much Georgia! 🙂
Julia@Cuckoo4Design
| 9 June 2015Am so loving this. Looks so pretty! And now I have craft plywood on my mind too. Had no idea they had that at the craft store.
annabode
| 16 June 2015Neither did I, Julia — the possibilities are endless!