Our DIY Modern Laundry Room Reveal with Semihandmade
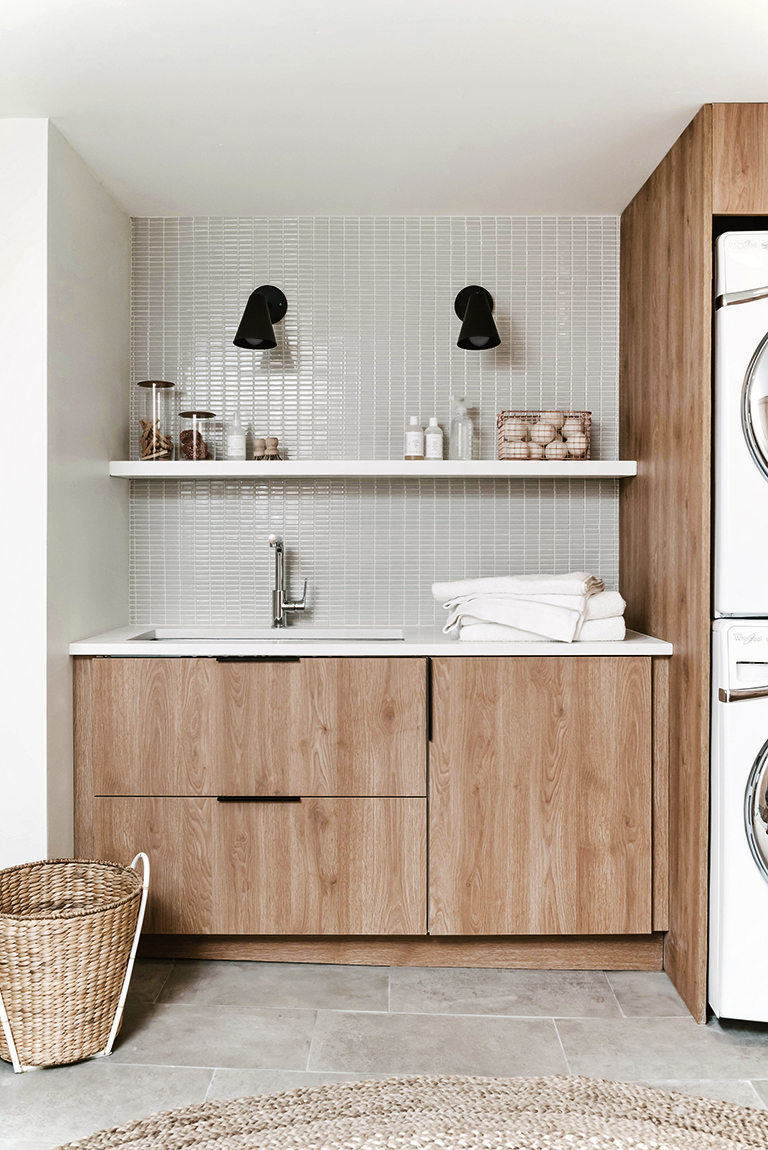
Renovating a house yourself can sometimes feel like jumping off a cliff and not knowing if there’s going to be water there to break your fall. It’s exhilarating and challenging…and you don’t quite know how it’s going to turn out. I can design a space all day, but framing walls and moving plumbing is another matter! Of course we did just that – and for the first time! – in our recent laundry room renovation.
*This post contains affiliate links. Thank you for supporting the brands that make this blog possible!
While my days are spent designing for clients, my weekends and evenings are spent with my husband (and kiddos!) on our 1972 fixer upper (see the full BEFORE tour). When we bought our house this space was unfinished and housed the laundry, a shop sink, furnace, and water heater. There are no windows (SIGH) so the room was big black hole of sadness:
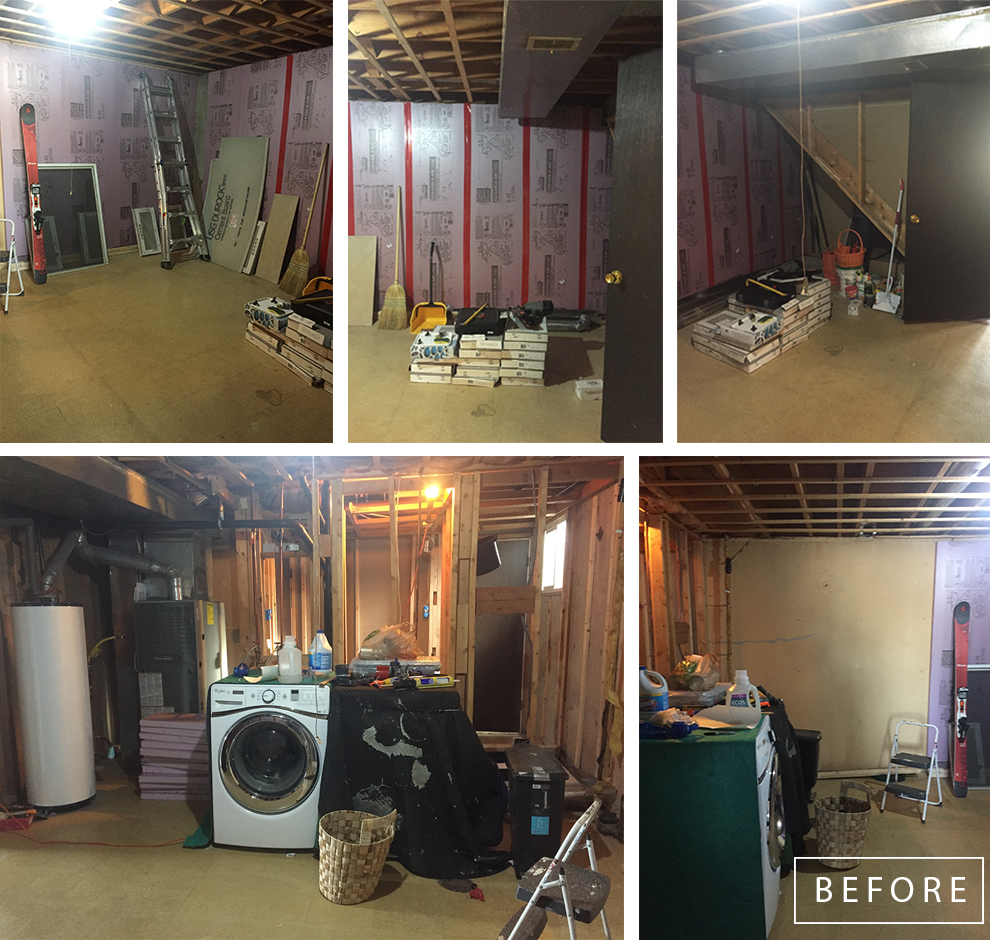
The floor was a vinyl-like tile, the ceiling and walls were entirely open, and there was one depressing light bulb with a pull switch that lit the whole space. See the string dangling at the top right?
My goals were to:
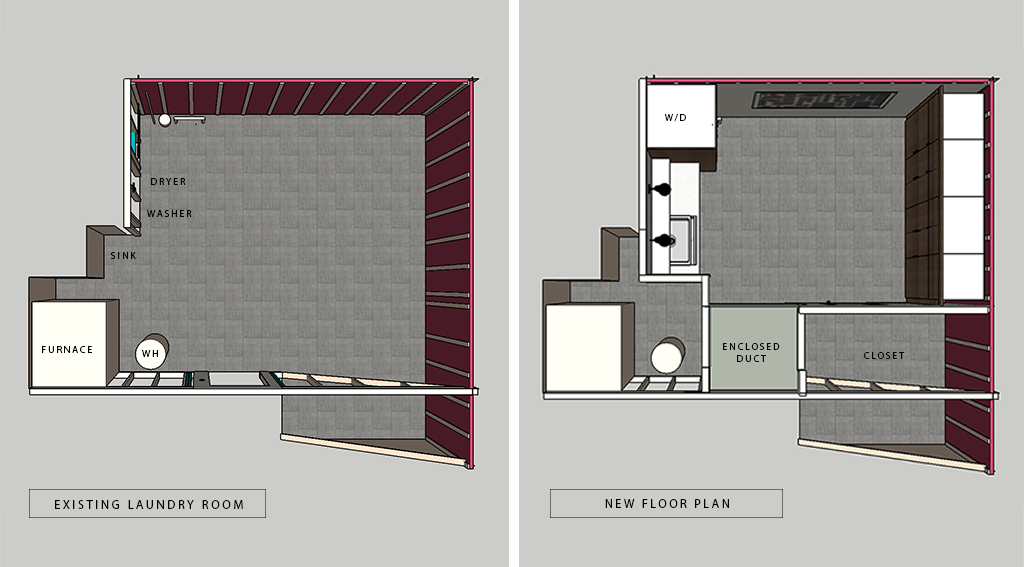
- Enclose the water heater and furnace (I did not want to look at those guys any more),
- Create a folding surface and sink area where we could treat stains,
- Add storage, storage, storage, and…
- Build a separate closet for large items like skis, winter tires, bikes, etc.
The plan was to stack the washer and dryer against the far wall and build it into semi-custom cabinetry with a sink to the left. In order to do that, we had to extend the old wall (behind the washer and dryer, above) and pull the sink forward a couple of feet. You can also see in those photos that there is a huge duct running across the room, which had to be enclosed. Luckily it was by the stairs, which means we were able to incorporate it into both the closet ceilings (rather than have an awkward soffit in the laundry room proper).
I could have made this into an entire series with the amount of time and work that went into it, so for your guys’ sake I’ll try to make this brief. This was our first foray into framing; Austin did the actual construction with the framing nailer but I laid out all the walls. An added difficulty was that the floors had to be floated to adjust for movement in our foundation…and then again that annoying ductwork proved tricky.
The new location of the sink and the washing machine hookup meant a lot of new plumbing was also needed (it previously drained into the sink, not its own drain). I’m not embarrassed to say we failed our rough-in inspection three times before finally figuring it out (thank god for permits or I’m sure our basement would be flooded by now!). We also had to vent the dryer to the outside, as well as the new utility closet, and create a drain line for our AC. Not to mention all the finish work that was involved – building and trimming the cabinets, tiling, etc.
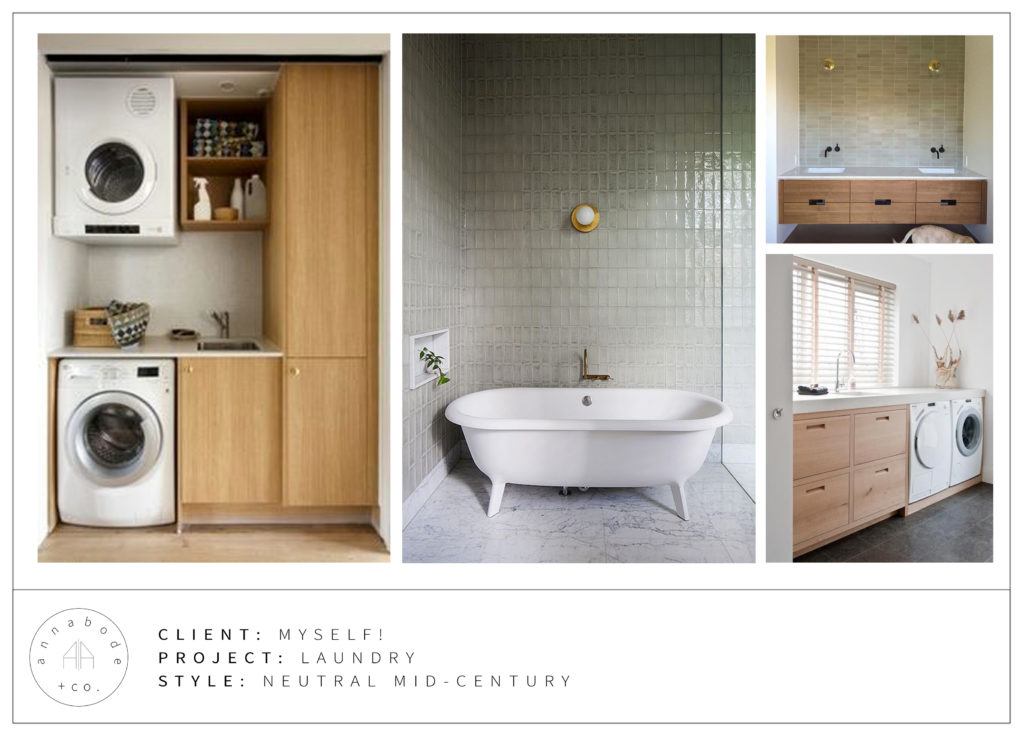
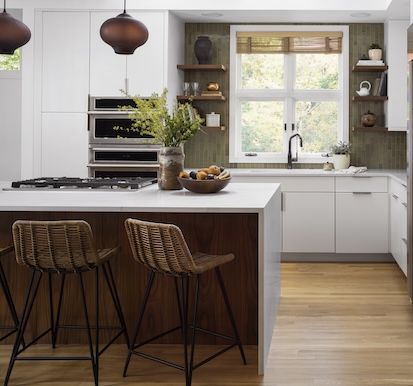
I wanted the space to feel modern, warm, simple, and very, very clean (it is a laundry room, after all!). I was really inspired by the gray-green tiles in the images below mixed with warm white walls and wood cabinetry.
Like all our home projects we used a mix of high and low; saving on the floor tile and hardware but splurging on the sconces and backsplash tile. Most of the expense went into actually finishing the space, which we started in February and didn’t finish until July. I actually went into labor the week before we completed it (because oh yeah, I did this pregnant!). Definitely our longest and most complicated project so far, but oh boy was it worth it!
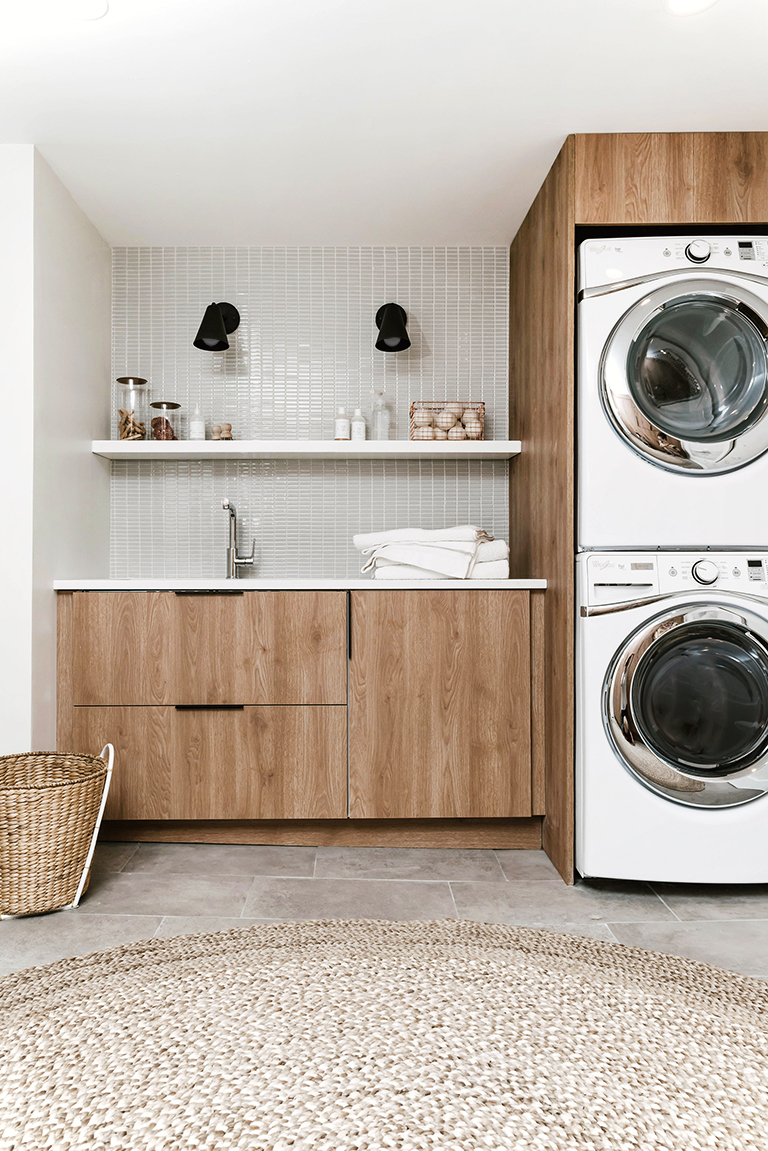
The killer element here is of course those Semihandmade fronts. We used Tahoe, which is from their more affordable impression line. (Although Tahoe looks very much like real wood, it’s actually textured melamine.) If you’re not familiar with Semihandmade, they make gorgeous doors for Ikea’s Sektion, Akurum, Pax, and Godmorgon frames that give you the look of custom cabinets for a fraction of the cost. I had used them recently in a client’s laundry room, and loved how they had turned out so using them here was a no-brainer.
We also used Semihandmade’s DIY slab shelf in a custom length above the sink and painted it Simply White by Benjamin Moore to match the room’s trim (and the walls in the rest of our house). The shelf was super easy to install because it comes in two pieces; there’s a long metal piece with supports welded to it that you attach to the wall wherever your studs are, and then the shelf itself which you simply slide on (it’s hollow).
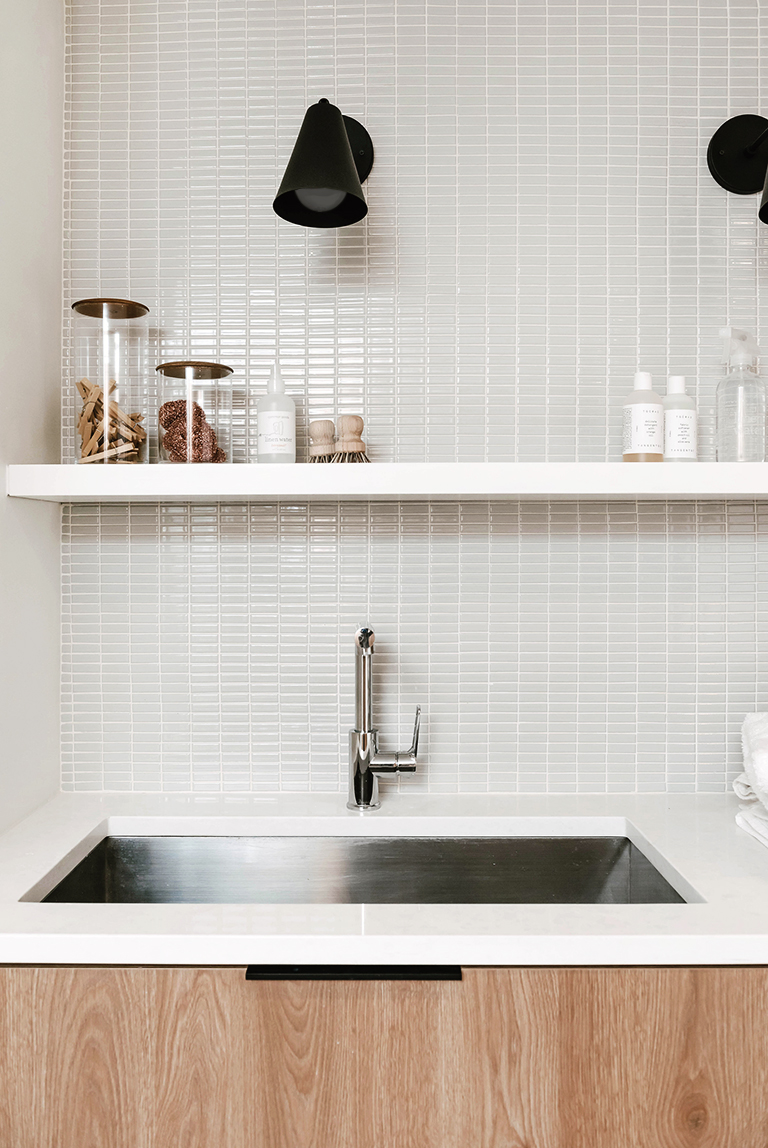
The faucet is one of my other favorite elements in the room – I love the chrome finish and sleek design (it has a pull-out spray feature for getting out tough stains). Plus at under $100 it’s surprisingly affordable! The countertop is a milky-white quartz; we needed something hard-wearing and stain resistant because until our house is finished this is still pretty much a shop sink. The sink is a very wide and deep single basin that we grabbed on Craigslist.
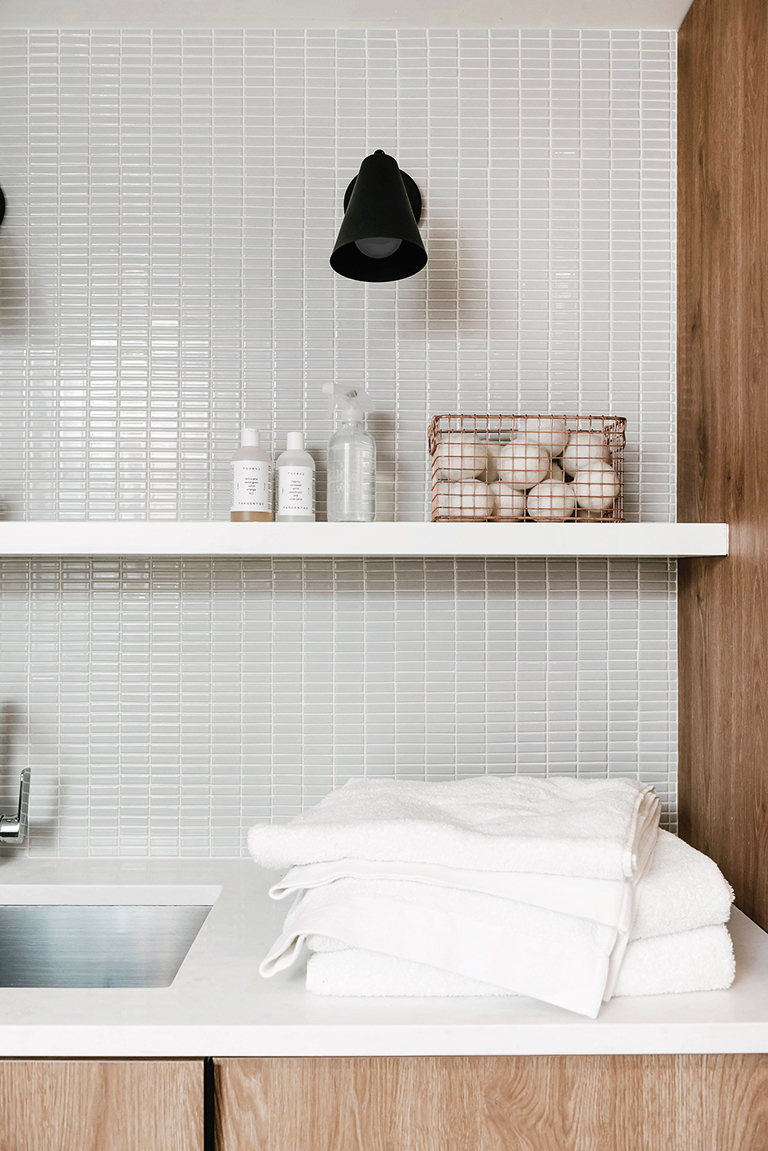
On the shelf I used these lovely simple storage containers to hold copper scrubbers which are as utilitarian as they are beautiful (the clothespins, not so much). We use these wooden scrubbers in our kitchen and love them, so I bought a few more to use here. And of course I’m a sucker for laundry products in pretty packaging! I use the Common Good lavender linen water when I’m ironing and their all-purpose cleaner on the sink and counter. I have yet to use the eco-friendly Tangent Garment Care fine wash and fabric softener, but I can’t wait to try them!
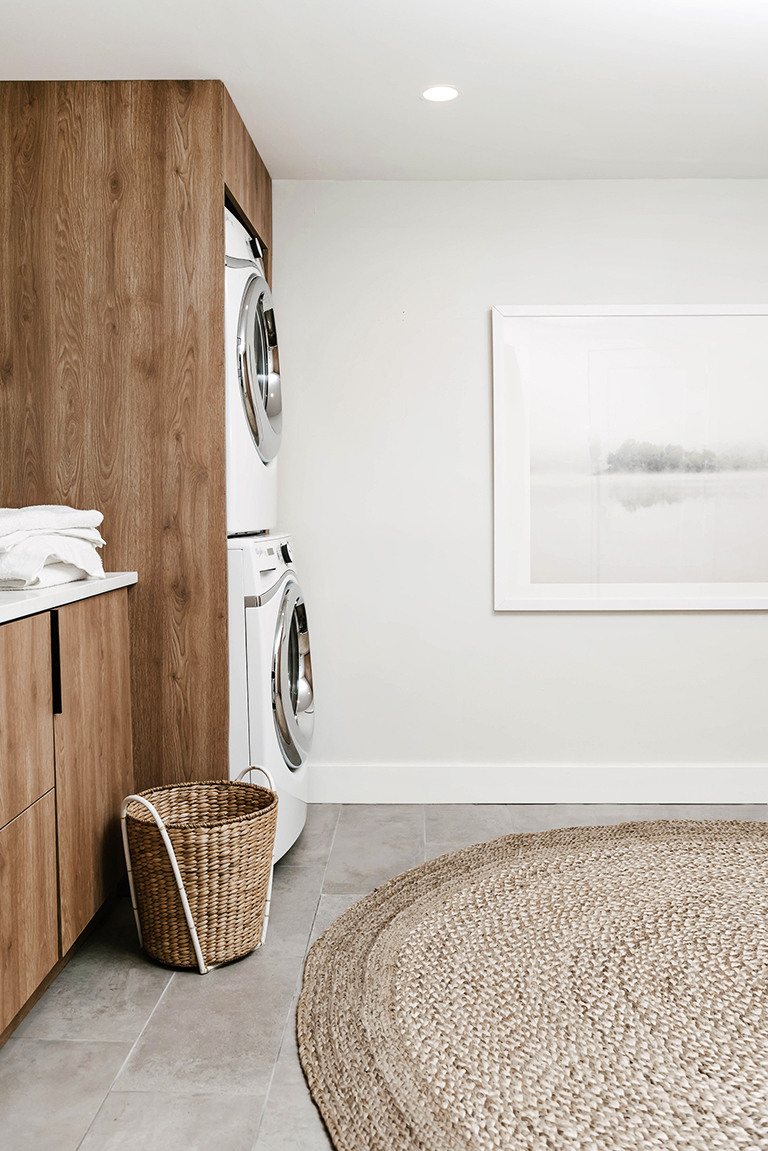
Recognize that Minted print? I had planned on using an incredible oversized piece of art from Porter Teleo here, but couldn’t find anyone who would frame and mat something that size. Instead I cut it into a triptych and framed it with an online company, but it didn’t turn out the way I imagined and I’m still deciding what to do about it. For this shoot (the photographer is the fabulous Kelli Kroneberger) I used what I had on hand, which was the artwork from our dining room. At some point I’ll find the right piece or perhaps have the original reframed (but…$$$). I hate to have wasted all that money on the original framing, but sometimes mistakes happen – even with the pros!
The floor tile was incredibly affordable at only $1.79/sq ft and was in stock at our Home Depot. It has a lovely concrete-like texture and would be perfect in an entryway or mudroom too. If I did this space again though, I would have chosen a smaller size because we did get some lippage over by the washer/dryer where the floor slopes down to the drain (hidden under that gorgeous round jute rug). I didn’t realize quite how sloped the floor was until we were actually tiling, but you can see it in the full shot at the bottom of this post. Cutting the toe kick for the cabinets was a pain, let me tell you! But we made it work.
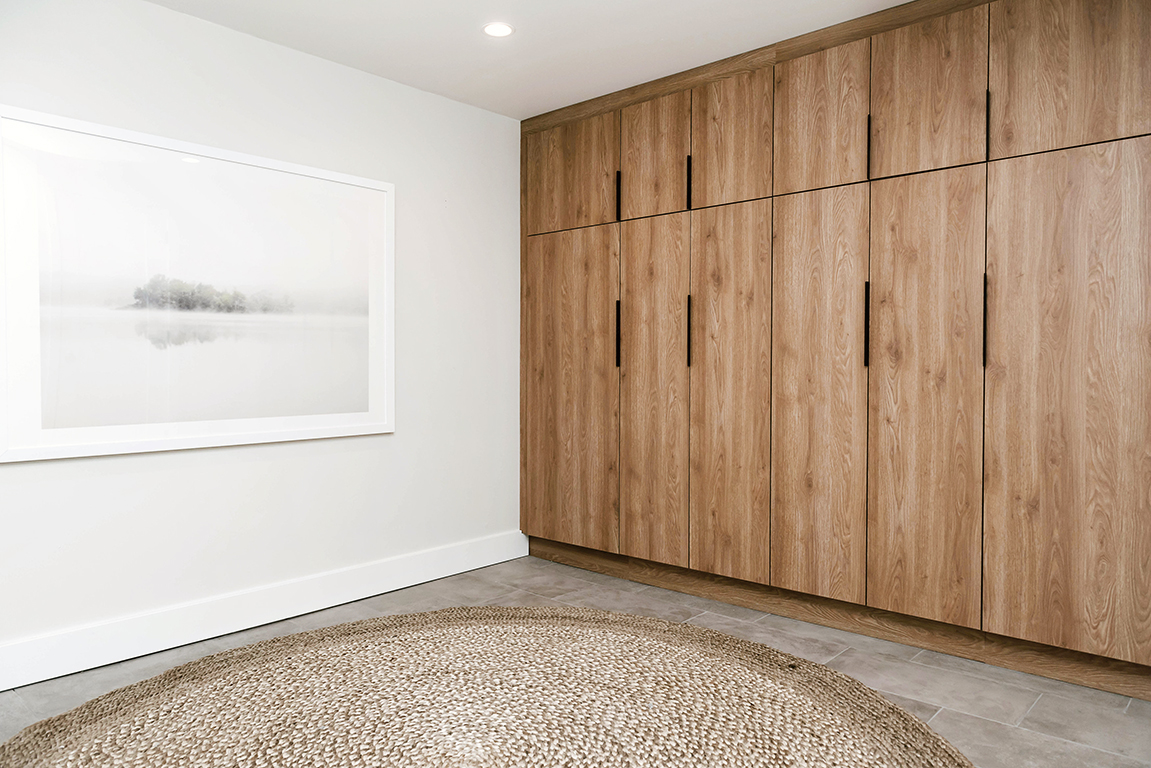
I get dizzy with happiness every time I look at that wall of built-ins. We have so much storage now we don’t know what to do with it! Can you believe those are Ikea cabinets??? Those Semihandmade fronts truly make the space.
Since the room is windowless I knew we needed a little pigment on the walls. The rest of our home is Simply White but we used BM White Dove here and it is subtle enough that the contrast between the trim and walls doesn’t bother me. Sometimes in the middle of the night I wonder if we should paint the trim as well…but don’t tell my hubby that.

The sconces are from Cedar & Moss and couldn’t be more perfect for the space. I love how they complement the black matte hardware and really dress up the backsplash.
Ah, the backsplash. I had originally planned on using a similar tile in a much larger size from Ann Sacks, but the lead time was too great (my due date was the ultimate deadline) so I used another of their tiles instead and ended up liking it even more! The color is Dove (coincidental with the wall color) and it is from their Savoy Mosaics collection (specifically Stacked Brick in 5/8 x 1 7/8″).

That copper basket has been kicking around our house for the past two years so I dragged it out and filled it with our dryer balls – you can find a similar one here. And that laundry basket is actually an old Ikea planter that we’ve since repurposed! Kelli didn’t shoot the other walls that house the closets because they’re not that interesting to look at, but you can check out my Instagram story tomorrow for a video reveal of the space!
Here’s how to get the look for your own home:

A big, big thank you to Semihandmade for sponsoring this post! They truly are an incredible company and so easy and pleasant to work with.
As a side note, I feel like a lot of our basement renovation has been an attempt to hide ugly things I don’t want to look at every day. As much as I dream about a life where each item we own is both beautiful and useful, sadly that dream is far, far away…if it’s achievable at all. What do you guys think? Is that just an Instagram-induced fantasy, or is it attainable?
Photography by Kelli Kroneberger





Karisa
| 18 November 2017Love this anna! Ive been planning our MudrOoM/laundry room for our build So this is perfect! Good tip for Durable countertop materia too. BeauTiful joB!
annabode
| 8 December 2017Thanks Karisa! Can’t wait to see your new home :).
CarIna
| 18 November 2017Turned out beAutiful!! I Understand what a pain sloping floors are- we did our kitchen & Had to do the saMe for our TOE KICKS in there. But this looks amazing!!
annabode
| 8 December 2017Aren’t they a pain?? Thank you Carina!
Archie
| 18 November 2017EVERYTHING Looks great!! Can I ask, how did you connect the dryer vent before sliding the STACKED washer/dryer into that closet? I’m doing a similar design but haven’t figured out how to attach the duct within such a tight space.
annabode
| 8 December 2017Thank you Archie! We used this product.
Joanne Michael @Dreammaker Home Design
| 22 November 2017Beautiful Transformation and Vision. Makes me want to do my Laundry again and again.
annabode
| 8 December 2017Thanks so much Joanne! I’m just so glad it’s finally finished – though I’ll say it has only slightly helped with the desire to do laundry ;).
Denise
| 8 December 2017This looks great! I am actually currently looking at Semihandmade and ikea for a kitchen and mudroom/laundry room. How did you get panels that fit around your washer/dryer? did semihandmade make you a custom size panel? thanks!
annabode
| 8 December 2017Thanks Denise! Semihandmade makes tall panels for the sides that you cut down to size.
Beth Sanzone
| 11 December 2017Lovely! THIS TURNED OUT AMAZING. QUICK QUESTION, THE RENDERING OF YOUR BATHROOM (FROM THE ARIAL PICTURE), WHAT SOFTWARE ARE YOU USING FOR THAT? I”M REDOING MY BATHROOM AND WAS HOPING TO DO A MORE FORMAL RENDERING VS. MY CHICKEN SCRATCH ON PAPER 🙂 THANSK!
annabode
| 15 December 2017Thanks Beth! I use Sketch Up, it’s a free program by Google.
CARMEN
| 24 January 2018wHAT LINE OF IKEA CABINETS DID YOU USE? AND WHAT DO THE INSIDES OF THE LARGE WALL STORAGE ONES LOOK LIKE? THANKS!
annabode
| 25 January 2018Hi Carmen, we used the Sektion kitchen cabinets – the insides of the tall cabinets vary, but are all combinations of pull-out drawers and shelves. They are technically pantry cabinets. Hope that helps!
SOPHIA
| 6 April 2018LOVELY! DID YOU USE KITCHEN SINK CABINET OR JUST A REGULAR ONE AND WHAT SIZE FOR UNDER THE SINK?
annabode
| 6 April 2018Thanks Sophia! Yes we used a 36″ sink cabinet. I don’t remember the exact size of the sink because we got it on Craigslist, but it’s probably 32-34″.
Leanne
| 6 October 2018Hey there, I love the style. I am planning on using IKEA kitchen cabinets in my bathroom. Did you have to alter the top drawer for your sink?
Thanks!
Morgan
| 19 February 2019hi! i’m looking to purchase tile that looks like the type you used in this project. It seems that the majority of local tile shops only sell “subway” style tiles these days, vs the “stacked” look you used here. i went to the webpage you linked in this article to try to buy it; however, it’s not showing up as for sale. any recommendations/suggestions on where to find something similar?!
mina bradford
| 10 February 2021Great job!! Your links to the wall savoy tile and the floor tile aren’t working and I’d LOVE to know what you used. I love everything in your portfolio by the way.
Anna Smith
| 27 March 2021Sorry about that Mina, and thanks for letting us know! Here is the savoy tile: https://www.annsacks.com/products/tile-stone-mosaic/savoy-classic-mosaics#/savoy-classics-large-stack-mosaic